view the rest of the comments
3DPrinting
3DPrinting is a place where makers of all skill levels and walks of life can learn about and discuss 3D printing and development of 3D printed parts and devices.
The r/functionalprint community is now located at: or !functionalprint@fedia.io
There are CAD communities available at: !cad@lemmy.world or !freecad@lemmy.ml
Rules
-
No bigotry - including racism, sexism, ableism, homophobia, transphobia, or xenophobia. Code of Conduct.
-
Be respectful, especially when disagreeing. Everyone should feel welcome here.
-
No porn (NSFW prints are acceptable but must be marked NSFW)
-
No Ads / Spamming / Guerrilla Marketing
-
Do not create links to reddit
-
If you see an issue please flag it
-
No guns
-
No injury gore posts
If you need an easy way to host pictures, https://catbox.moe may be an option. Be ethical about what you post and donate if you are able or use this a lot. It is just an individual hosting content, not a company. The image embedding syntax for Lemmy is 
Moderation policy: Light, mostly invisible

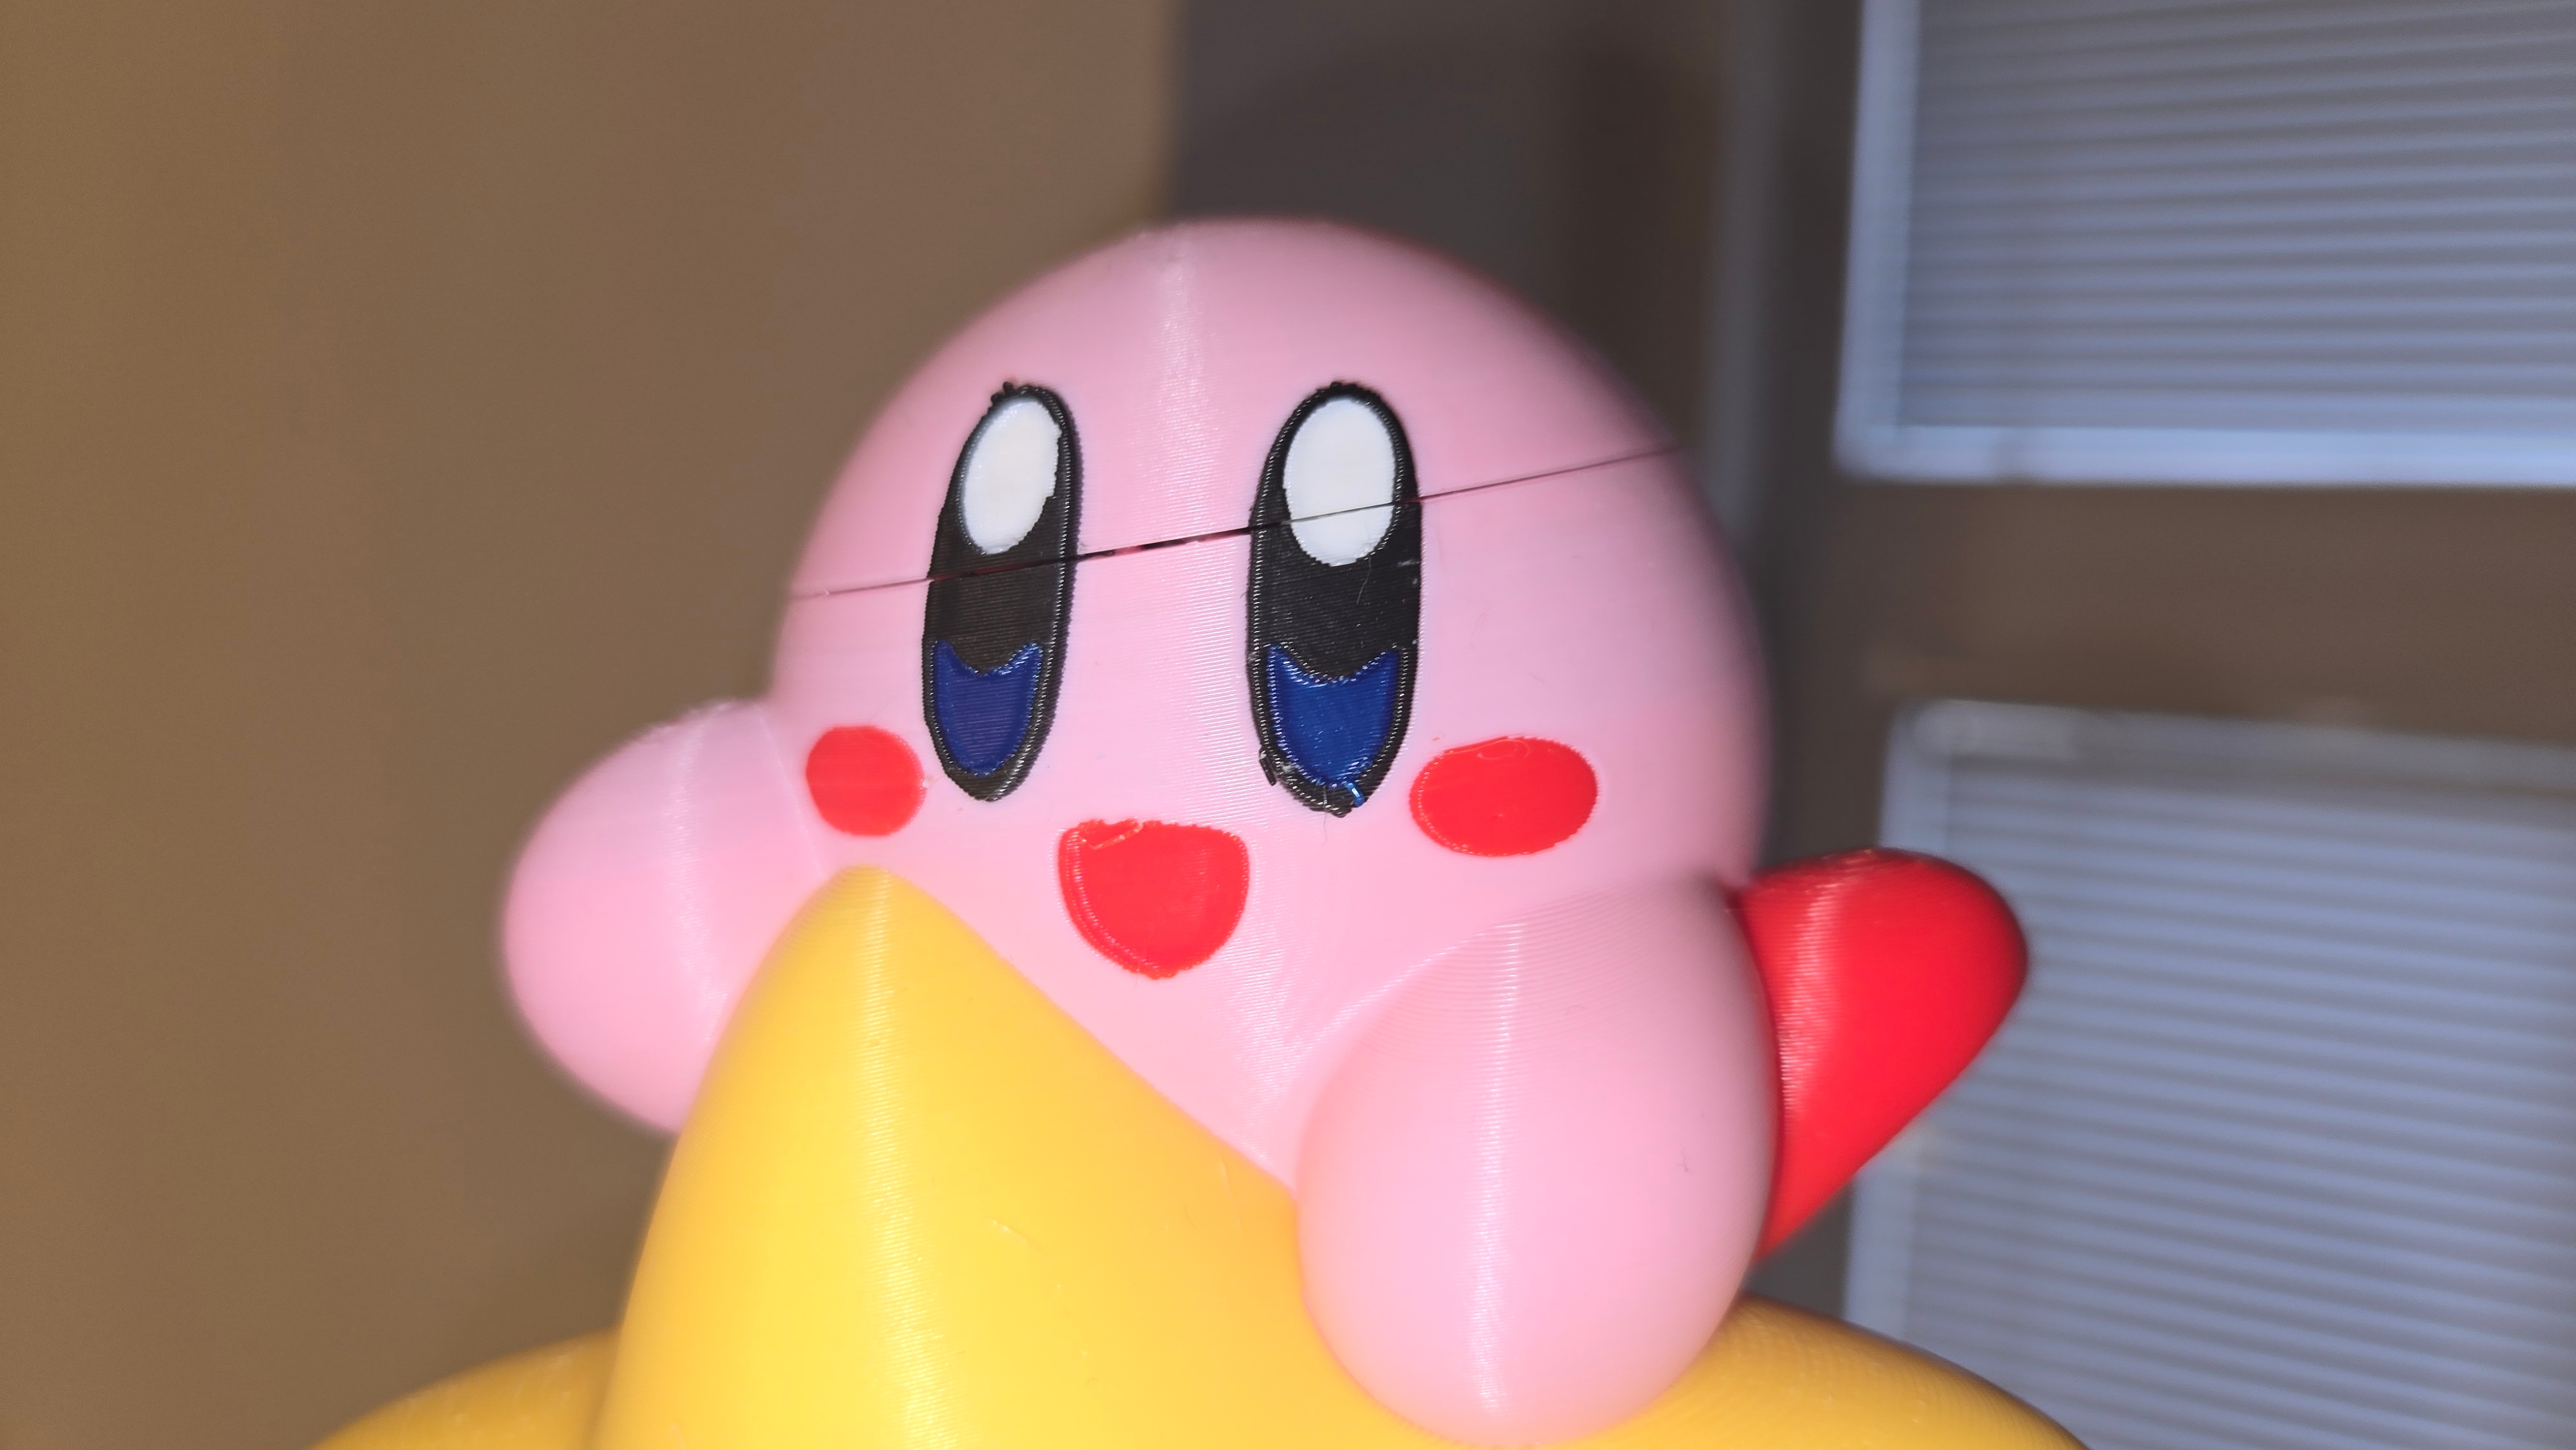
It looks like the gap is a whole perimeter missing likely caused by the infill being printed first? Or something else inside stopping it from being flush on the outside. This might not help now (unless you can separate the parts without damaging the outer perimeter) but before gluing it up it would have been best to get some sandpaper on a flat surface and sand the whole top flat until you have one complete outer perimeter. Or cut away the infill so the outer perimeter is the highest point.
If you cannot separate them without damage to the outer perimeters then you have a few options. First you could deform the plastic near then seam to cover it up. This can be done by heating the seam up with a hot air gun or hair dryer and pressing the layers together to close up the gap. You would really want to be gentle with the heat, just enough to let it start plasticity deforming with moderate/light pressure but not enough so it deforms under its own weight. Too much heat will also start to melt the surface edges of the layers rounding them over and making them look shiny which can look very obvious as well. So you really need to take it slow and apply as little heat as you can until it is just soft enough to deform.
The other options are to fill the gap. This can be done with any old filler but requires lots of sanding and painting afterwards. Or you can try to fill it with more plastic. You can use your printer to print small lines to give you something the right shape to fill the gaps, then it is just a matter of gluing or melting it in place. Super glue/CA glue will not be a good option here as it tends to leave white smear on 3d prints if you get any over spill which is very likely with a small gap. There are some glues designed for PLA that don't do this but I have never tried them myself. You could also heat the patch first until it can deform and press it in quickly though this can be tricky to do quickly enough before it cools and may not stick in well. There are also solvents you can get that dissolve the plastic and let it weld together, best way to use that is to dip the patch peace in it and press that into the gap trying to get as little on the print as you can - any spillage will start to dissolve the layer lines smoothing them over and making them look shiny.
Each of these does require some skill to do well and are easy to mess up making the print look worst - so i would try them out on some scraps first. Though you can always opt to use any filler and sand/paint the model after but that requires quite a bit of work to make it look good but is the only real option that you can keep going until it looks good.