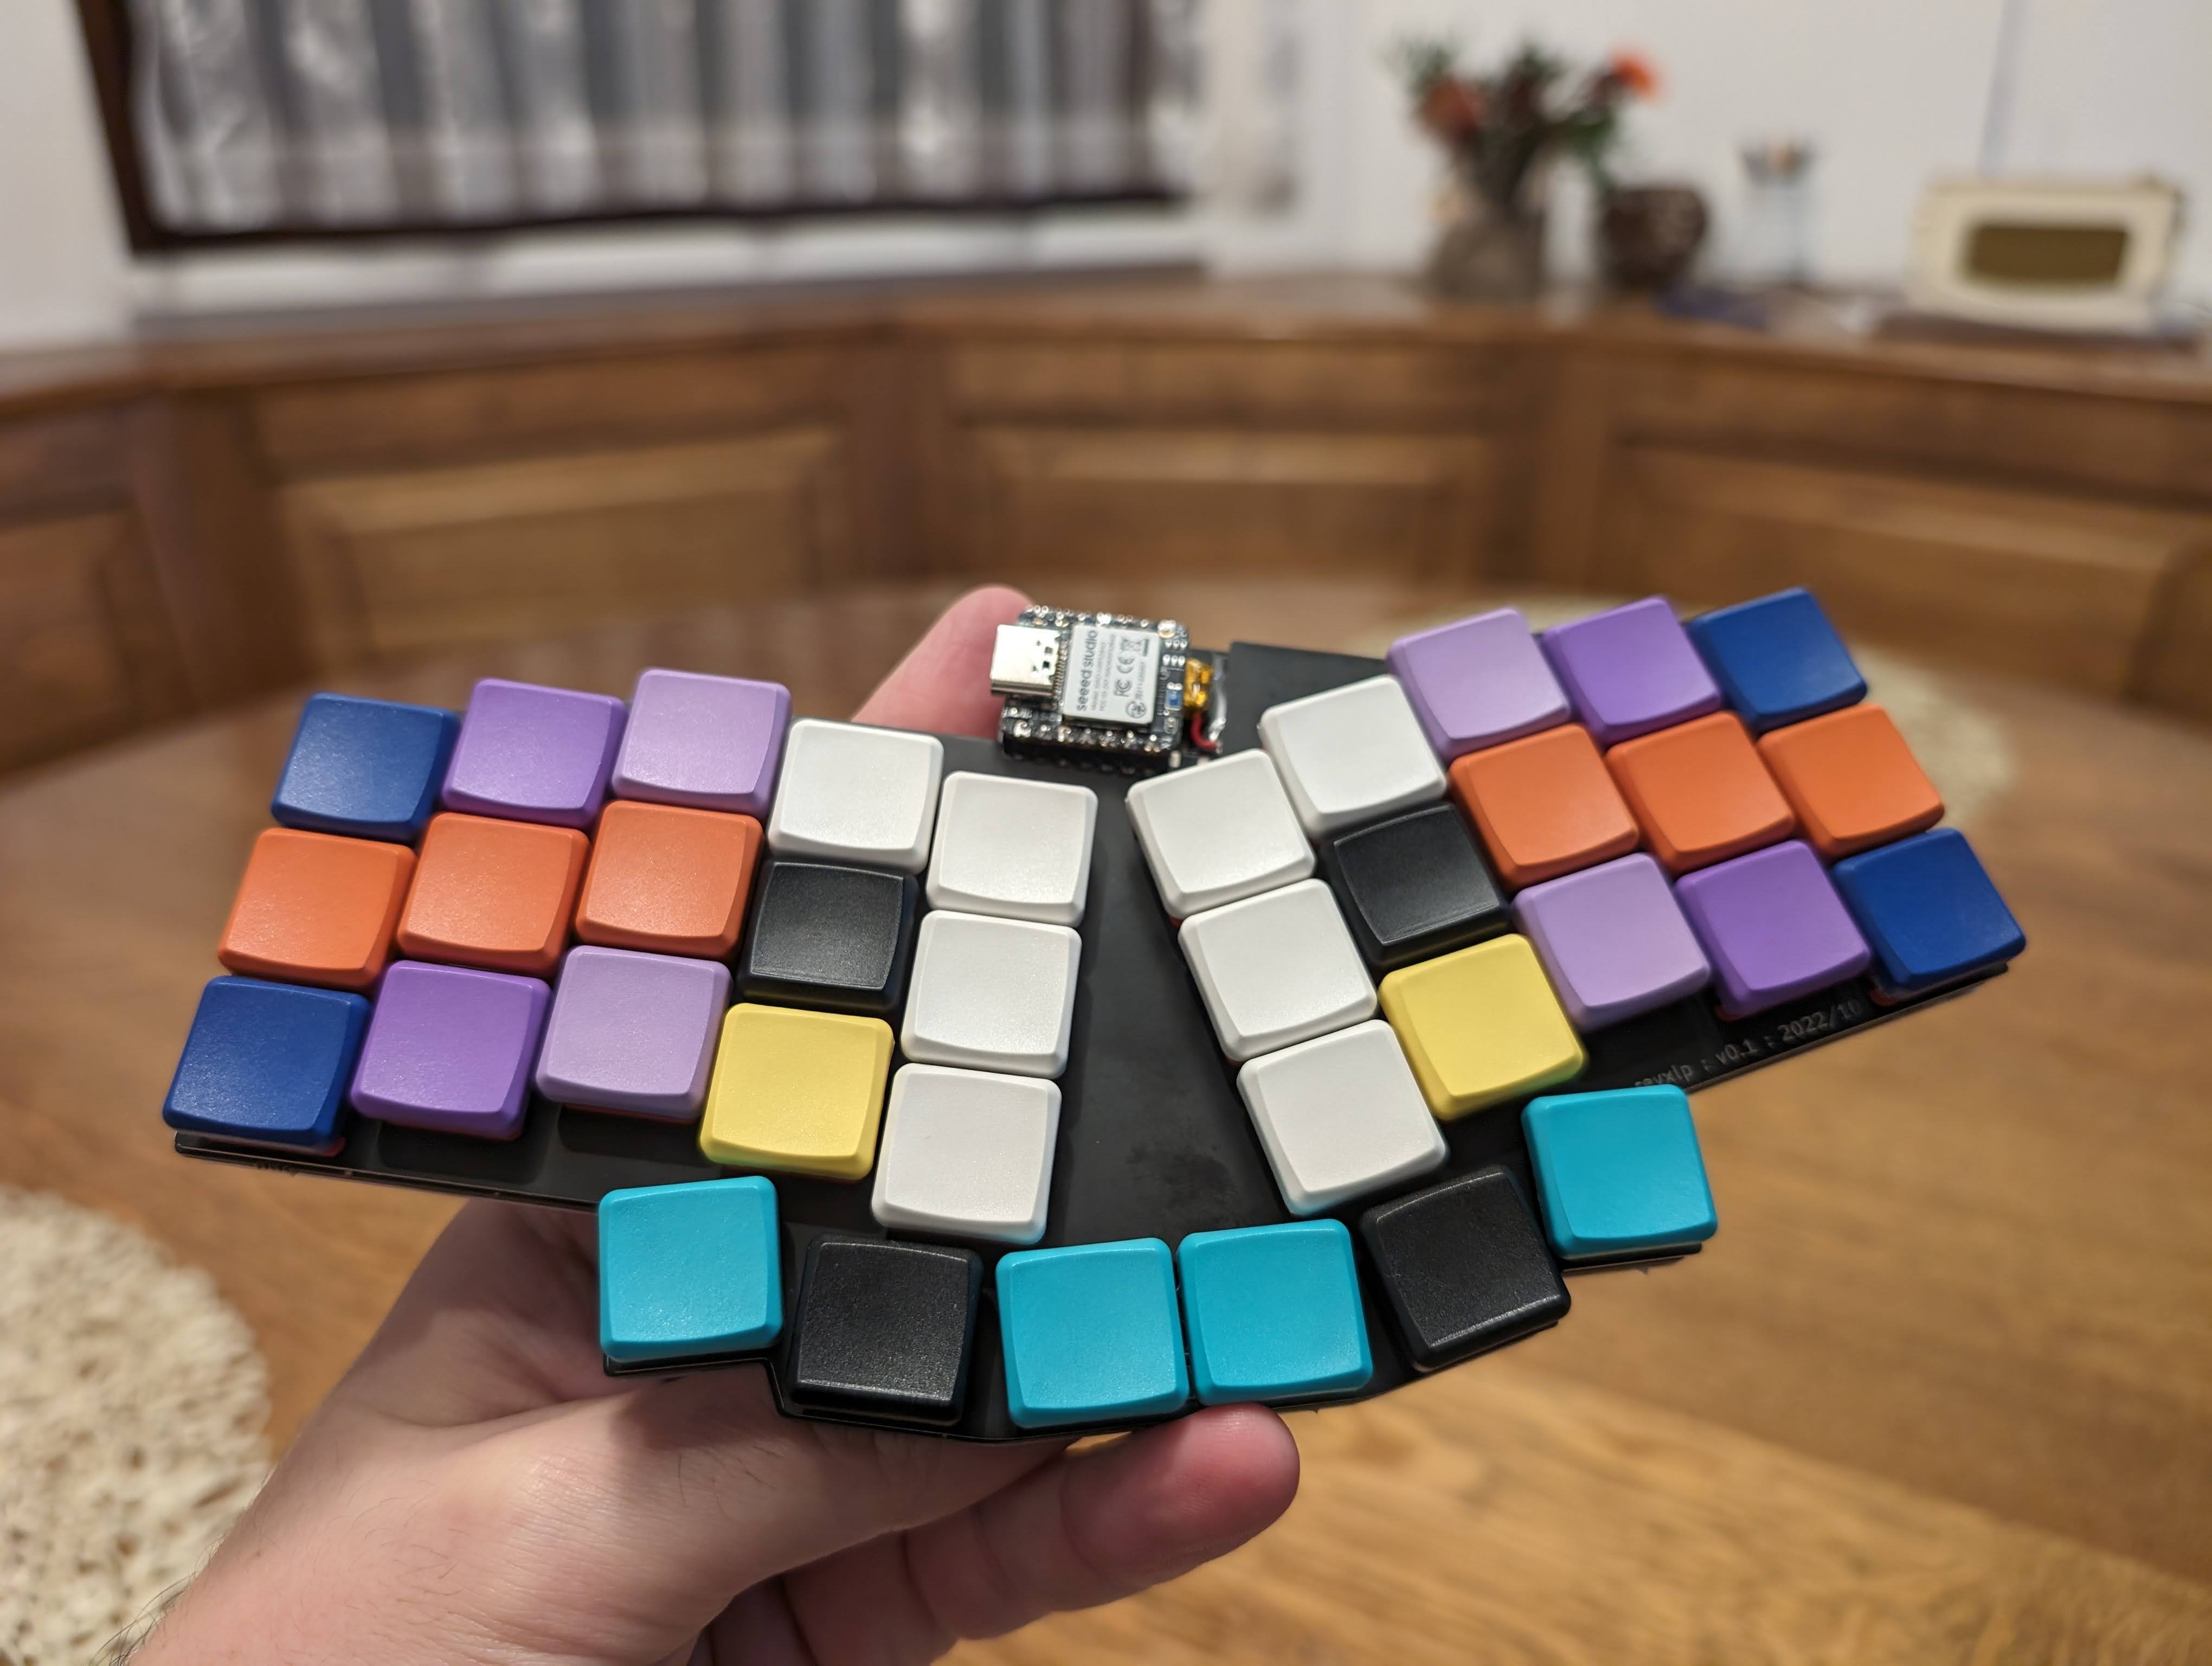
[-] hansamann@lemmy.world 3 points 11 months ago

The revxlp is using a shift register - that's the trick

42

I built the rexxlp 12u a while ago but honestly 36 keys and miryoku is all I need. So when the 10u came out, thx @petejohanson@lemmy.world I had to build it.

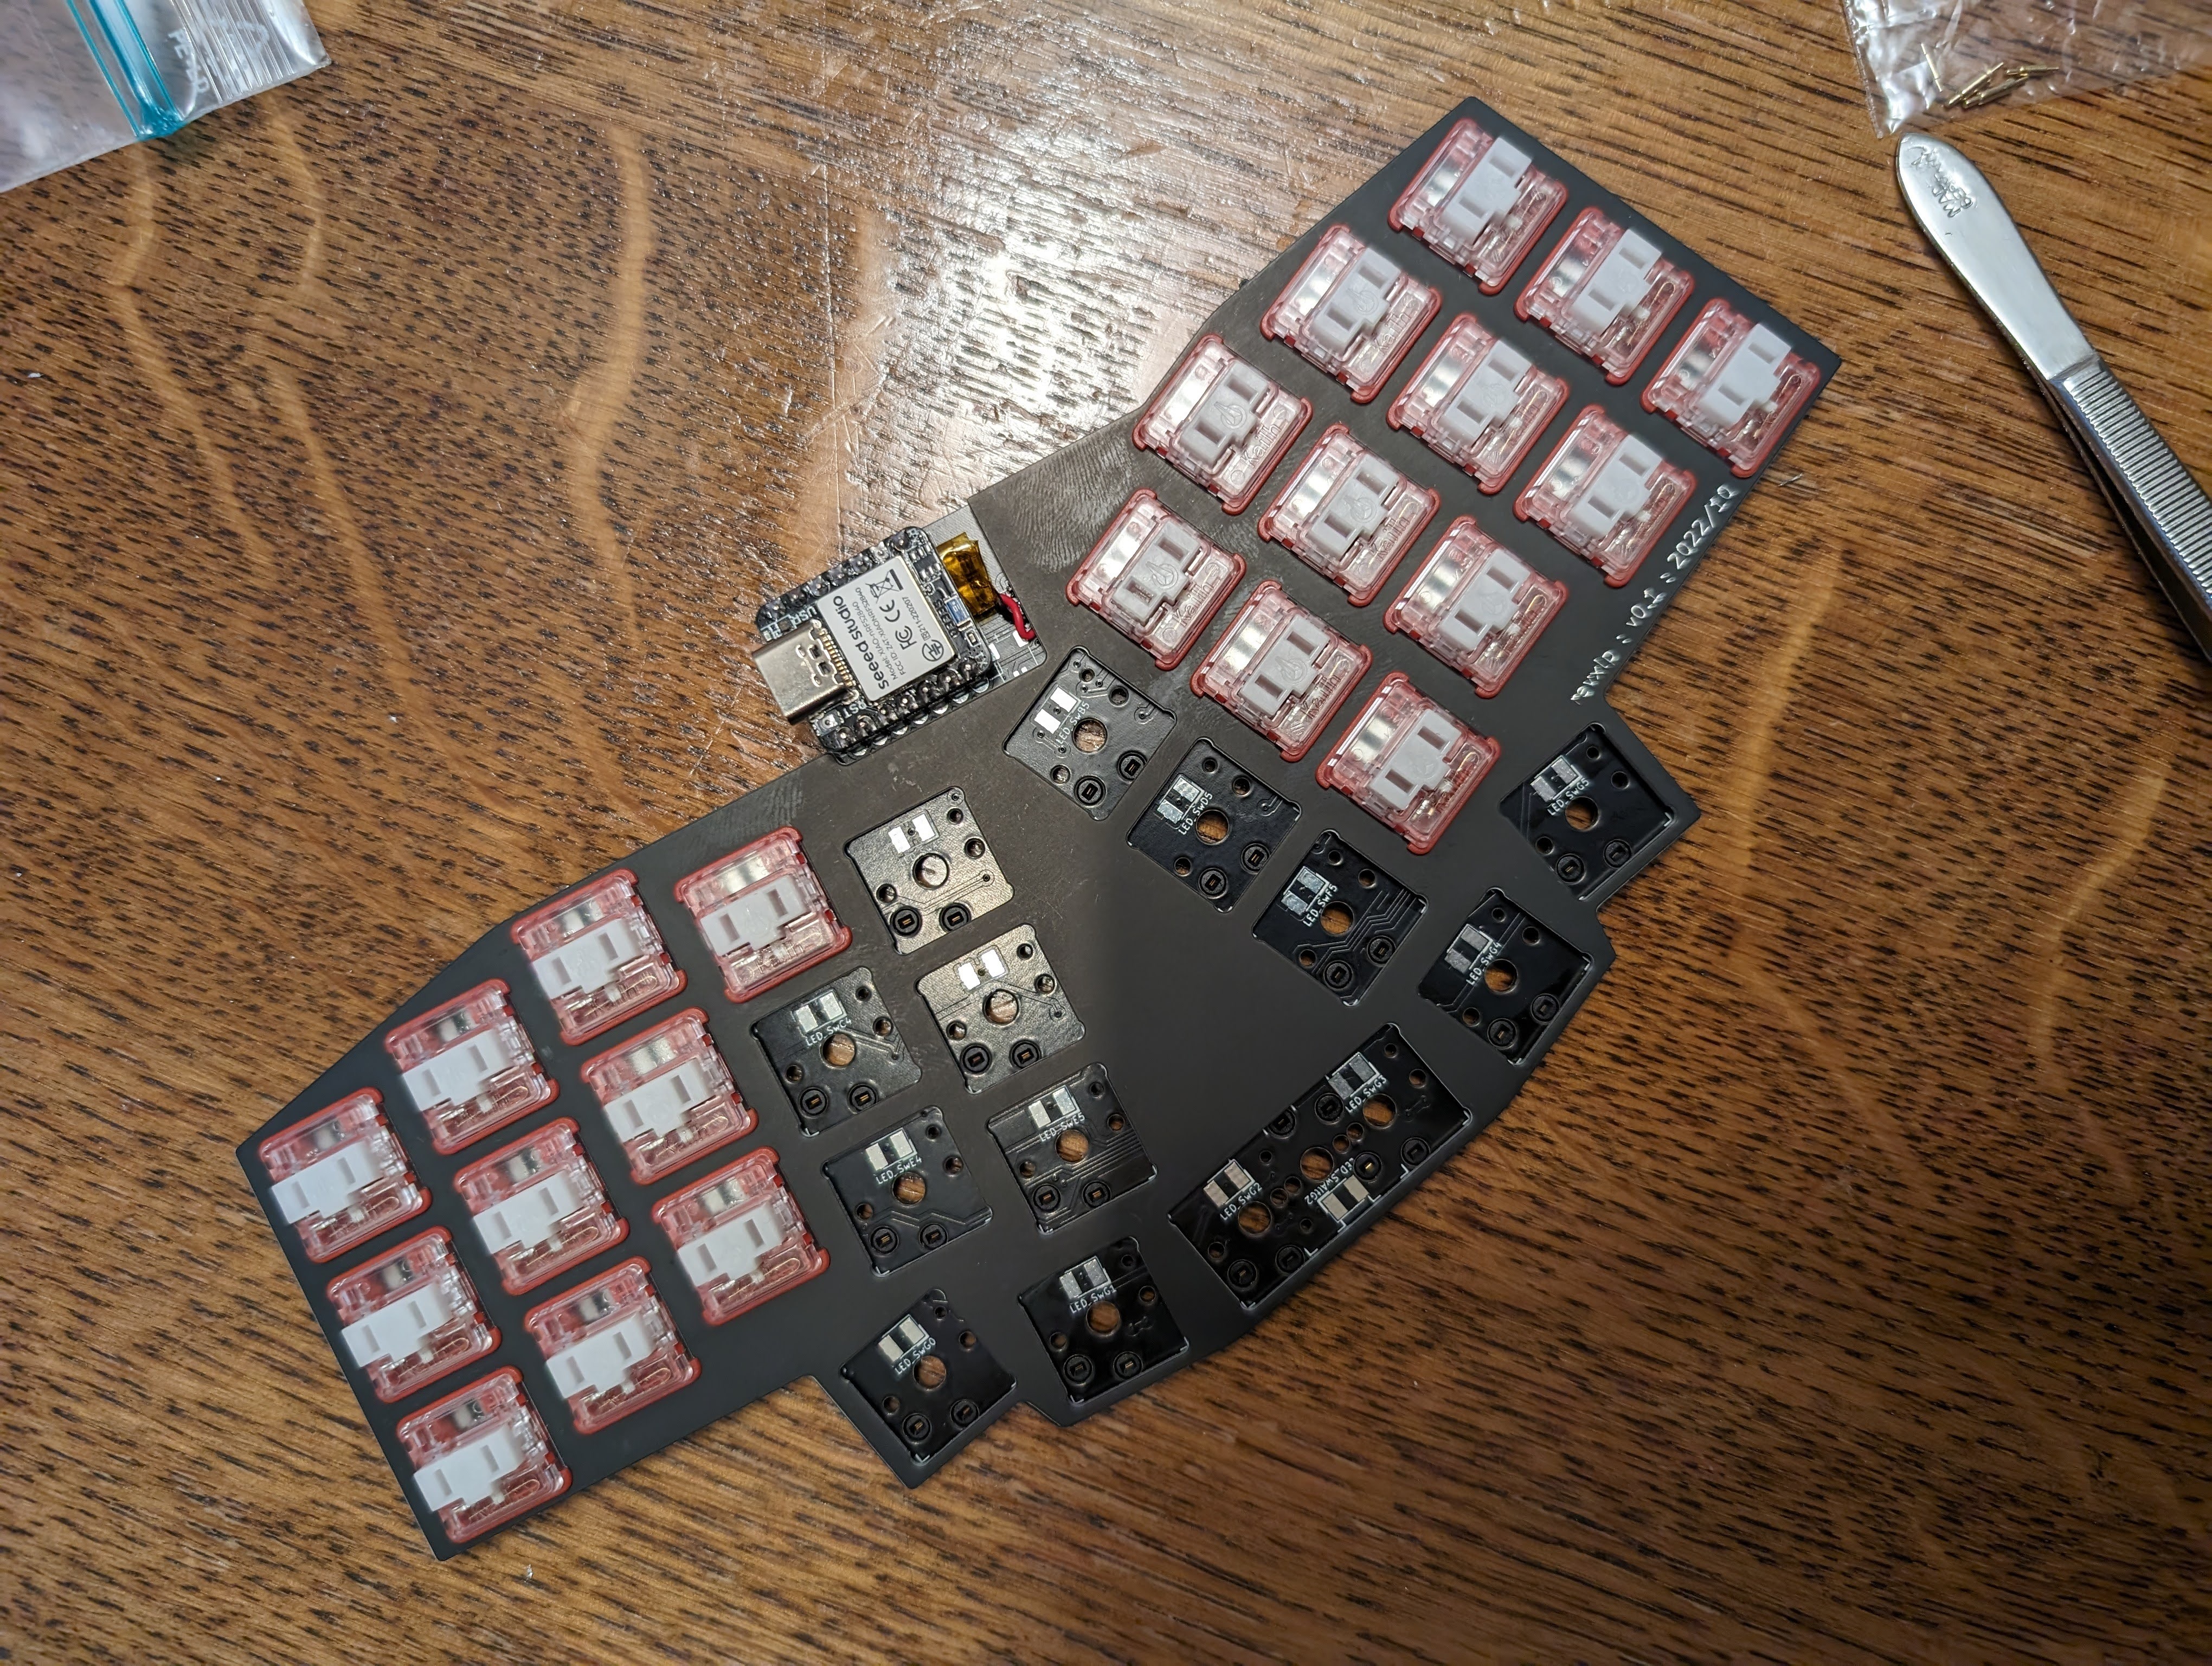
It was a tiny challenge for me, due to not properly following the guide. My big fat learning was that the tape on top of the sockets really really makes sense - I had some shorts between pins and then some socket pins were not even connected after I pulled out the board (XIAO ble) with too much force. Now I know.

What do you think?

[-] hansamann@lemmy.world 2 points 11 months ago

Done. Love it. thx @manna_harbour@lemmy.world and @petejohanson@lemmy.world for your help - and thx goes to frobiac from Munich for jumping on a mental health call and debugging the issues. it works so well now. my fav keyboard!

[-] hansamann@lemmy.world 3 points 11 months ago

SOLVED

all solved... I had 2 dead pins due not really following the tape socket explanation in the readme. and when I pulled out the xiao, the socket came half way out. I now did solder a new xiao and checked all pins, now all good... phew! thx again! it chose the 12u miryoku firmware and it works

[-] hansamann@lemmy.world 2 points 11 months ago

will try building with defaults... which I pretty much did to be honest. just mac style copy/paste is special. I will take off the alu back and chec the xiao ble connections. thx

33

Great progress on #revxlp 10u now that batteries arrives. This time, even with pogo pins...

Hardware assembly almost done. Just got some software issues now - like always I try to get #miryoku on and did build the uf2 file already (the same way I did for the 12u version... hmm), copied over. Now a few keys seem to work but emitting very unexpected (not my miryoku colemak mod dh) keys... Do we need a special miryoku build?

[-] hansamann@lemmy.world 2 points 11 months ago
[-] hansamann@lemmy.world 2 points 1 year ago

I am interested in the 3x5+3 version and would love to get Miryoku on it, plus of course the track pad needs to work, too. Is there an easy way, like a qmk workflow build that achieves this? Or another guide that describes it?

[-] hansamann@lemmy.world 2 points 1 year ago

Awesome, you deserve thx so much. I will try again soon as some of the components are not available, indeed. Would be nice to get it assembled fully.

[-] hansamann@lemmy.world 4 points 1 year ago

Thx again - just printed the right side and was initially a bit worried about the snug fit, but after pushing it in a bit it simply fits perfectly!

[-] hansamann@lemmy.world 2 points 1 year ago

Just checking - files/parts/build guide is not yet available, or did I miss it somewhere?

[-] hansamann@lemmy.world 2 points 1 year ago

This is it - thx so much, let me know when you think it's ready and I am ready to build.

[-] hansamann@lemmy.world 2 points 1 year ago* (last edited 1 year ago)

I also ran a workflow (https://github.com/hansamann/miryoku_qmk/actions/runs/5660097404) now and did set the ColemakDHK specifically but it still does not quite give me the desired outcome.

q w t ; z
a p r b g
x c d s v

is the left side, which is not really colemak mod dhk... am I doing things dramatically wrong? or is something wrong with my build @Tompi@discuss.tchncs.de - I can hardly imagine, what could it be? also I think the default qmk built worked from a main colemak layout perspective, so the keymap was correkt with the default...

10
Built Cheapino... (lemmy.world)

... plus figured out the basics of qmk. Will need to get it up and running with full miryoku though as this is what i use on ALL my keyboards. So if anyone can tell how i now get the full miryoku on I'd be super happy to give it a try.

2

I just built cheapino 3x5_3 split and of course need to get miryoku on it - there's a qmk branch here https://github.com/tompi/qmk_firmware/tree/cheapino but could not find the board over at miryoku.

It also has a special encoder, wondering how one could use it in the most meaningful way with miryoku....

Could someone describe the steps or create a miryoku config?

view more: next ›

hansamann

joined 1 year ago