[-] IMALlama@lemmy.world 1 points 10 hours ago

How would one consume buckthorn? That stuff is super invasive around here, so there's a ton of it around. Leaves? The berries?

[-] IMALlama@lemmy.world 10 points 10 hours ago

The next time you buy a pineapple, save the rind and make tepache with it. It's a nice refreshing drink on its own. It's also a great mixer for tequila and rum.

[-] IMALlama@lemmy.world 6 points 2 days ago

It was probably wrapped and not paint, likely cheaply if stainless was still visible in the door seams. Tesla offers it as a factory option and they call it "color paint film".

[-] IMALlama@lemmy.world 1 points 2 days ago

The challenger/mustang/camaro pulled this off fairly well for a while. There have been others, like the Thunderbird, but they never sold well.

These days, if it's not a crossover it seems like no one will buy it. I am blissfully unaware of interesting looking old SUVs, but surely one is out there. Maybe the bronco qualifies? Too bad it's suffering from size and price inflation.

[-] IMALlama@lemmy.world 13 points 4 days ago

They did see it coming, this was the goal.

[-] IMALlama@lemmy.world 1 points 4 days ago

ASA and ABS are warp prone and this is an 11" / ~275mm wide print that's equally tall 🤷

The build volume of my printer means lots of surface area for the acrylic enclosure, which in turn makes it hard for me to exceed a 50°C chamber temp, despite 4x bed fans.

The next print, with normal supports, pulled the bed off the magnetic build plate. Insulation eliminated warping and let me pull off the print.

I do agree that a "nicer" enclosure is the preferred method. I have zero issues with PETG at this size. I've never tried PLA on this printer, but it should be fine too.

[-] IMALlama@lemmy.world 9 points 5 days ago

I will second this, even though I also agreed with "build a Voron". My 2.4 is a massively capable printer, and has a lot of quality of life features like actual mechanical bed leveling, but odds are your first build will have some teething issues. My extruder motor didn't have a fully aeat wire terminal in its factory harness so it extruded inconsistently. Thankfully it was easy to find and fix. I've had a few wire breaks in my cable chains because I didn't leave enough slack in the runs. The build itself is also long, but I did find it to be straightforward. Vorons are also Vorons, so the modding is endless.

Printer as a tool? Prusa. Maybe also Voron, especially if you want print volume/raw speed/quality of life. Printer as a tinkering device? Voron. Ship of theseus as you upgrade your way to a better printer? Ender.

[-] IMALlama@lemmy.world 7 points 5 days ago

Haha, came here to say the same thing.

[-] IMALlama@lemmy.world 2 points 5 days ago

Rather than 4x monitors, how about bigger and higher resolution monitors? I have 2x 27" 1440 monitors. They're fine to read at 100% scaling, which gives me tons of space to put things. I often run four columns of windows side by side - two columns per monitor. Going back to 1080 in the office is a big downgrade. You could do a similar pattern with ultra wide and/or higher resolution.

Monitors with a built in KVM are tons cheaper in total, especially if you care about high refresh rates. I share my M27Qs and a mouse/keyboard between my personal computer and work laptop this way.

I'm not sure that I get the need for three laptops, but you do you.

[-] IMALlama@lemmy.world 2 points 6 days ago

It sounds like the design goals Nikon and Canon were using were similar, yes. On a crop body, it's great for capturing things far away. I used it for motorsports. It was also a good people lens, but at 110mm FF equivalent you had to have some space to use it.

Wish I’d had more ambition to get out this Summer, there’s been a LOT of sunspot activity that I’ve missed.

I can relate to this. Especially when it comes to reach and close focus, your gear can get in the way of the shot. I feel like a lot of this hobby is clearly identifying your use case (reach, close focus, speed, etc) and then weighing the lenses that satisfy that use case against their tradeoffs (size, weight, image quality).

Over in e-mount land, I have Sigma's 35mm f/1.4 (the old HSM version) and Sigma's newer 35mm f/2.0. The extra stop is nice, but I rarely need it and f/2.0 is half the length and weight. Guess which lens gets used more often.

Sometimes you find great deals, sometimes you find Chinese garbage. Luckily I never paid much for garbage.

The nice thing about buying used is you can usually sell it without much of a loss. I've been treating this as "longer term renting" gear to help me find what I want.

[-] IMALlama@lemmy.world 7 points 6 days ago

Looks pretty cool. The frame reminds me a bit of a piper. Is this home brew?

24
submitted 1 month ago by IMALlama@lemmy.world to c/jerboa@lemmy.ml

If you look at the very bottom of the screen shot you can see that the home, search, etc buttons are cut off.

Happy to provide more info to help. I'm on a stock pixel 3a.

99

I am (slowly) working on mounting ACM panels to my Voron 2.4 to try to get my chamber temps up to reduce/eliminate warping on big ASA prints. I only needed 12 of these parts, so I chose to print them sequentially.

Want to know how slow my progress has been? Well, this photo proceeded this post and I made that post weeks ago... I'll crack open the cable chain and get this ball rolling again soon. Or maybe I'll ditch the chains and go to a USB toolhead. But that will require me to print some parts, so I guess I have to fix this. And if I'm doing that it's going to probably be 'good enough' for quite some time... 🙃

There's nothing major in the print queue, but I do want to make sure the printer is ready to go when something does turn up.

48

I can see the wire break in the cable chain :'(

350

No banana for scale, but let's say that it's not too big and not too small. The dimensions are 295mm tall, 270mm wide, and 240mm deep. If I had to do it again, I would be tempted to go a bit wider and touch less deep. It's probably better to be large in one of these dimensions as opposed to both of them.

Here's the top. It has a jack for charging, a connector to program the DSP, a switch to turn it on and off, and a battery gauge.

The speaker also has a built in handle that's way chunkier than it appears, but is still particle.

The big BOM pieces are a Dayton Audio LBB-5Sv2 for the BMS (battery management system), a Dayton Audio KABD-250 2 x 50W for DPS, amplification, and Bluetooth, a Peerless by Tymphany BC25SC08 tweeter, and an Italian-but-made-in-India woofer (a Coral PRF 165).

The print itself is three pieces: the bottom bit (black), the middle bit (white, blue, and white again thanks to not having enough white left to do it all in white), and the black top. Here's a CAD view that more clearly shows the three pieces:

the three pieces are held together with heat-sets and m3 bolts. There's also a tong and groove like joint to help the enclosure leak less air. I haven't noticed any evidence of air leaks while listening.

The amplifier and battery board mount to the bottom like so:

The middle was printed with some supports for the driver overhangs, but the ports and everything else were designed to print in place without supports.

This is certainly not meant to be audiophile build, but it's surprisingly decent. This isn't my first blue-tooth speaker, or even my first printed loudspeaker enclosure, but it is the first that was somewhat intentionally designed to have OK bass response while also being reasonably compact.

It measures fairly well. Frequency response, along with harmonic distortion, is pretty good. There's zero windowing or smoothing on this plot. I suspect the distortion spikes at 1 kHz, 2 kHz, etc are induced by the Bluetooth stack the board is running since they've shown up in multiple different enclosures and with multiple different drivers.

There's no nasty ringing, caused by either the drivers or the enclosure, so life is pretty good:

89

At least so far. The first go round had the nozzle crash into the tree support, resulting in a layer shift. The good news is that the print stayed very firmly stuck to the bed.

I've reset, lowered my extrusion multiplier a smidge, switched to a more traditional support pattern, and am going for it again. Wish me luck!

56

This is a follow up from my spaghetti post a few days ago.

Good news: I caught the nozzle catching on the infill during travels. The infill must have been curling up ever so slightly. Turning z-hop on solved this. I also bumped my nozzle to 255 based on a temp tower, but I don't think my original issue was flow related.

Bad news: this brought me to the failure above - evidently my chamber temps are too low for this size of ASA part and it warped. Maybe the higher nozzle temp contributed. Maybe this size of ASA part is unrealistic despite not having sharp corners. Maybe it's the fact that it's continuous from side to side. I am still going to attempt to print a hollow cylinder to go between this piece and another similar piece in ASA, so I guess we'll find out!

Good news: the part did not let go of the build plate. I'm pretty happy about this. My first layer is not overly squished, I've never used any adhesion aids (glue stick, hair spray, ASA slurry, etc), etc. Tuning my print_start sequence is resulting in a very consistent first layer.

Bad news: the build plate came up with the print. Holding the build plate down with binder clips or the like would probably just make something else fail.

Good news: I had enough PETG in stock to use that instead. Zero warpage, so great success. I had to go a bit slower because a flow test showed that I'm limited to around 25 mm^3 for PETG before the extrude motor started misstepping, despite bumping temp to 255 °C. I limited flow to 20 mm^3 to be safe. The print's a success so meh.

112

Any suggestions before trying again after a reset? This is my first go round changing nozzle diameter. I went from a 0.4 mm nozzle to a 0.6 mm nozzle.

After the swap I checked my extrusion multiplier (no change needed) and tuned pressure advance (I had to decrease the value a bit, but it looks spot on now).

As part of the nozzle swap, I also bumped line width from 125% to 150% in Orca Slicer (should be around 0.9mm extrusion width) and increased layer height to 0.3mm. This should put me around 22 mm^3/s of material, which shouldn't be an issue for a Rapido 2 but this is the most flow I've pushed through it so far. Maybe I should bump temp a touch? I'm still at my fairly-low-for-ASA 230 that I was using with my 0.4mm nozzle.

The print didn't move on the bed and shows no signs of warpage. There also aren't any signs of curling on the areas that the nozzle must have hit to cause the layer shift.

The only thing that seems like a miss was having z lift turned off while troubleshooting a print quality issue. I had it set to only lift above 0.25mm (not on the first layer) and only lift below z 0mm (this probably disabled z-hop). Z hop when retracting is set to 0.2mm, which is less than my 0.4mm retraction length so it seems like changing the "only lift below below z" value would re-enable z-hop.

86

Our youngest broke his big brother's bumblebee. Three iterations later, everything fits pretty well and the older one is happy to have bumblebee back.

This part seems super niche, so no printables link. That said, if anyone needs a replacement for this VSO let me know and I'll upload it.

35

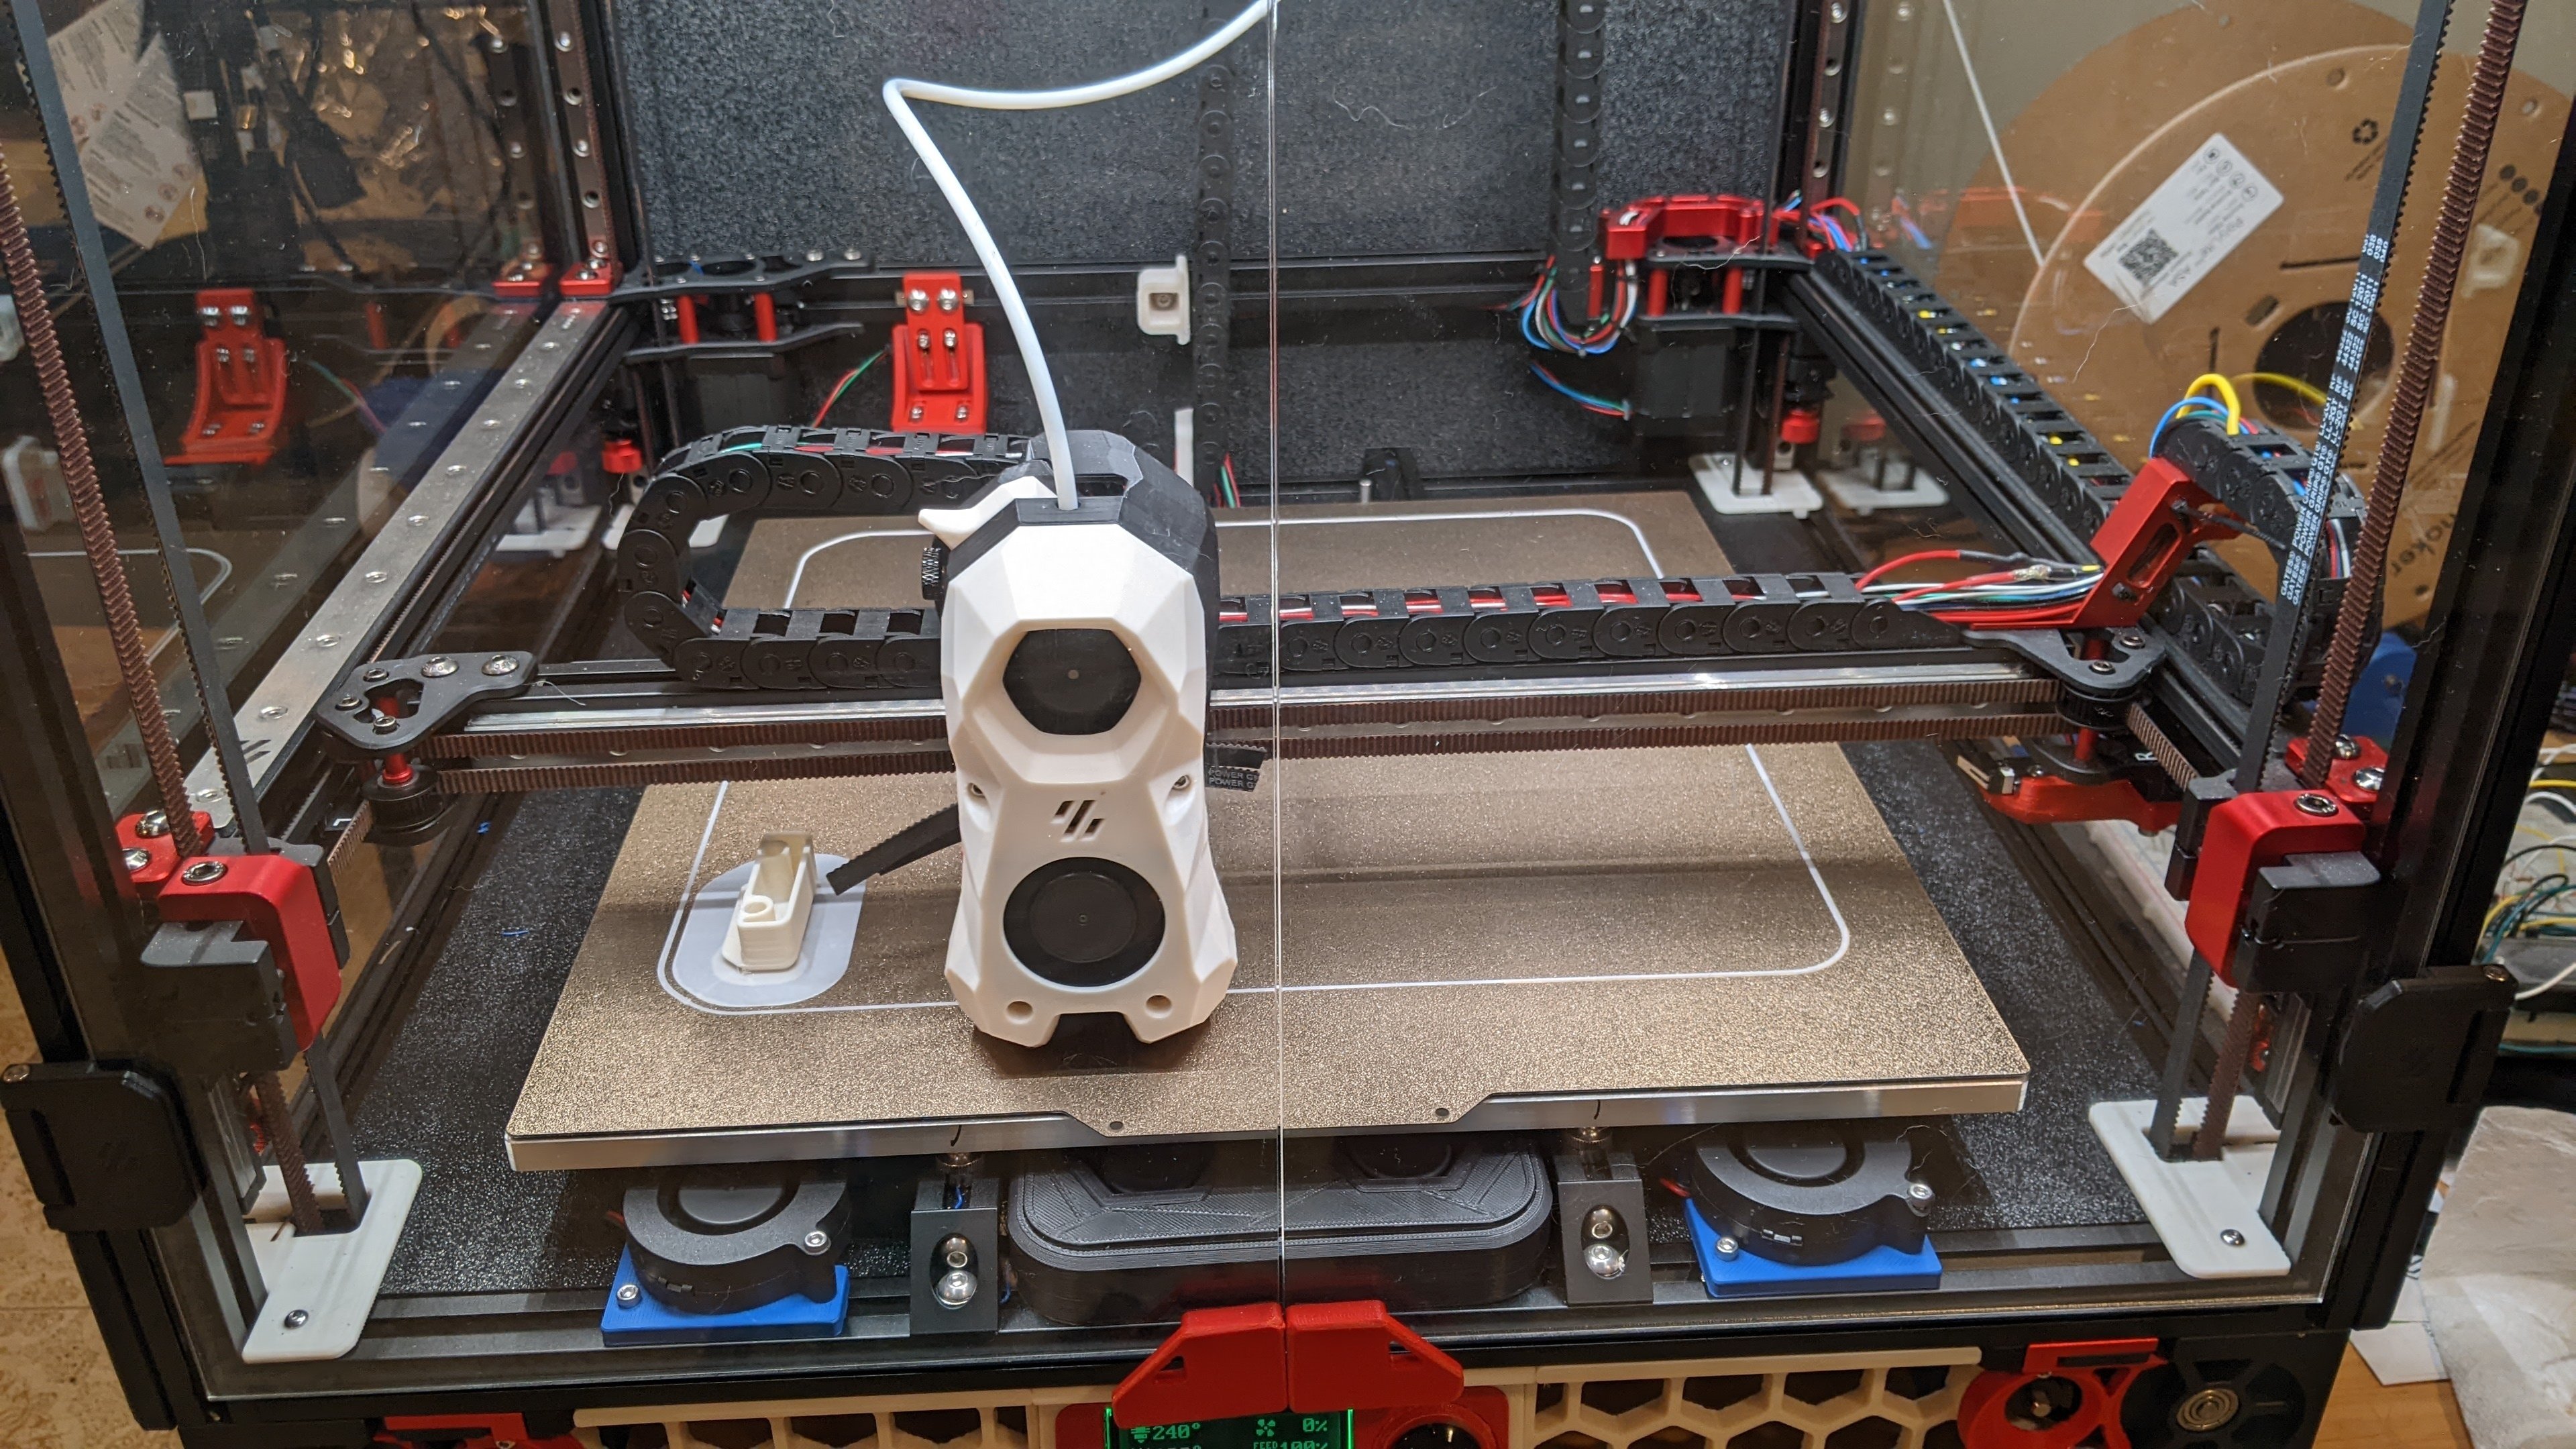
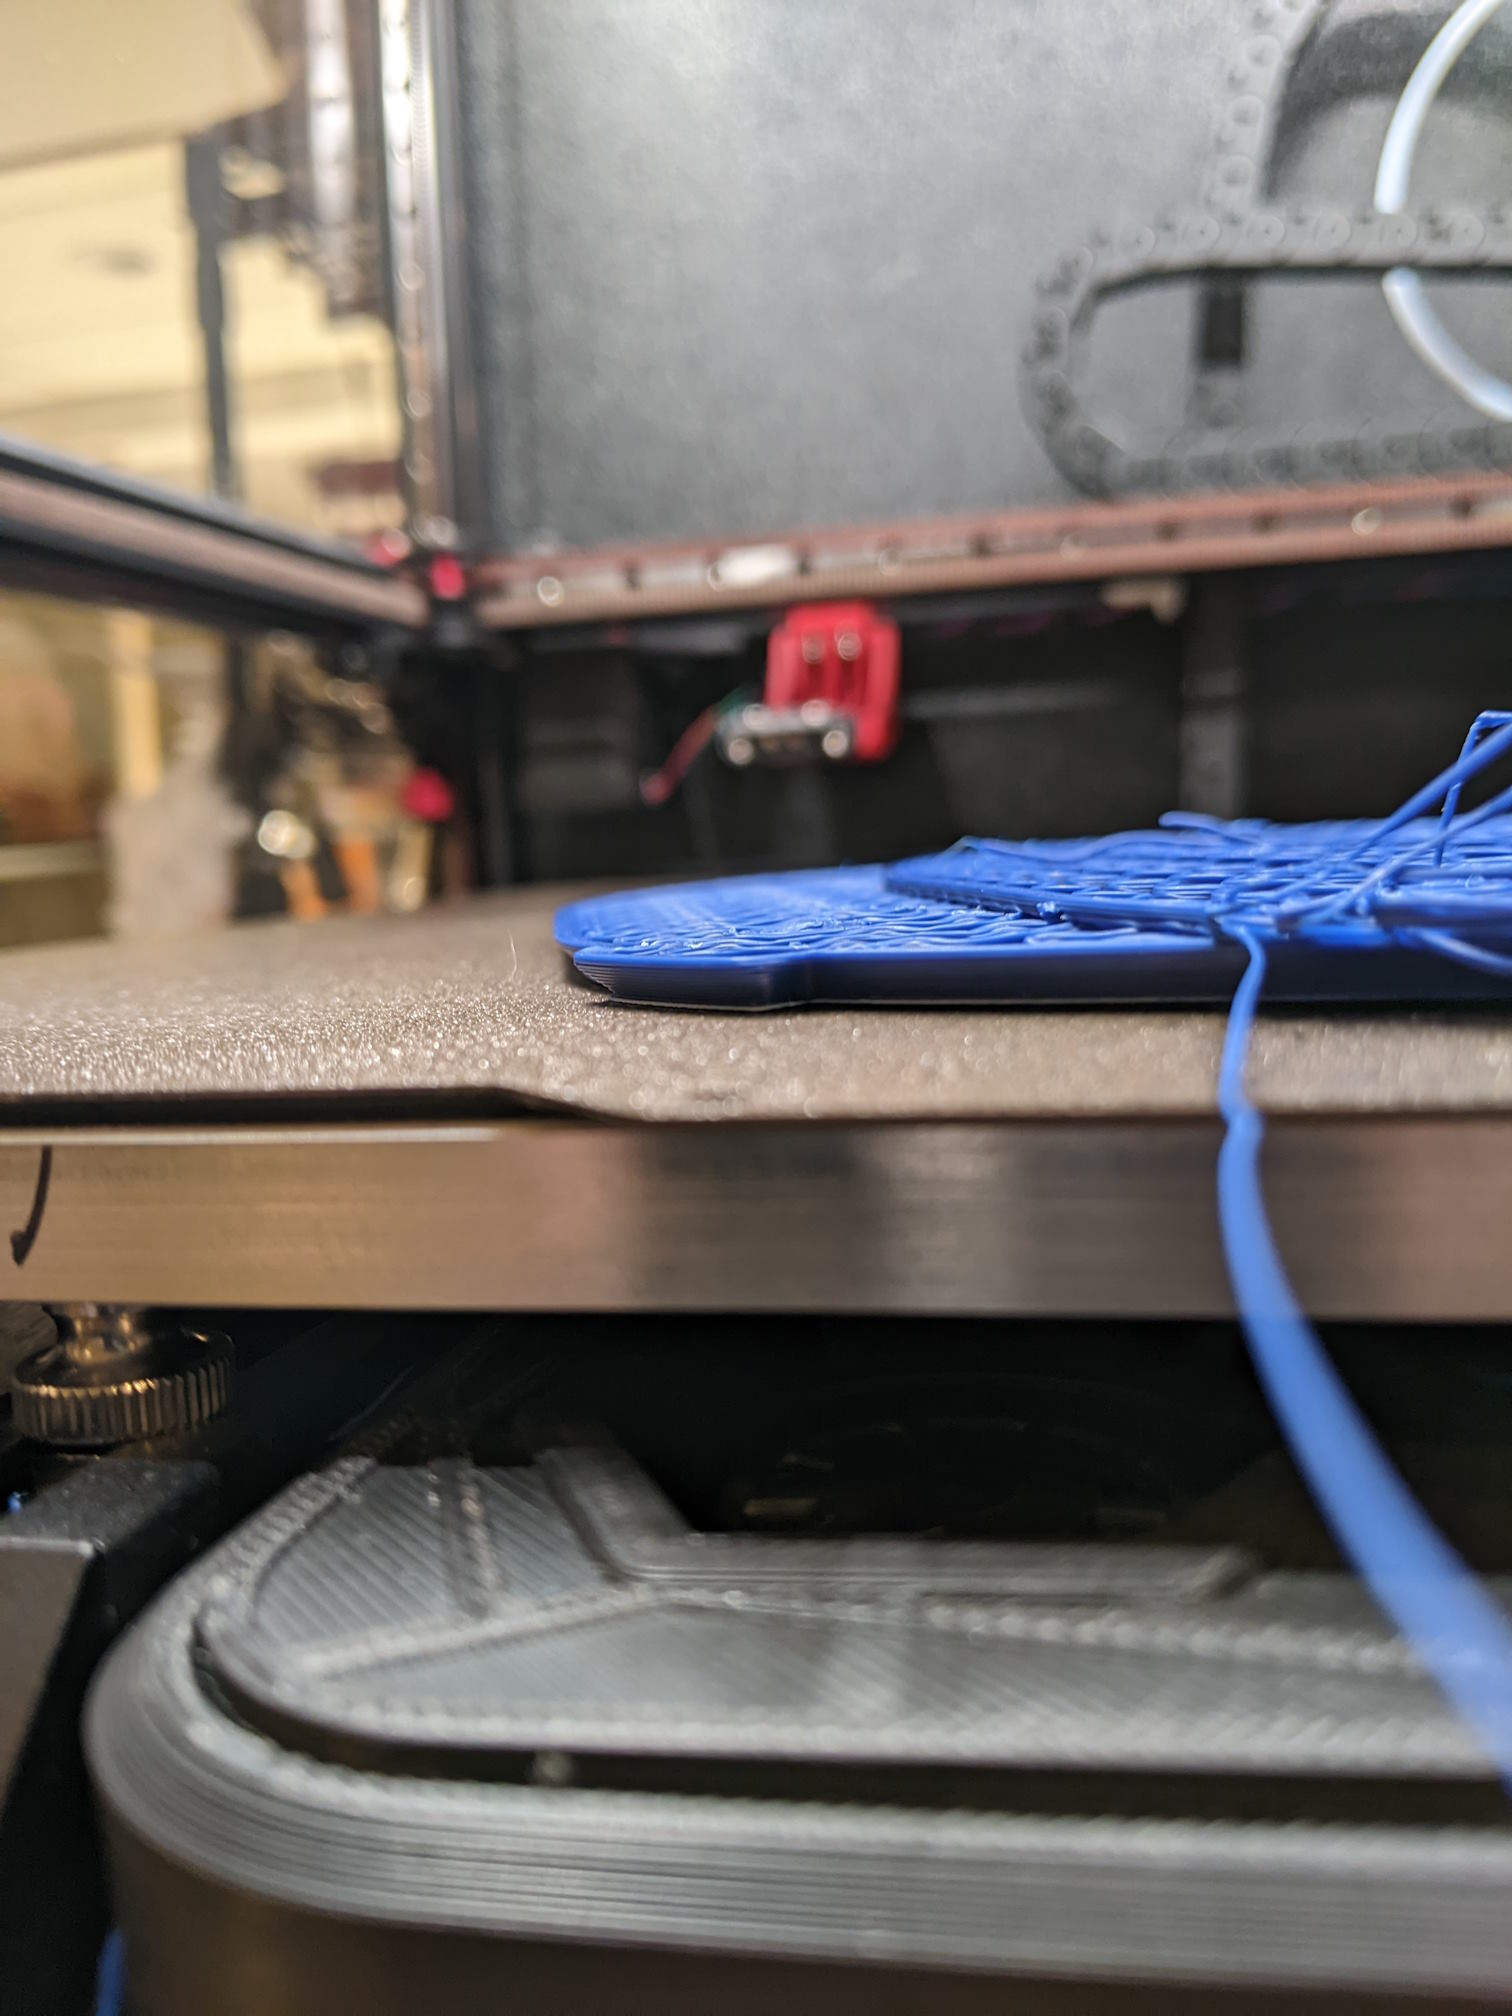
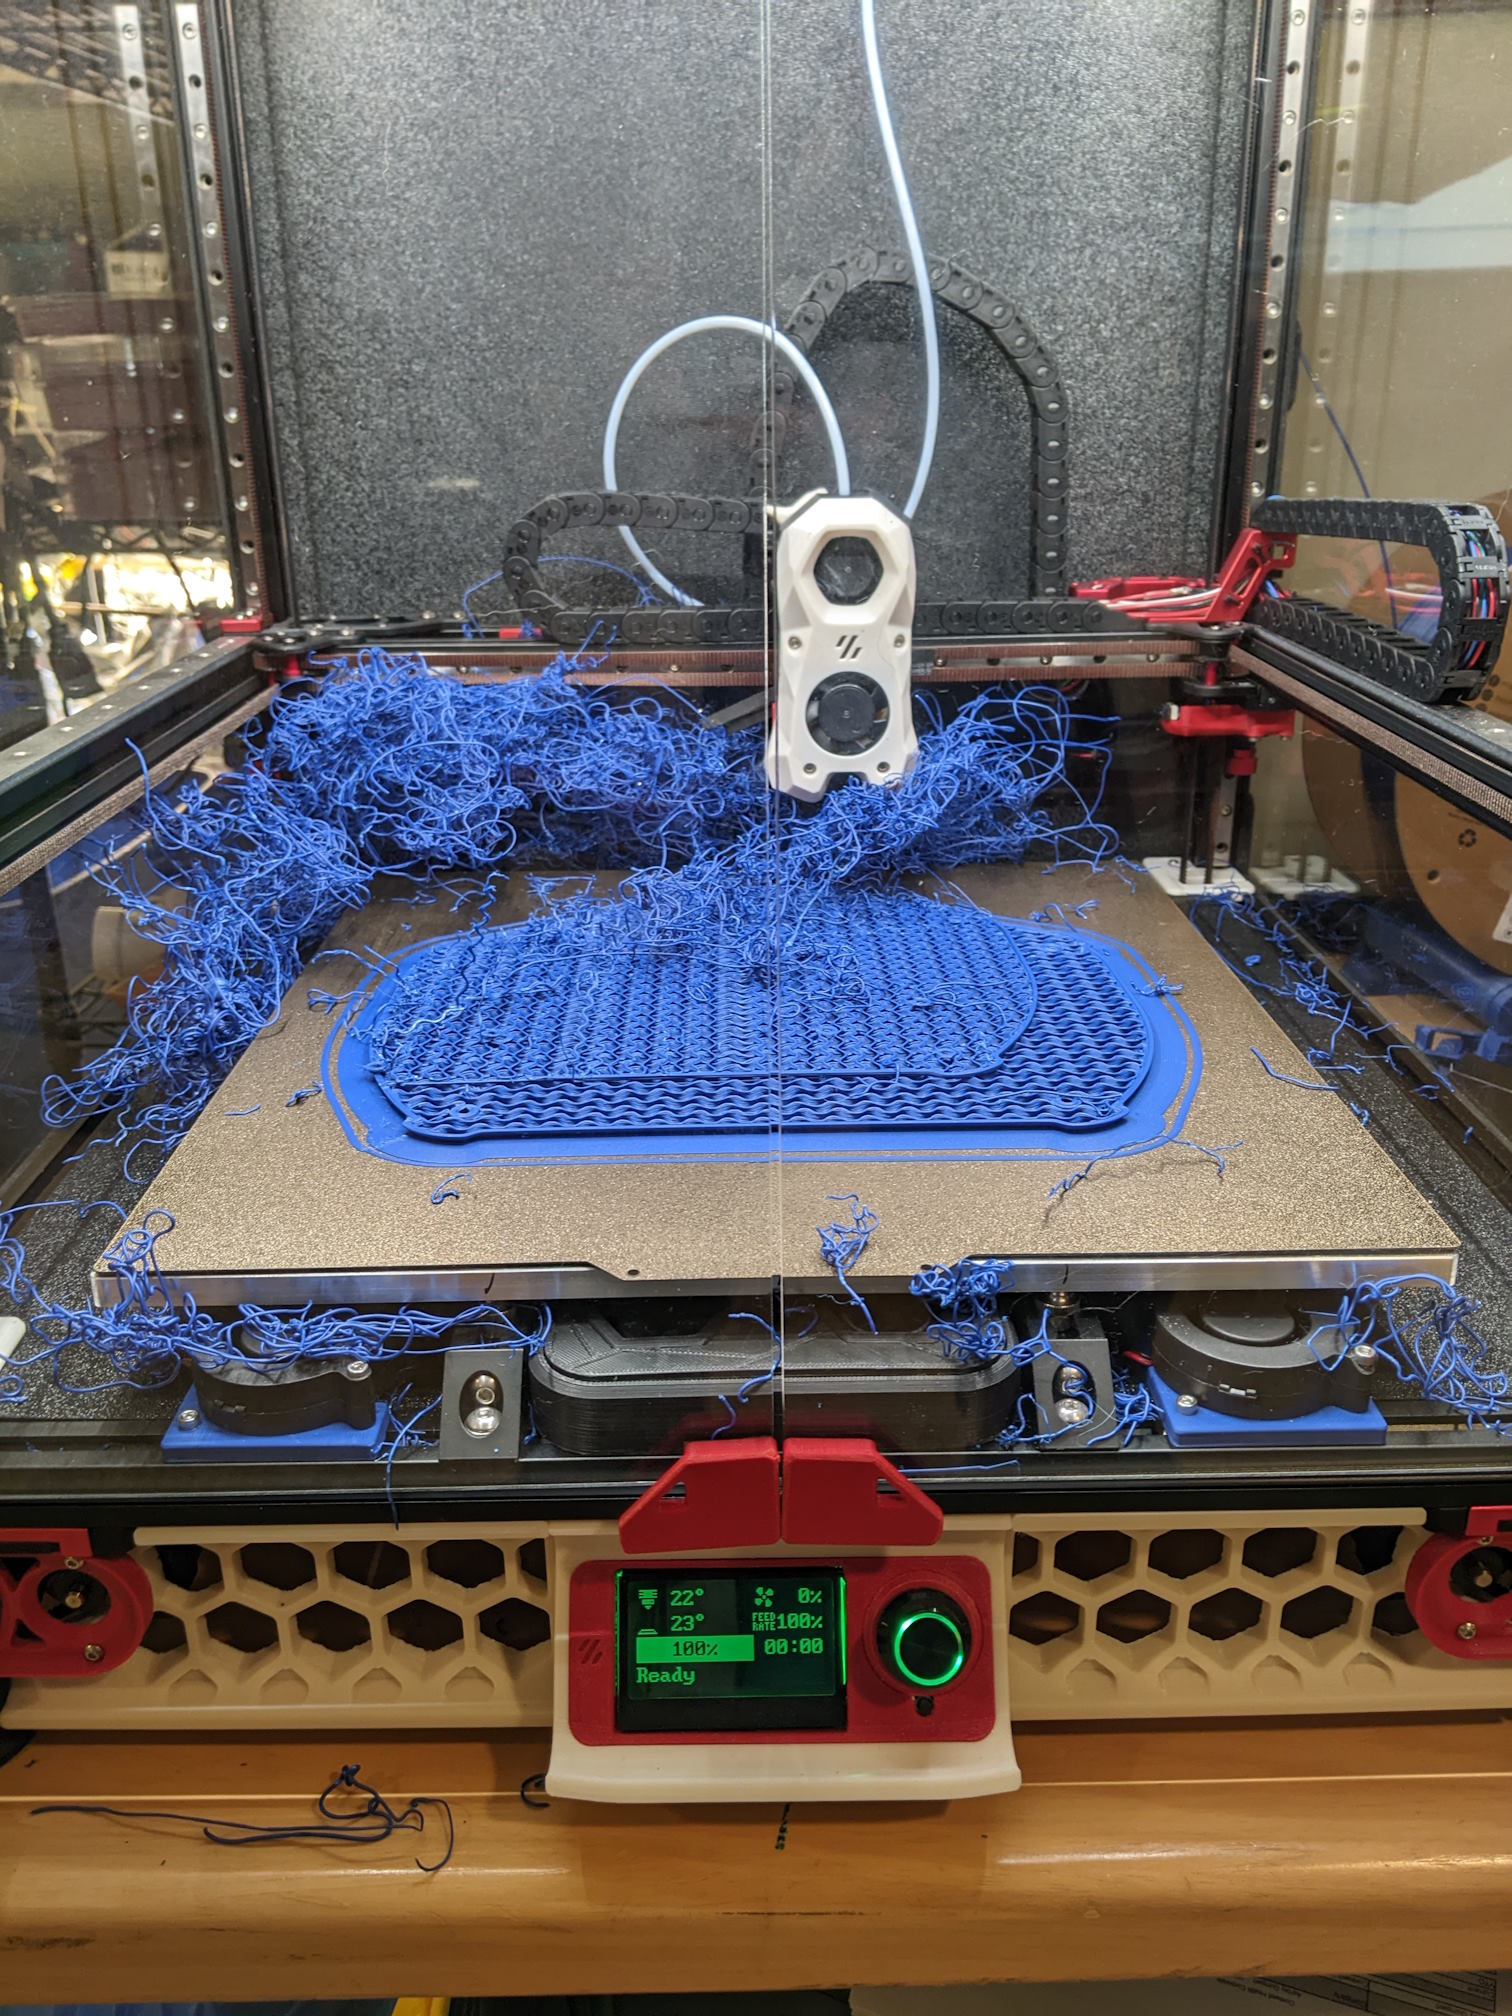
The printer is a Voron 2.4, the extruder is a StealthBurner, and the hot end itself is a Rapido MK1. I'm printing Polymaker ASA on a spool that hasn't given me any grief thus far (I last printed with it a few days ago) and am slicing with Orca Slicer.

The printer has about 700 hours on it. In that time, I've run 4.1 km of filament through it. These two prints are two of the three jams I've experienced in that time span. The first print failed on a very similar feature (internal bridge), but on a much much much smaller print. I've printed some pretty long (> 12 hour) parts on this printer with the same brand of filament, and similar settings, without issues although this is the first large "fairly normal polygon with big parallel faces" that I've tried to print.

For all three jams, I was able to release the extruder latch and pull the filament out of the heat brake. There was a blob at the bottom of the filament, which would be too big to get through the orifice in the heat brake (it's a very snug fit on a Rapido). I suspect this is from sitting touching the heat brake for the remaining hour and 50 minutes in the print after the jam occurred. Note to self: install a filament run-out sensor....

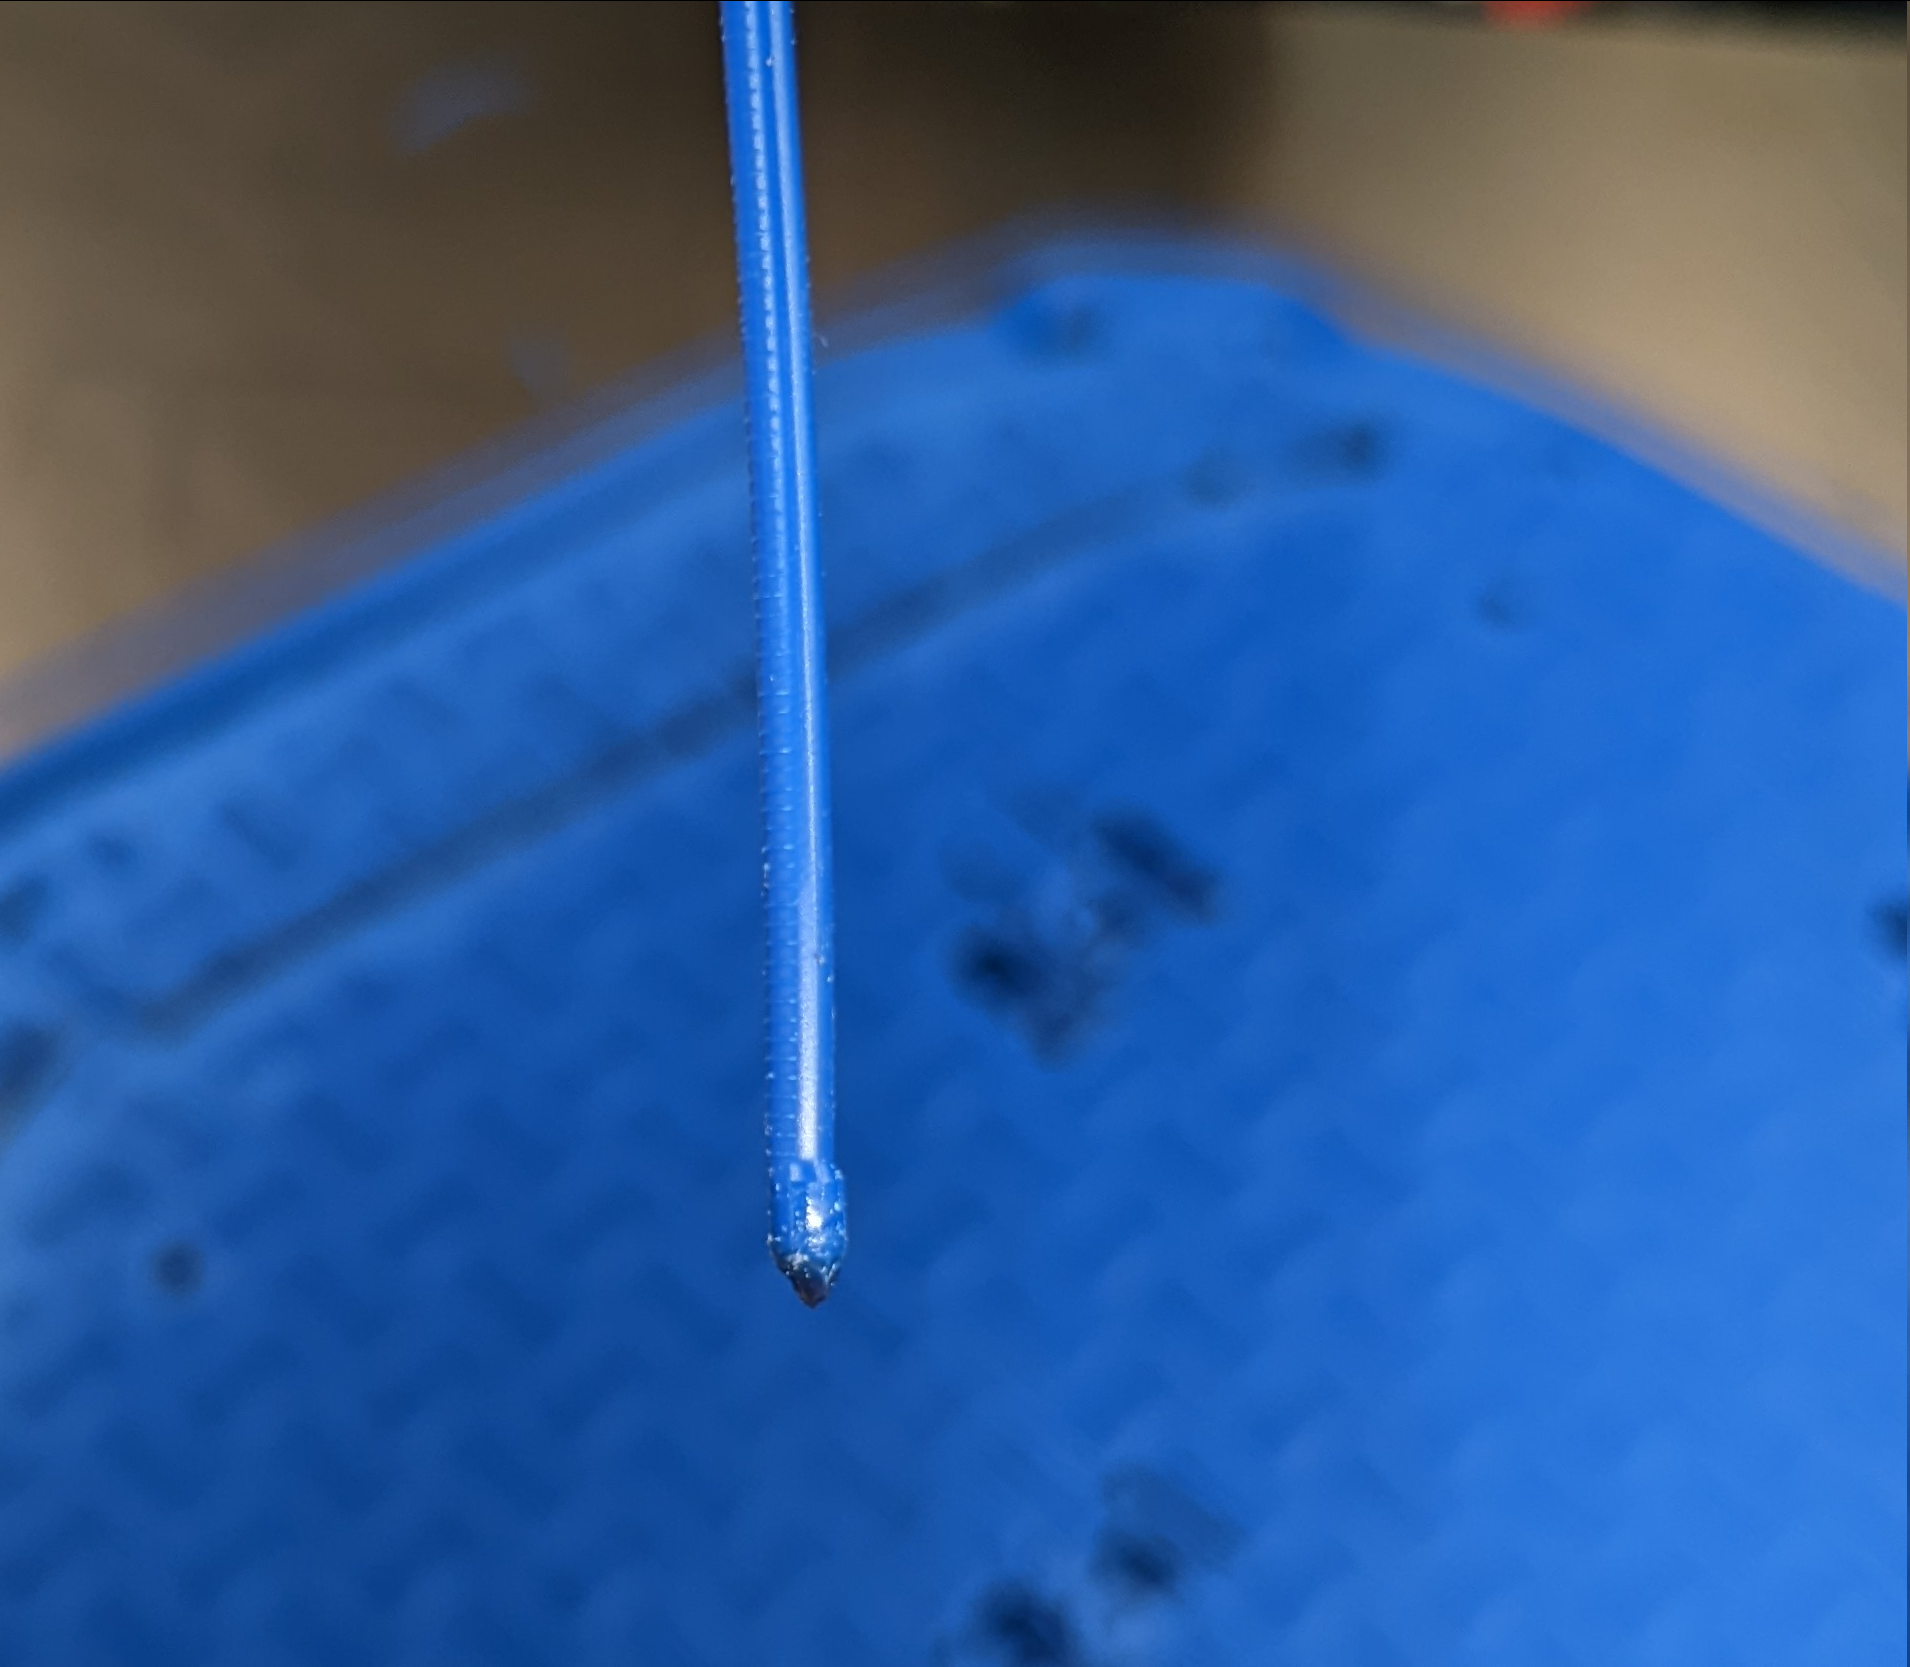
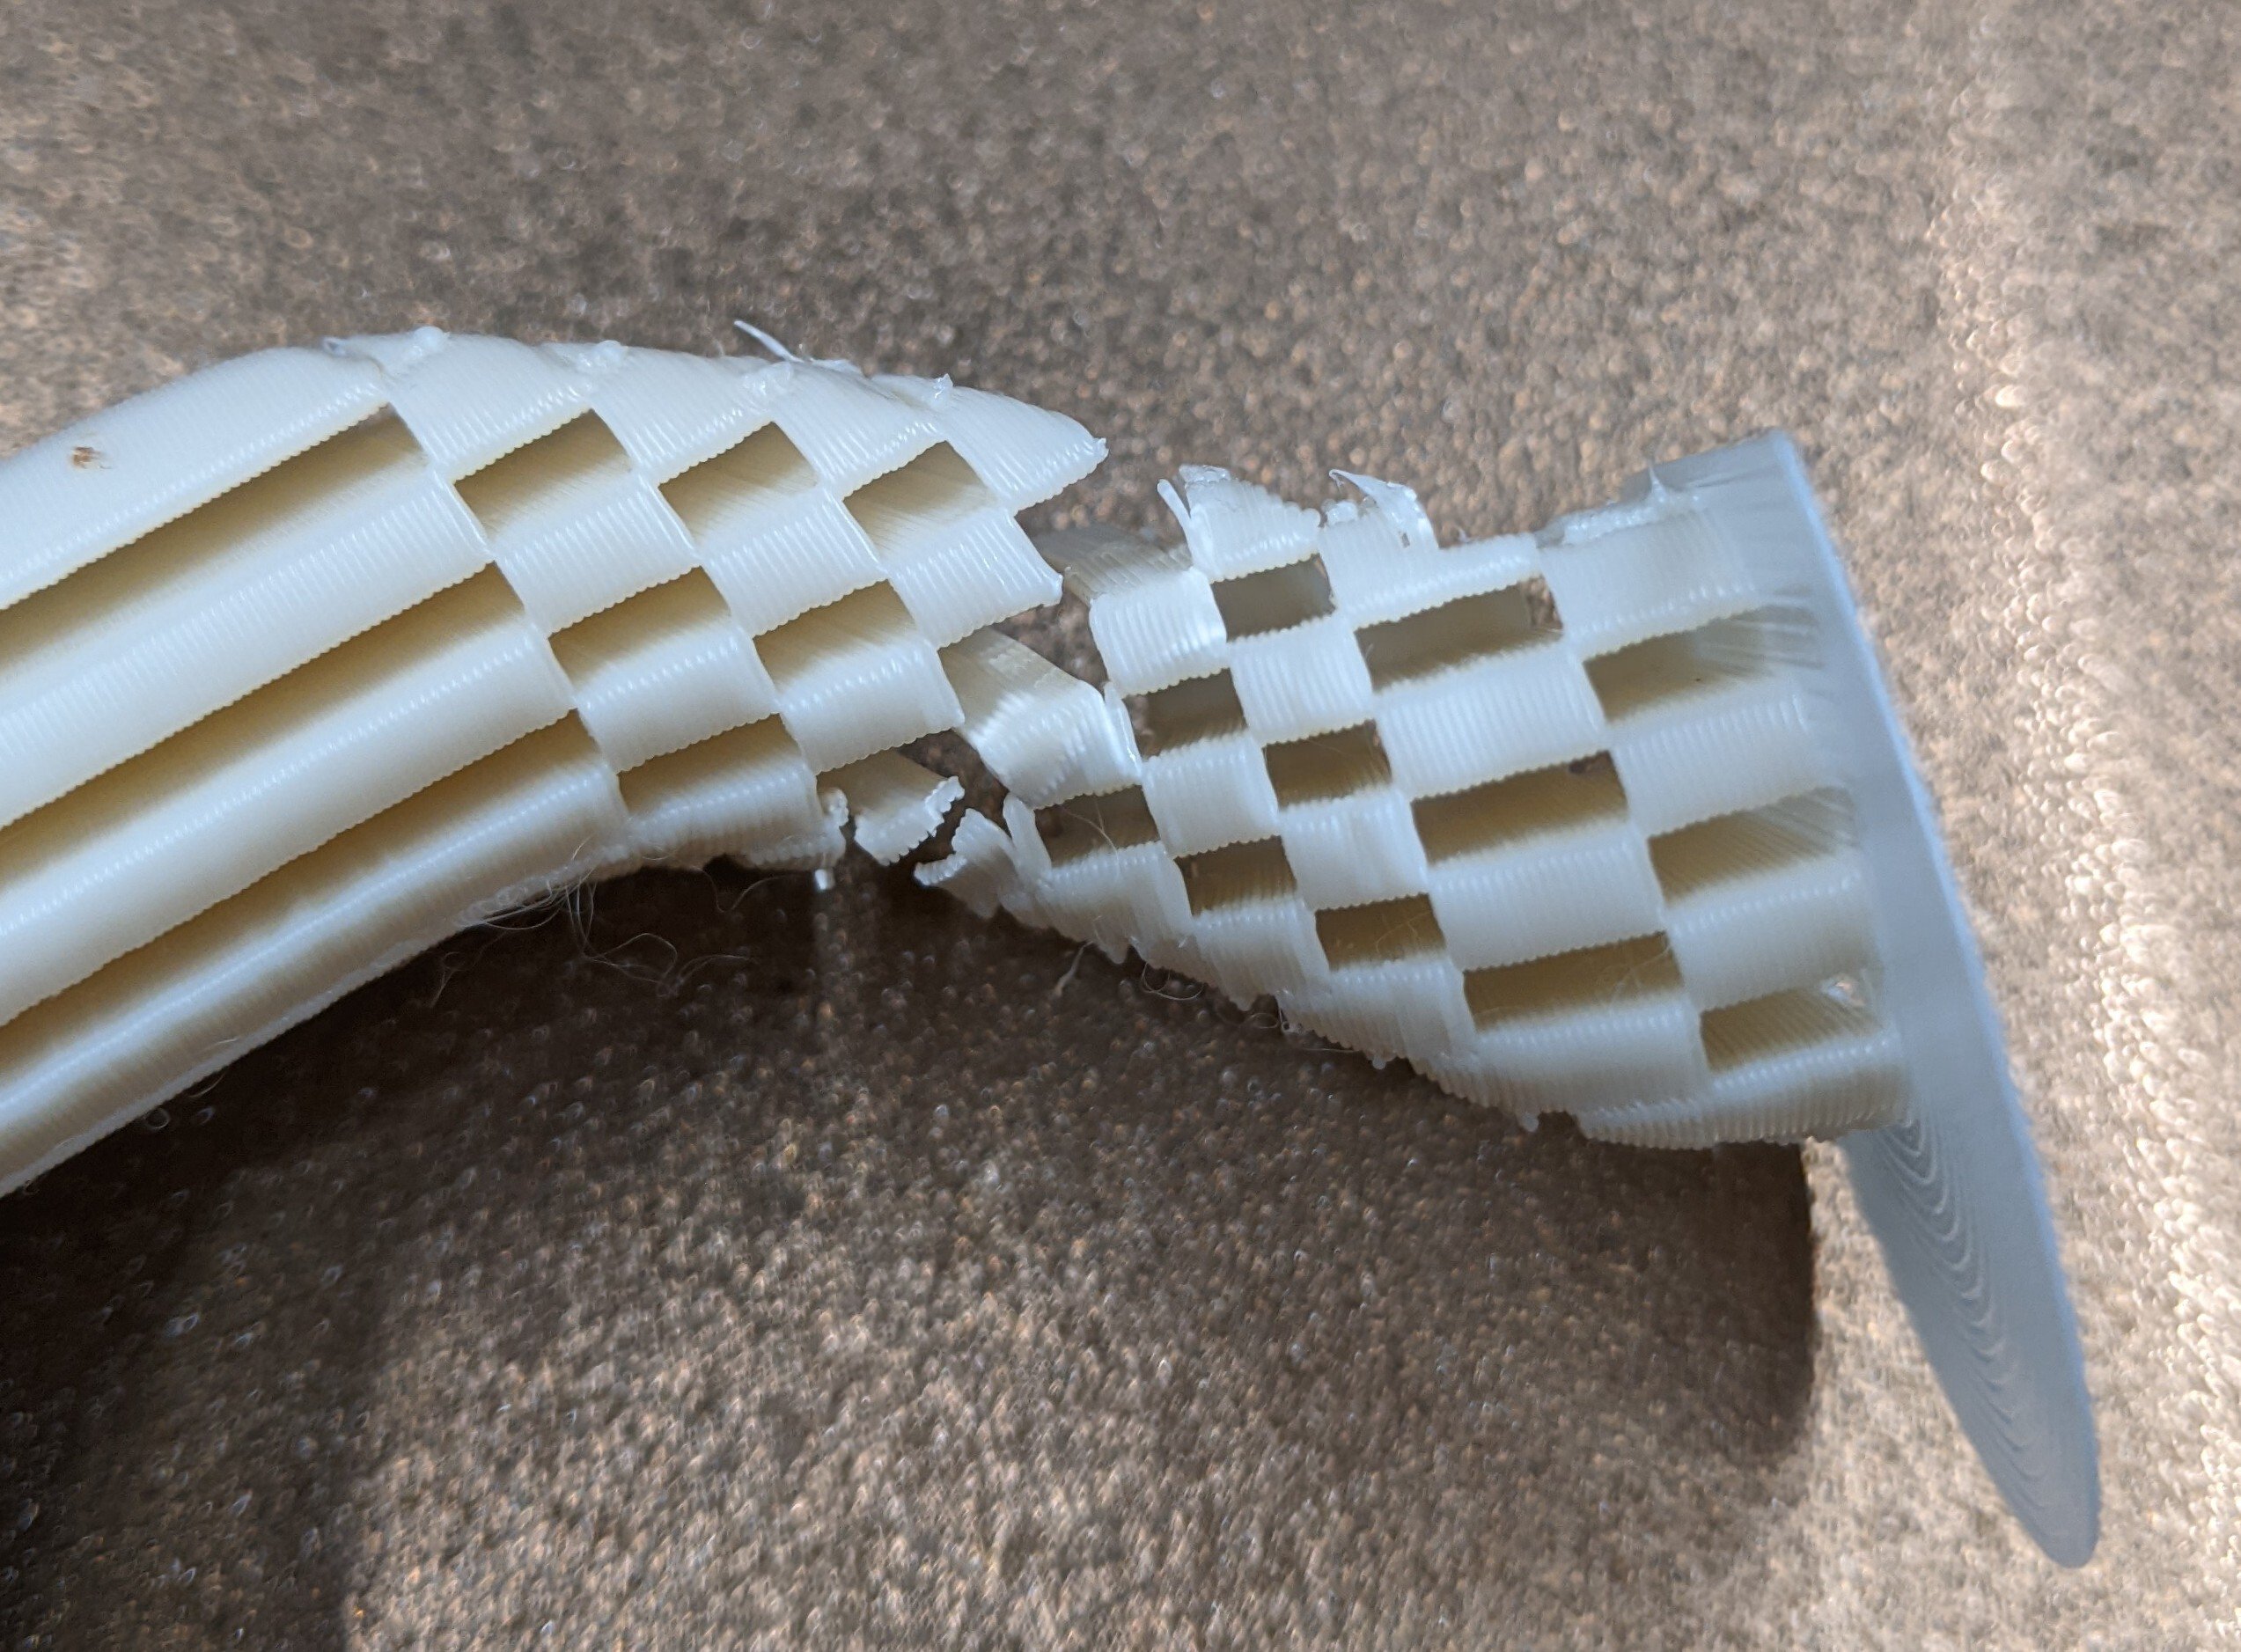
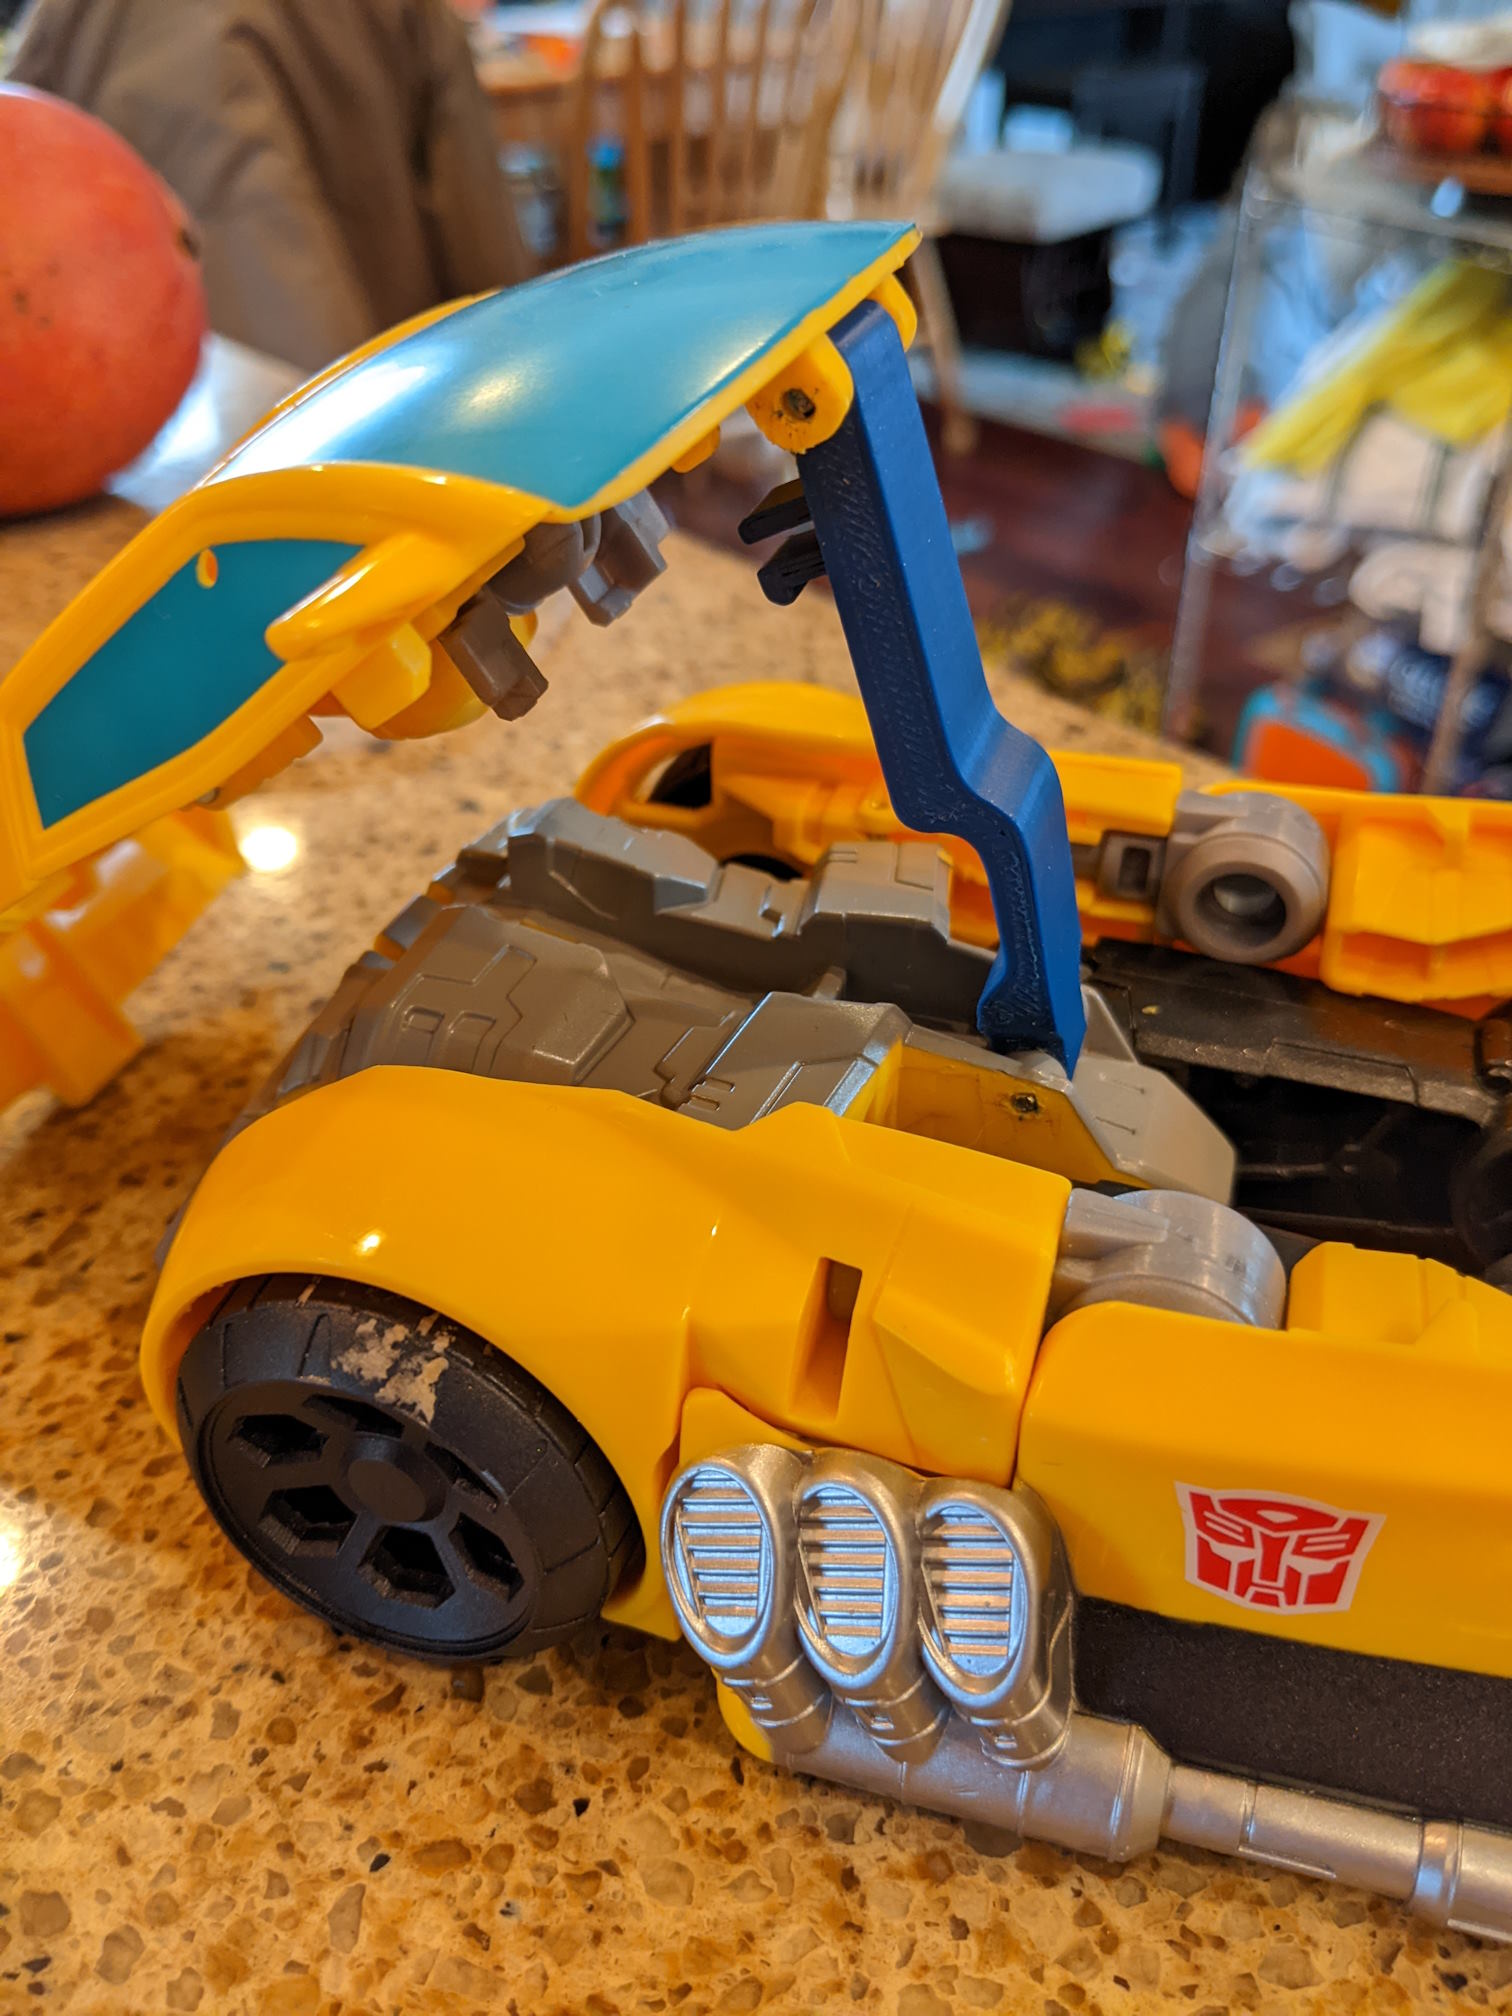
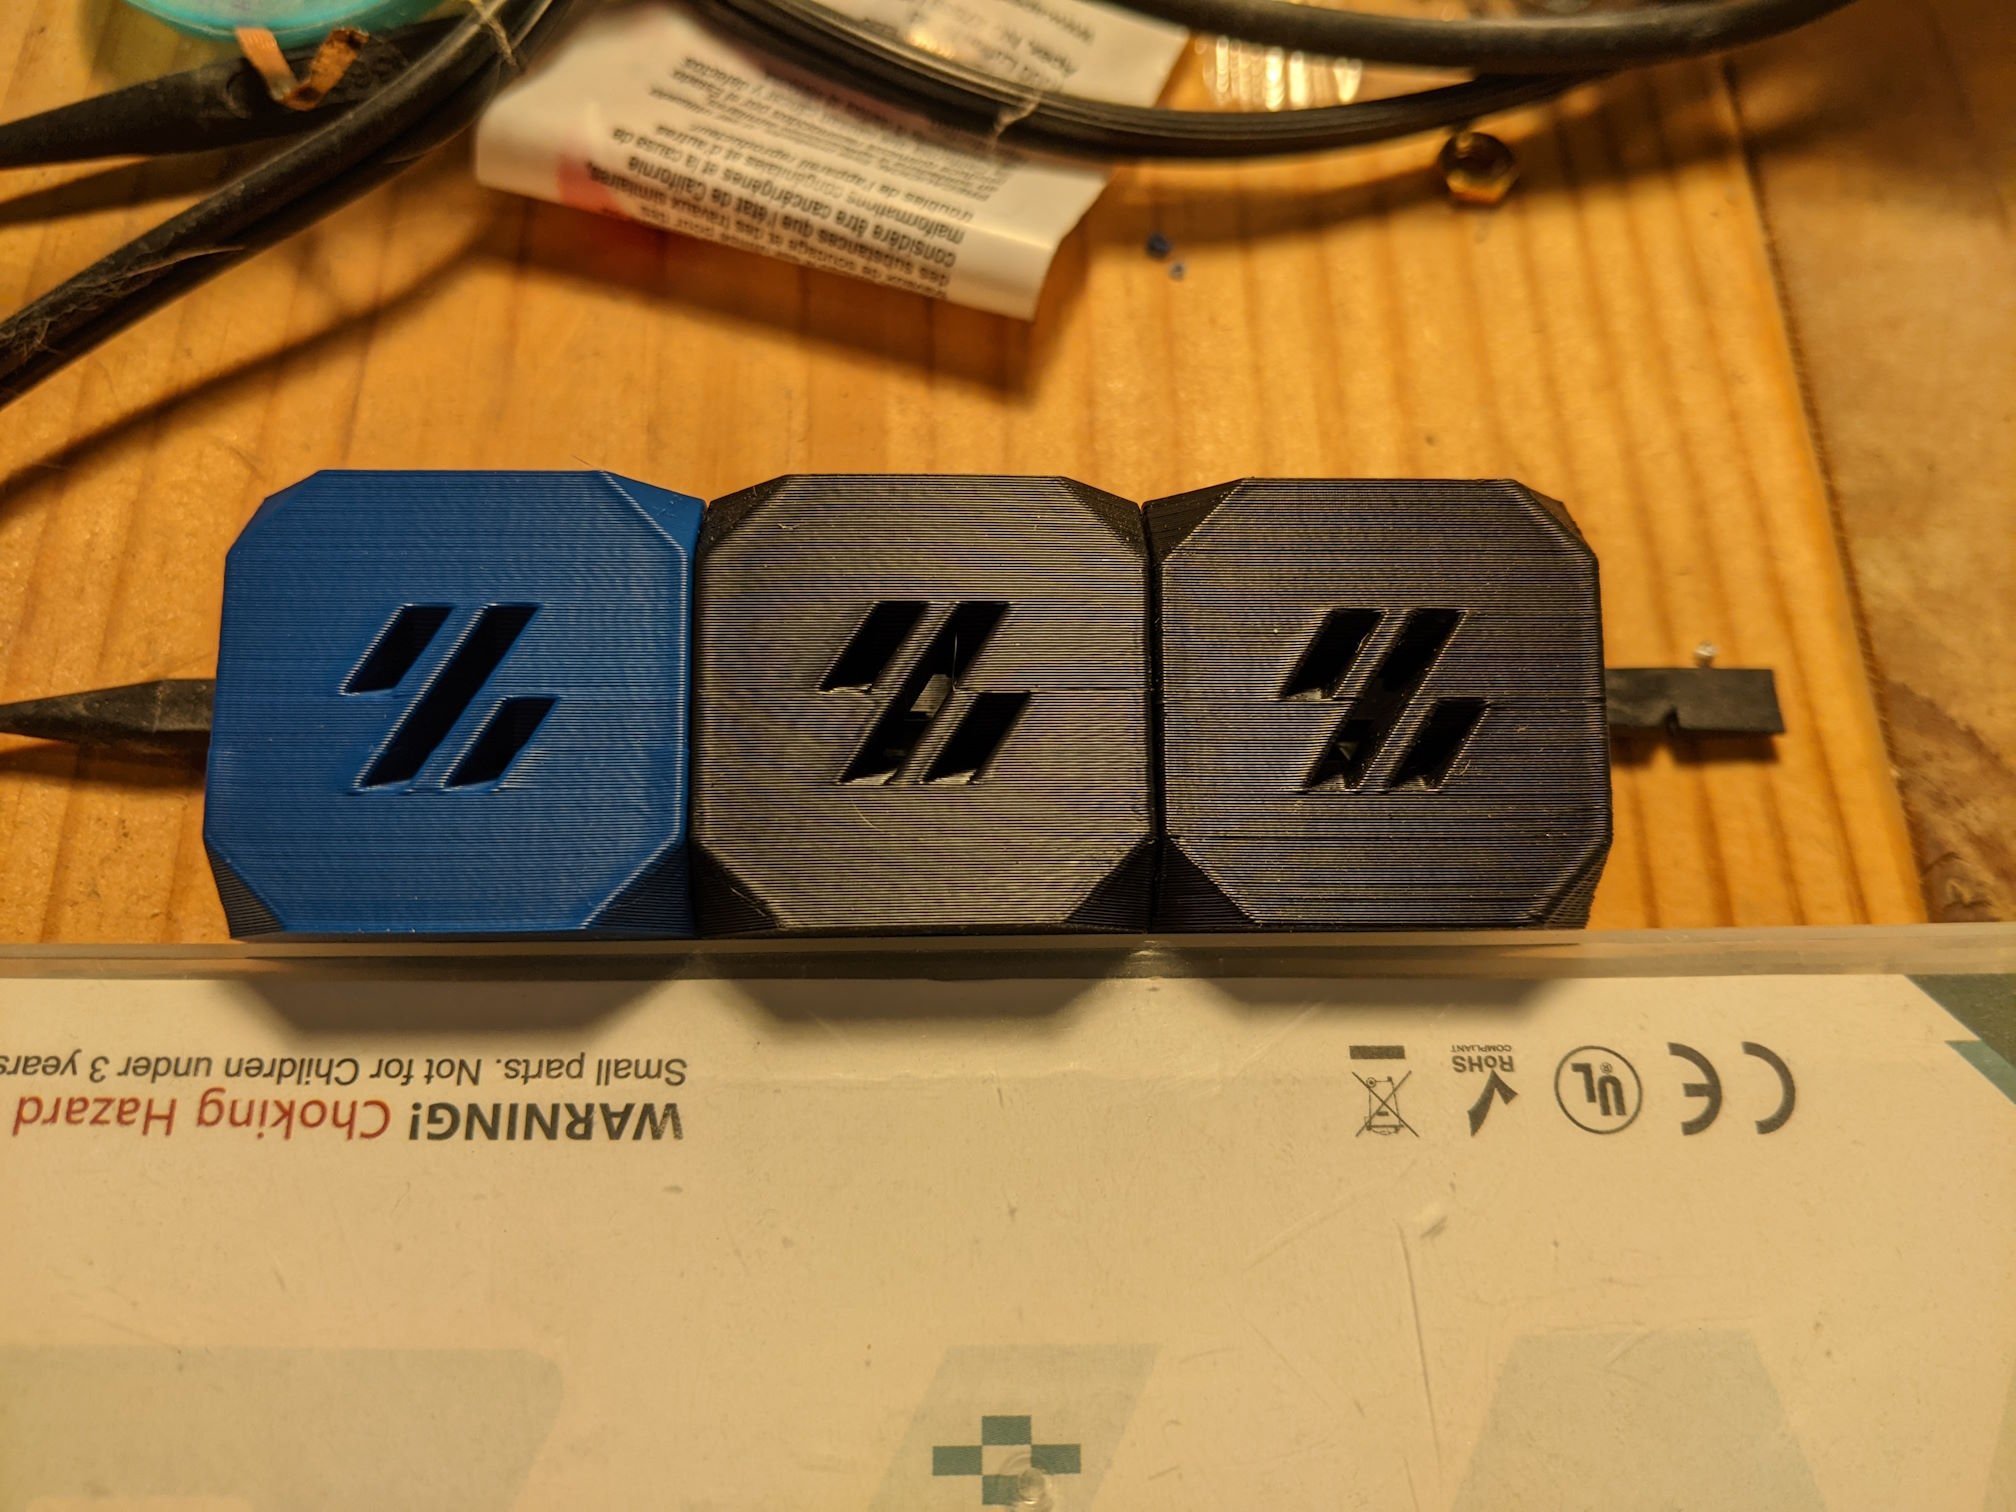
There's also always been a little bit of filament left in the hot end. The photo below is what came out after manually pushing it out with a metal rod I got with my i3 clone.

After the first clog on the small print, I reset and the print went off without a hitch. I didn't think about it again until the top print above failed. I decided to swap nozzles just to be safe and bumped my extruder temp up from 230 to 240.

It looks like I might have been under extruding a tad on the third print and/or I need to tune pressure advance. The OG nozzle was plated brass, and I had recently tuned, so if it was starting to wear out then some minor under extrusion with a new/fresh nozzle makes sense.

Here's what the slicer shows as happening on this layer. I am not showing the full layer so you can see it ends with the internal bridge on the lower left. There are a handful of retractions, but they're not very frequent. There is no retraction at the end of the internal bridge before the travel to the start of the next layer.

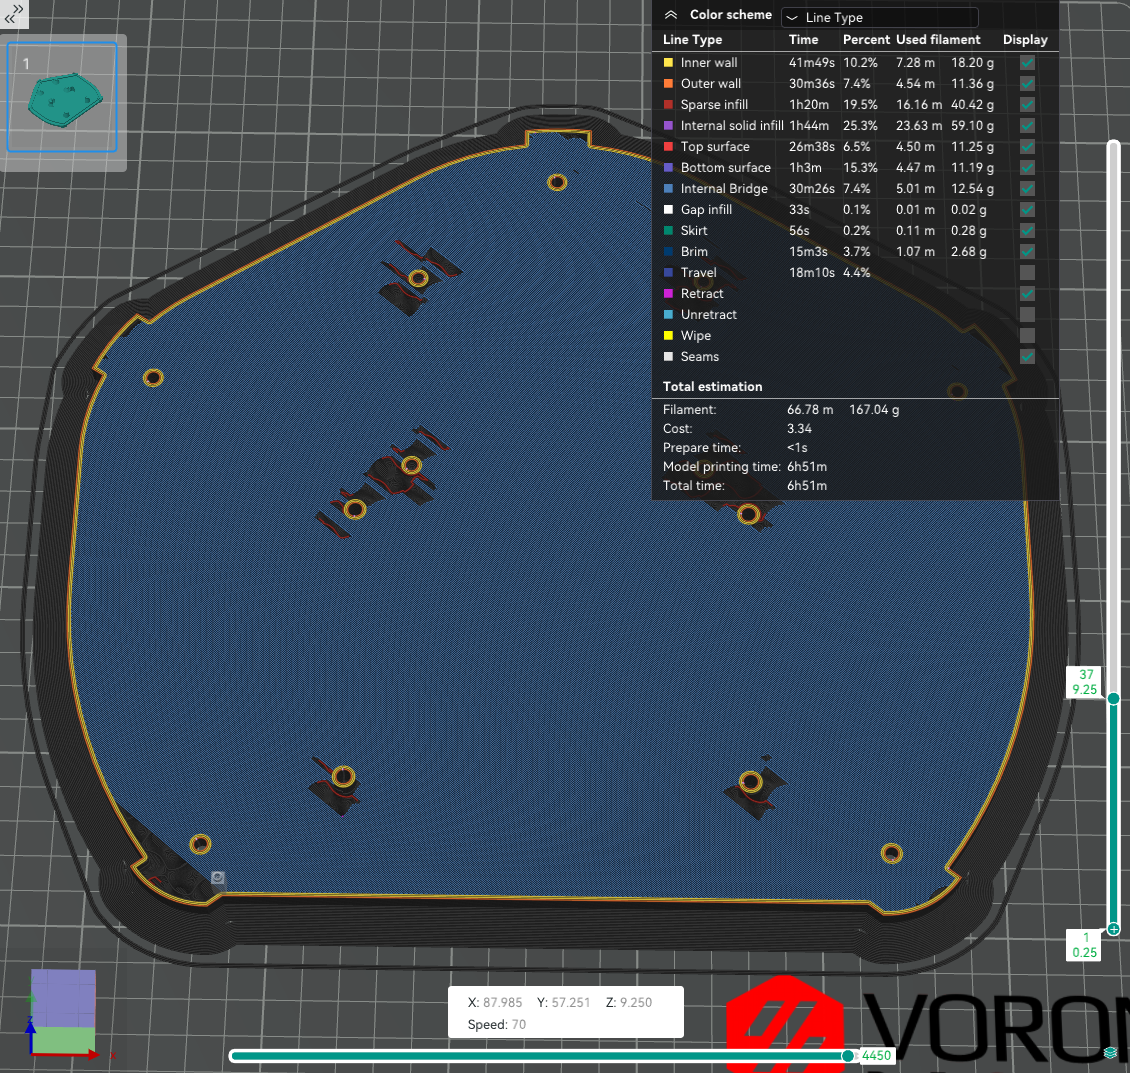
The next layer starts perimeters first in the lower right hand corner. I don't see evidence of the perimeters starting, so odds are the jam is happening between the two layers.

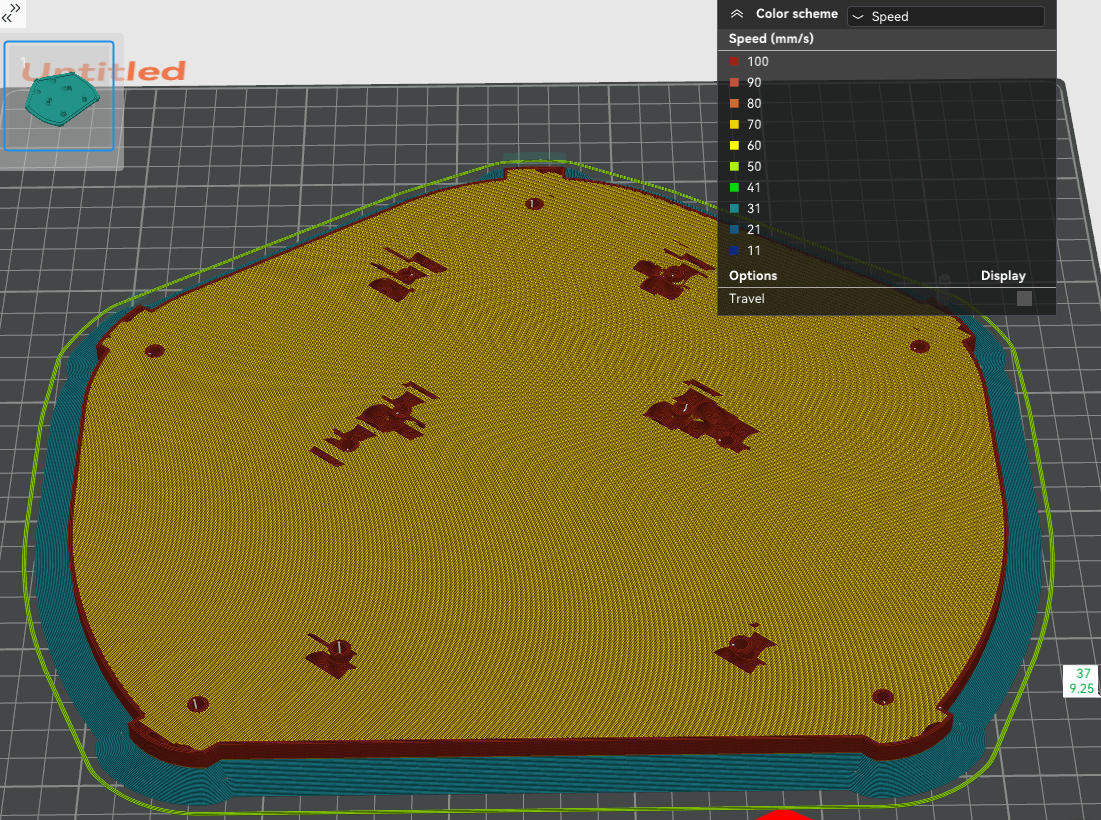
I have the slicer set to print nearly all features at the same speed, other than overhangs. This is potential correlation #1

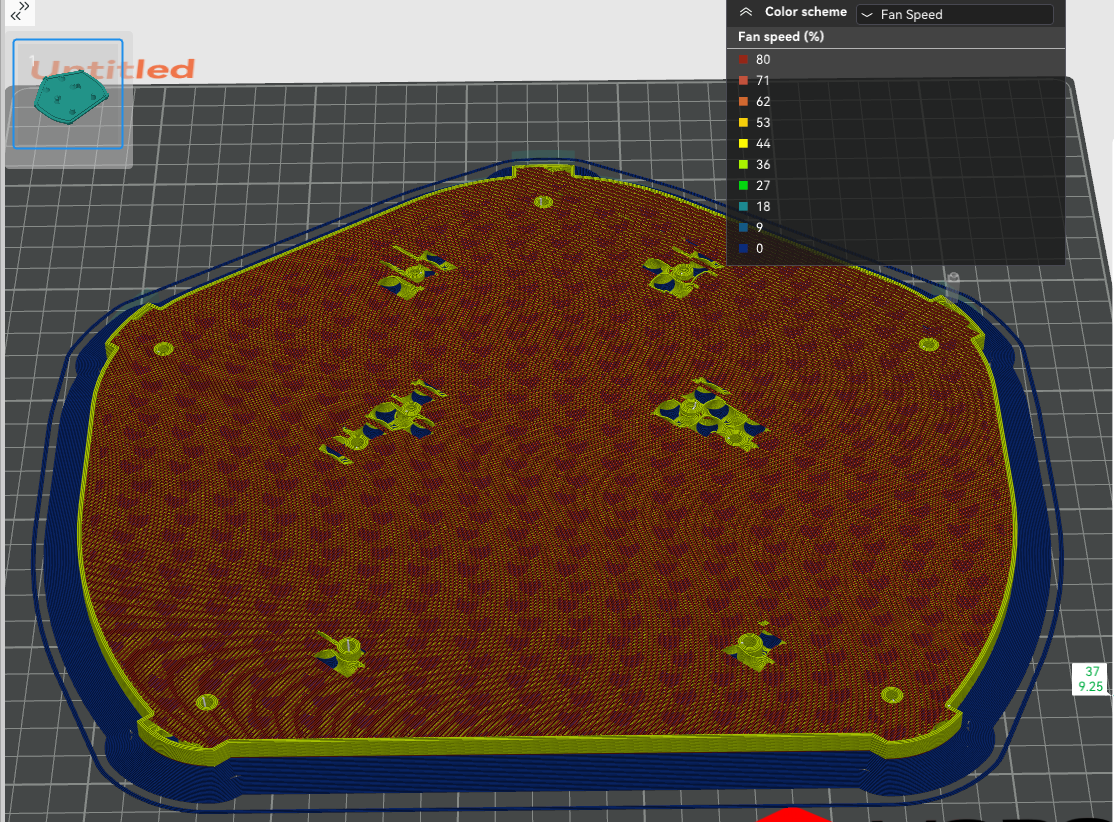
I have the fan set to 40% with no cooling for the first 10 layers. However, for overhangs it's going to 80%. This is potential correlation #2

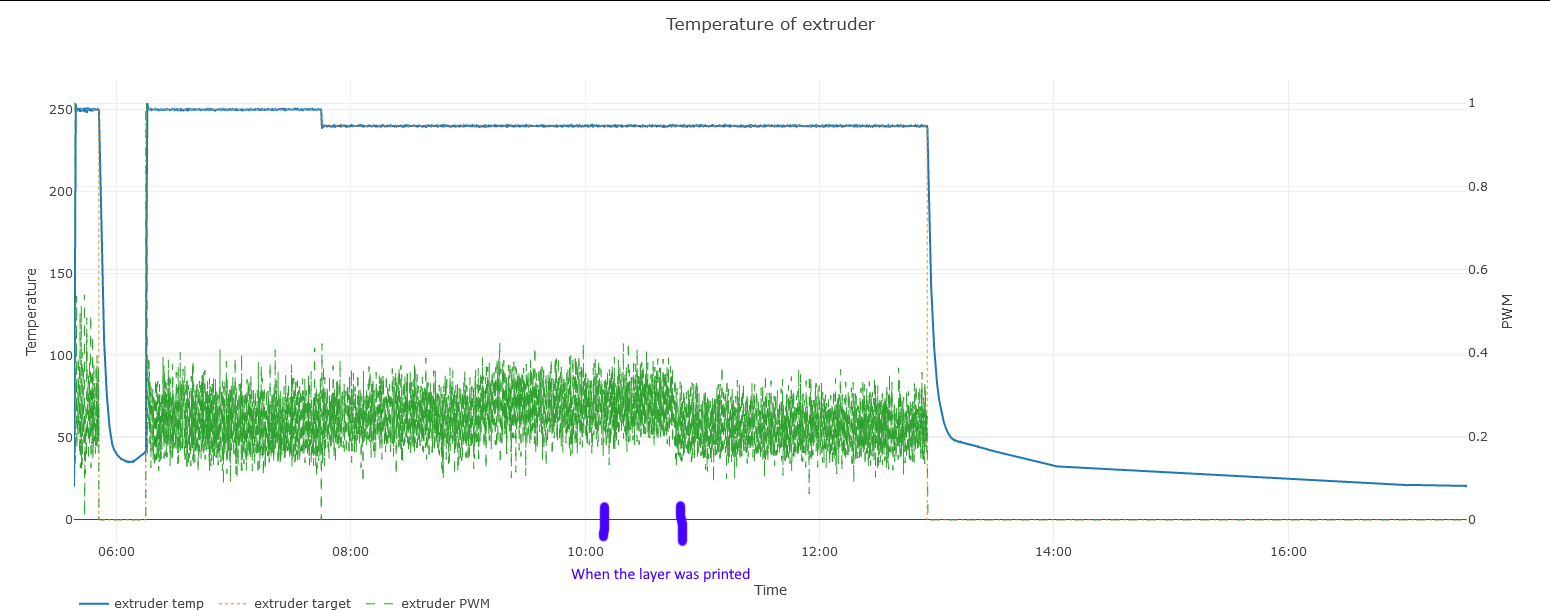
Looking at a graph of what was going on with the extruder, it looks like all is (fairly) well here, at least from a temp perspective. The min PWM value might increase a hair for this layer, but without calculating the average and/or smoothing the line it's hard to eyeball meaningfully. It does appear that the PWM falls off some once the jam occurs.

All ideas and tips welcome!

90
It fits! (lemmy.world)

Pardon the brim remnants. Not pictured: the many prior iterations. This started as a head on photo that I imported into fusion 360 and scaled after some measuring with calipers. It's not perfect, but it's rapidly approaching good enough. The square indent is to help with orientation - although the part obviously is not symmetrical, it's much harder to judge the home.

101

Very Specific Objects are a lot of fun, so here's another one.

If you find yourself purchasing a ~~cheapish Amaon RC car~~ Very Fancy DOUBLE E 1:12 Scale Large Remote Control Car Monster Trucks for Boys with Head Lights 4WD Off All Terrain RC Car Rechargeable Vehicles Xmas Gifts for Kids only for its spring perches to get broken one by one, well - I've got a solution for you.

Printables link if anyone thinks this object might apply to them.

74
submitted 6 months ago* (last edited 6 months ago) by IMALlama@lemmy.world to c/3dprinting@lemmy.world

While I acknowledge the expectations Ellis tries to set, all the youtubers out there have me chasing a dragon looking for better and better layer aliment on my z-axis. I suspect (at least) one of you will come out of the woodwork and say your printer has better aligned layers than mine too 😭 I'm certainly not alone, but even in that thread you can find some people claiming that not everyone experiences the issue

So far, I've been through three iterations on my CW2:

Results below with me hand holding my cellphone and moving a Pixar style desk lamp to be at a progressively steeper angle to the face of the cubes. Left = FYSTEC Pom (I also used Orcaslicer), middle = BMG IDGA, right = 'normal' BMGs. Note that the cubes are upside down.

Vanity shot with very soft and indirect light

Direct light, 90 degrees to the face of the cubes (basically perpendicular)

Direct light, ~45 degrees to the face of the cubes

Direct light, ~5 degrees to the face of the cubes (basically parallel)

At this point, I am going to shrug, give up, and print with fuzz (or avoid harsh light).

view more: next ›

IMALlama

joined 1 year ago