[-] IMALlama@lemmy.world 1 points 21 hours ago

Local or did you need to travel? Even though you were "only" performing for say ~30 minutes/day were you able to do any other work those days?

This does seem like a good hourly rate, but if you had to travel there and back, and couldn't do other things for $$ in your free time, the deal doesn't become as good sounding.

[-] IMALlama@lemmy.world 2 points 1 day ago

The scanner will only work if your model is absolutely flat. I spent some time trying to model a baseplate for my camera that I wanted a glove like fit on. In the end I had to iterate a ton. I suspect this was due to

  • The camera base had a 1mm or so fillet around the edges and the scanner has a very narrow focal plane. This made it hard to precisely place the spline
  • I was probably a bit too obsessive about the tight fit initially and would have been better off starting with a looser one

Good luck!

[-] IMALlama@lemmy.world 7 points 1 day ago

+1 for a flatbed scanner. Put a ruler somewhere on the bed for scale. If you use fusion 360, you can add an image to a sketch and scale it to be the correct size. That said, if you're going for a perfect fit it's really hard to beat a pair of calipers and things like radius guides unless it's a super complex shape.

Great call out on lens distortion. Photoshop, along with most other high feature image editors editors, will often have a lens correction option if they have a built in profile for your lens. Darktable is a good FOSS option. You still need to be absolutely parallel to your object though.

[-] IMALlama@lemmy.world 2 points 3 days ago

Straight off the printer! I've never tried annealing and the minimal amount of poking around has been somewhat inconclusive. I tend to change materials when I want different physical properties. The vast majority of my prints are functional, and don't need to be super pretty, so I buy mostly ASA and PETG these days.

IME, PLA prints nicer than PETG, which in turn prints nicer than ASA. Also IME, ASA supports are super nice to remove. PETG is a massive PITA.

Thankfully, I haven't had a print that demanded very nice surface finished and also strength/ruggedness.

[-] IMALlama@lemmy.world 3 points 3 days ago

They're under an intermittent load, but it's probably not very high. Interestingly, the parts don't seem very brittle. I suspect the exact materials in PLA+ probably vary wildly between blends/companies, so their material properties likely have some variation.

[-] IMALlama@lemmy.world 1 points 3 days ago

I wonder what the various companies blend into their pla+. This stuff is from a company that's since gone out of business, but it seems to shrug off UI, rain, and ice/snow. It wasn't matter hackers, but they had a similar name from what I recall. USA made and cheap, but their QC wasn't great.

As for ASA, I've only printed Polymaker. I buy the 3kg spools when they go on sale and it's hard to beat 3kg for $70 or so. I am tempted to try another brand to see if it prints differently though.

[-] IMALlama@lemmy.world 2 points 3 days ago

Cars and airplanes do have 3D printed parts. They're much more common in the prototyping phase, but they are used in production and are making their way to space.

I completely agree with your general sentiment though. Any time a new piece of technology shows promise there are a ton of people who will loudly proclame that it will completely replace in while turning a blind eye to things like scaling and/or practical limitations.

See also: low/no code, which has roots going back to the 1980s at least.

[-] IMALlama@lemmy.world 4 points 3 days ago

Agree on ASA. I have some PLA+ prints that have been outdoors 24/7/365 for going on 5 years now and they're holding up really well, so that's another good option.

I've been printing ASA for about a year and a half and haven't dried a spool yet. I guess it all hinges on a mix of relative humidity in your area and how much you care about a flawless finish.

27

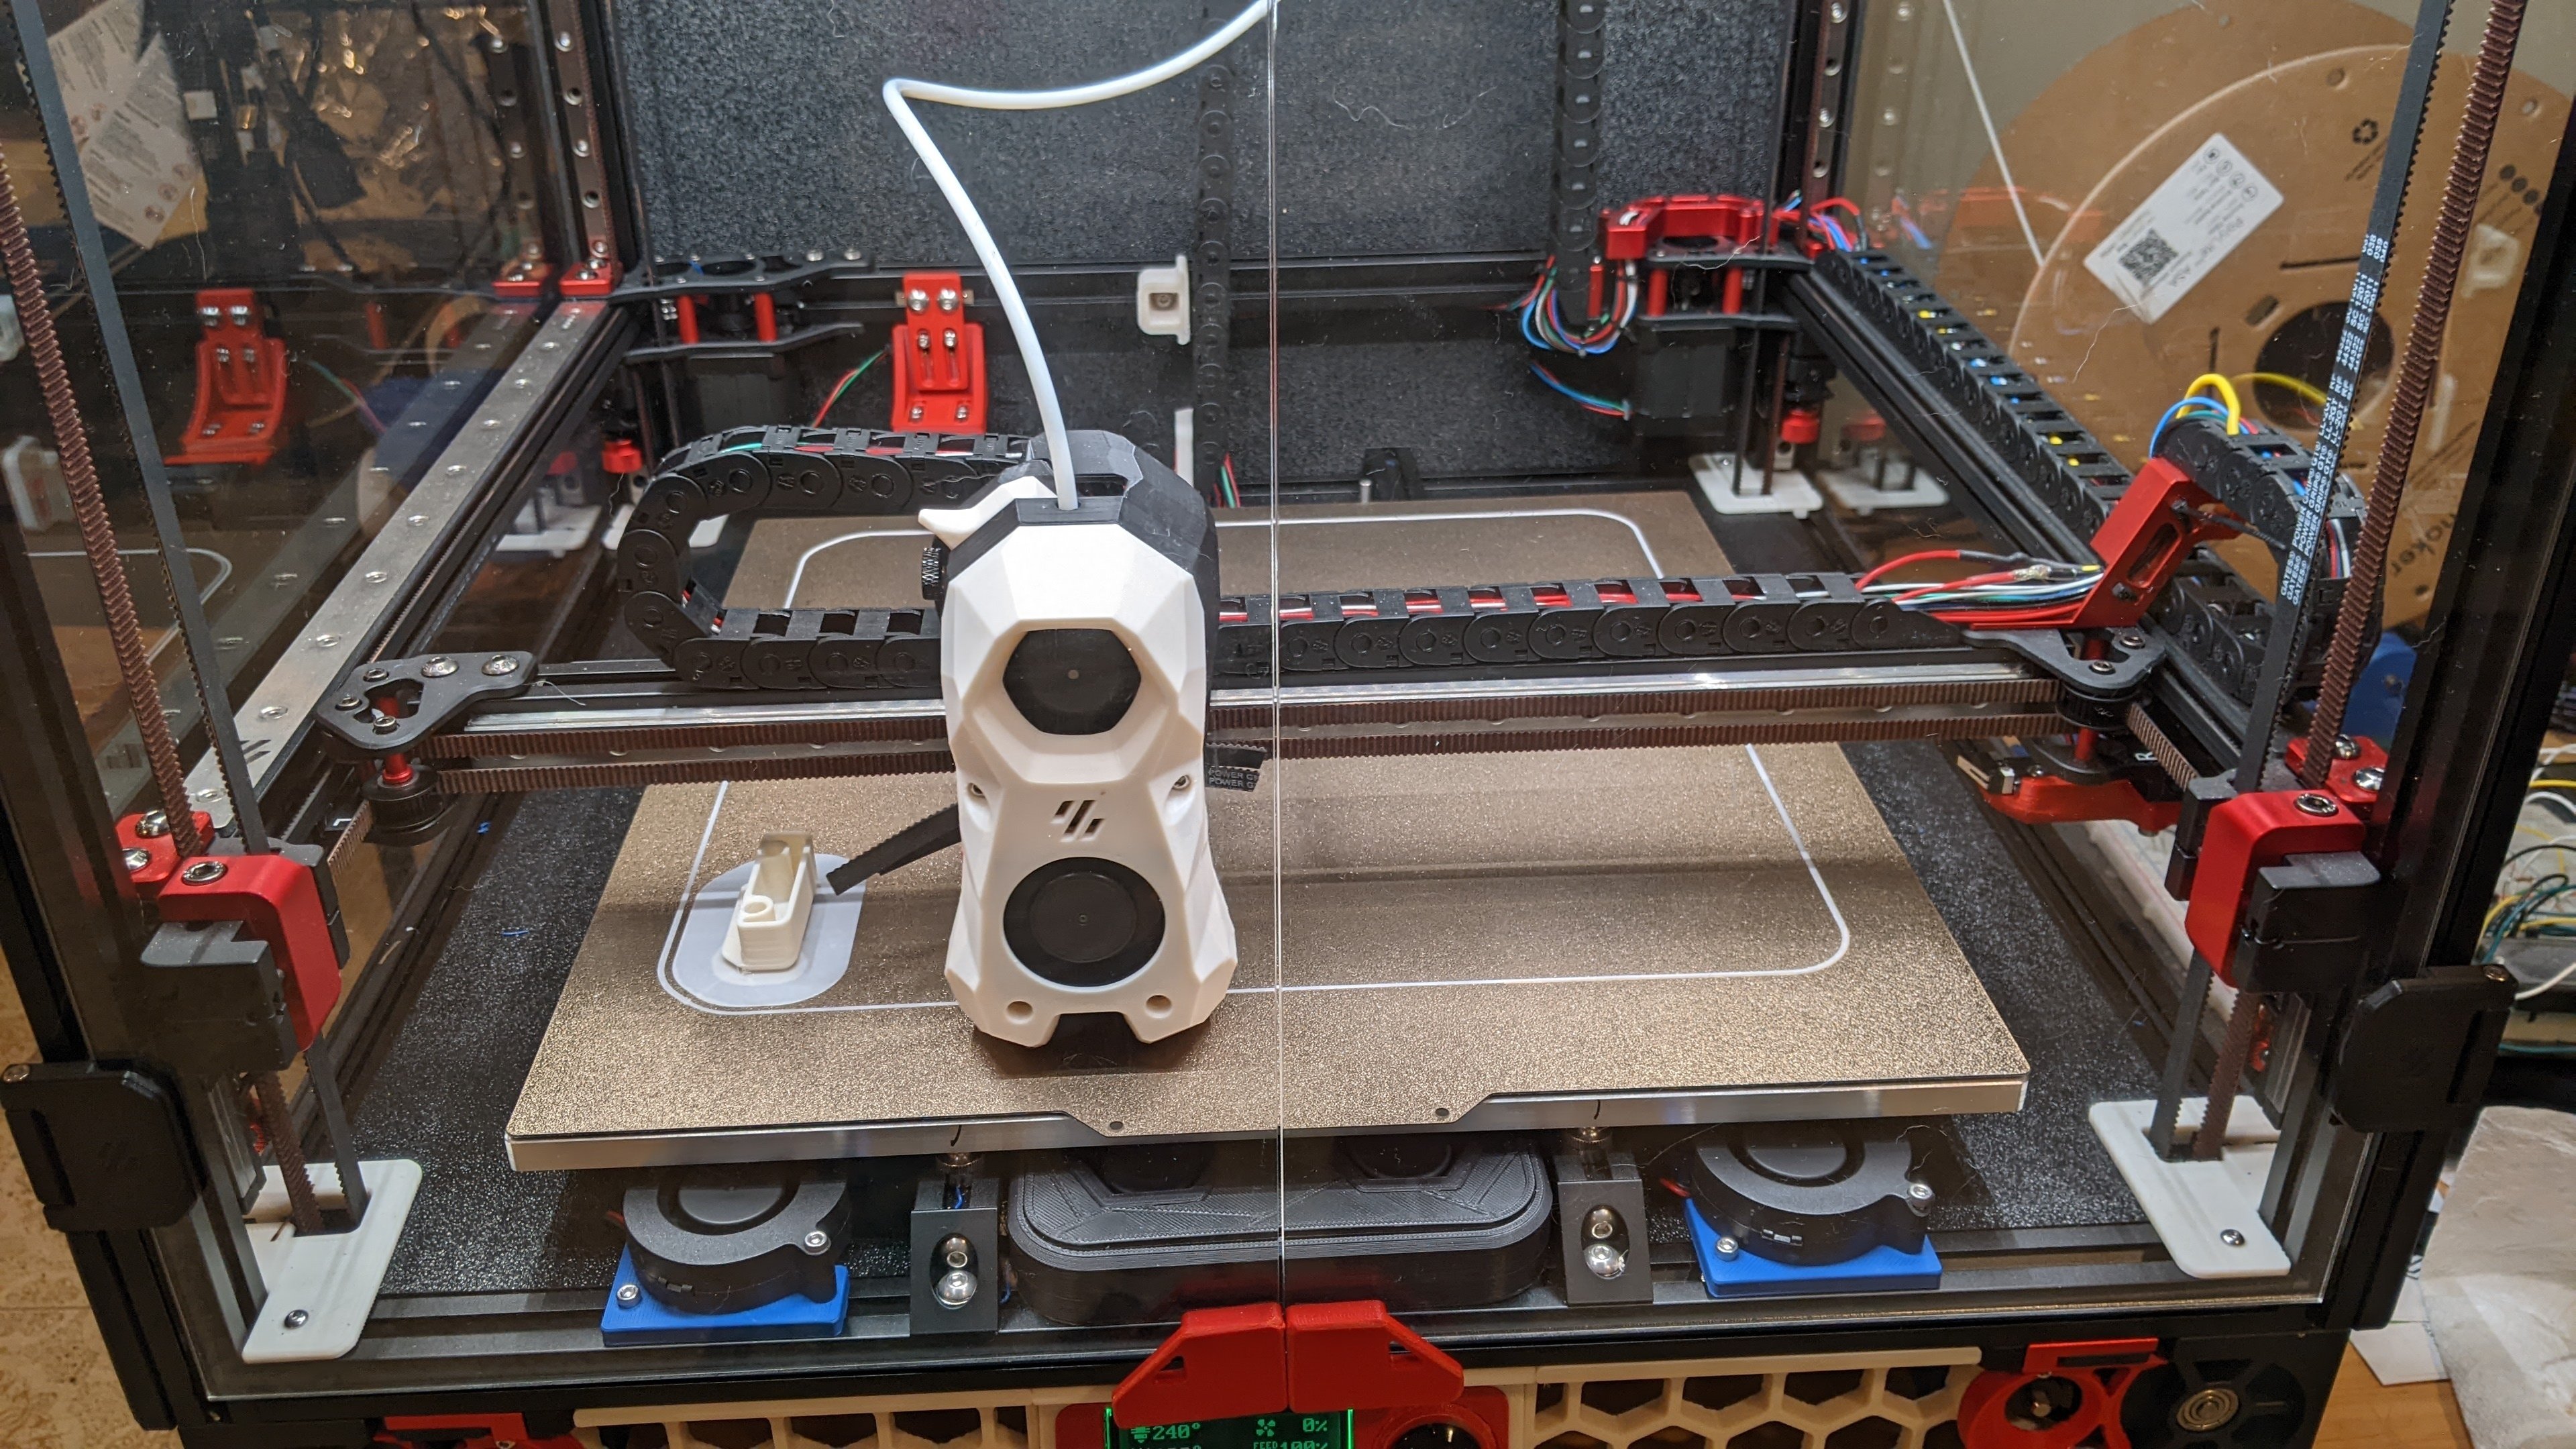
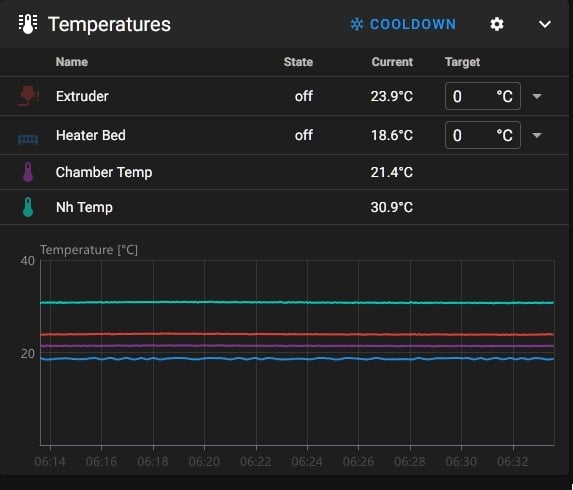
I am in the process of buttoning up a Nitehawk conversion on my Voron. I also replaced my extruder thermistor with an OE replacement purchased from a reputable vendor.

Post setup, my heated bed is reading spot on (it's 18.3 C in my basement aka 65 F). I verified that my extruder is also at ambient temperature by wedging a Thermapen under its silicone sock and letting it acclimate for 10 minutes. The I'm not sure why the extruder would be reading high.

I bought a spare thermistor and wired it in. The result was identical.

Thoughts? Ideas? I'm pretty sure I have the Nitehawk and thermistor set up correctly.

[extruder] step_pin: nhk:gpio23 dir_pin: nhk:gpio24
enable_pin: !nhk:gpio25
heater_pin: nhk:gpio9
sensor_pin: nhk:gpio29
pullup_resistor: 2200
sensor_type: ATC Semitec 104NT-4-R025H42G`

18

Klipper aborted the print with:

Heater extruder not heating at expected rate Transition to shutdown state: Heater extruder not heating at expected rate See the 'verify_heater' section in docs/Config_Reference.md

Before any of this started,I goobered my original Rapido, so I replaced it with a Rapido 2. It's been in the printer since April, but I haven't done a ton of printing with it. After the replacement, all was well for a while. At some point, Klipper started randomly tripping thermal runaway protection. The spikes were instantaneous, so I suspected a wire break. It wouldn't be my first and they're usually easy to find. I moved the tool head around trying to find it with no success. I pulled apart both cable chains (yay Voron) to look for the wire break and didn't find one. I flipped the printer updside down and connections at the MCU - everything was fine. I went through the hot end and inadvertently pulled the thermistor out of the m3 slug. Here's a stock photo:

Suspecting a potential wire break at the thermistor, I manipulated the wiring to no real effect. Inside the M3 bung was some dried white stuff, which I think was probably Boron Nitride Paste. I bought some more from Slice Engineering and reinstalled the thermistor.

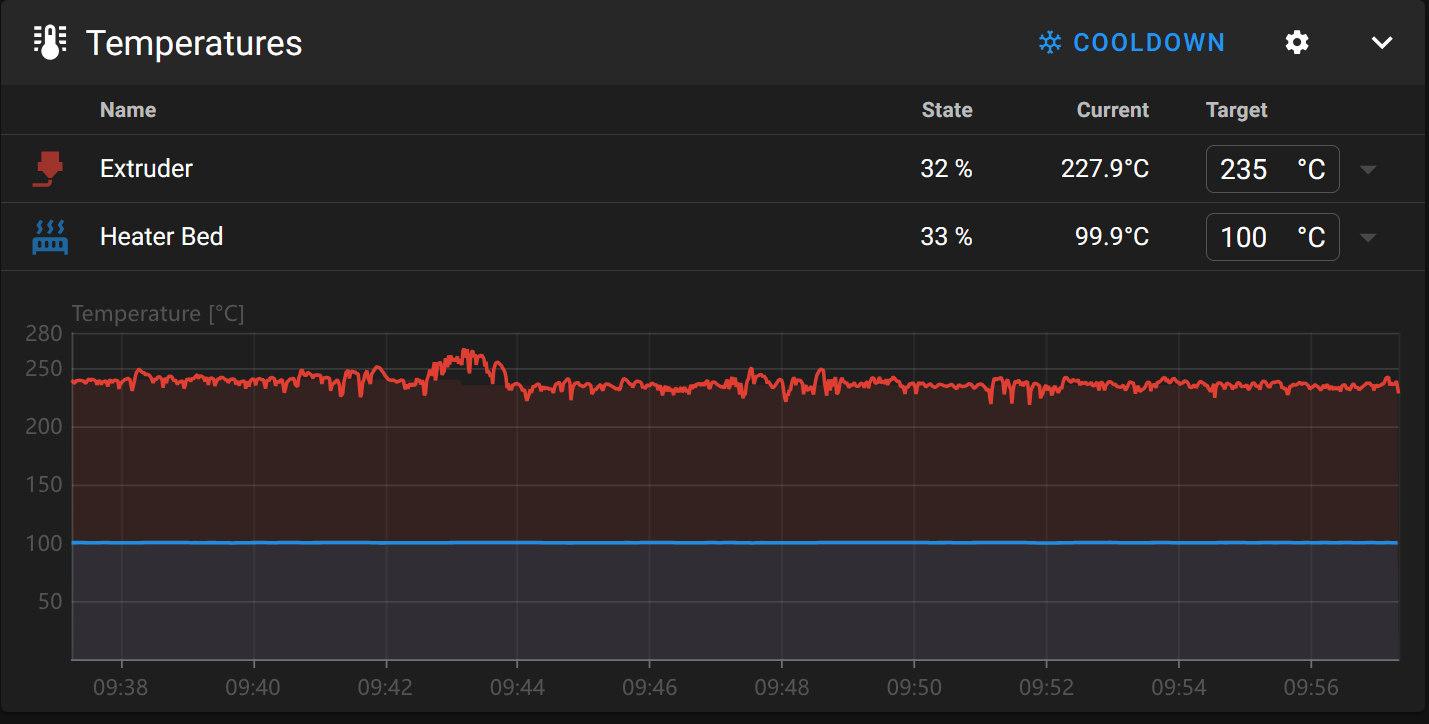
Two things changed after this. First, the terminator seems to be reading lower than it did before. I say this because I have a ton more stringing than I did previously. Second, the temperature is no longer spiking but it is doing this high frequency oscillation thing now.

The oscillation only happens once the printer is moving quickly. If it's still, or moving slowly, things are fine.

Thoughts? I'm suspecting the thermistor, but would like to troubleshoot if possible vs just throwing parts at the printer.

[-] IMALlama@lemmy.world 42 points 3 months ago

As a parent of younger kids, we're sorry. We come armed with as many activities as possible and will take our kids outside if they're too excited until food gets to the table. That will help them focus on eating.

We very rarely went out to eat when they were toddlers due to fear of our kids bothering others and understand that our desire to experience some level of normalcy shouldn't come at the expense of others.

All that said, if the parents are trying to keep their kids occupied, please extend some grace. Being a parent can be extremely isolating and we're simply trying to pretend like we still get to do normal things once in a while.

24
submitted 4 months ago by IMALlama@lemmy.world to c/jerboa@lemmy.ml

If you look at the very bottom of the screen shot you can see that the home, search, etc buttons are cut off.

Happy to provide more info to help. I'm on a stock pixel 3a.

99

I am (slowly) working on mounting ACM panels to my Voron 2.4 to try to get my chamber temps up to reduce/eliminate warping on big ASA prints. I only needed 12 of these parts, so I chose to print them sequentially.

Want to know how slow my progress has been? Well, this photo proceeded this post and I made that post weeks ago... I'll crack open the cable chain and get this ball rolling again soon. Or maybe I'll ditch the chains and go to a USB toolhead. But that will require me to print some parts, so I guess I have to fix this. And if I'm doing that it's going to probably be 'good enough' for quite some time... 🙃

There's nothing major in the print queue, but I do want to make sure the printer is ready to go when something does turn up.

48

I can see the wire break in the cable chain :'(

[-] IMALlama@lemmy.world 38 points 6 months ago

Both. Ethonal is still corrosive and the majority of fuel systems these days are compatible with E15. That said, check your owners manual.

351

No banana for scale, but let's say that it's not too big and not too small. The dimensions are 295mm tall, 270mm wide, and 240mm deep. If I had to do it again, I would be tempted to go a bit wider and touch less deep. It's probably better to be large in one of these dimensions as opposed to both of them.

Here's the top. It has a jack for charging, a connector to program the DSP, a switch to turn it on and off, and a battery gauge.

The speaker also has a built in handle that's way chunkier than it appears, but is still particle.

The big BOM pieces are a Dayton Audio LBB-5Sv2 for the BMS (battery management system), a Dayton Audio KABD-250 2 x 50W for DPS, amplification, and Bluetooth, a Peerless by Tymphany BC25SC08 tweeter, and an Italian-but-made-in-India woofer (a Coral PRF 165).

The print itself is three pieces: the bottom bit (black), the middle bit (white, blue, and white again thanks to not having enough white left to do it all in white), and the black top. Here's a CAD view that more clearly shows the three pieces:

the three pieces are held together with heat-sets and m3 bolts. There's also a tong and groove like joint to help the enclosure leak less air. I haven't noticed any evidence of air leaks while listening.

The amplifier and battery board mount to the bottom like so:

The middle was printed with some supports for the driver overhangs, but the ports and everything else were designed to print in place without supports.

This is certainly not meant to be audiophile build, but it's surprisingly decent. This isn't my first blue-tooth speaker, or even my first printed loudspeaker enclosure, but it is the first that was somewhat intentionally designed to have OK bass response while also being reasonably compact.

It measures fairly well. Frequency response, along with harmonic distortion, is pretty good. There's zero windowing or smoothing on this plot. I suspect the distortion spikes at 1 kHz, 2 kHz, etc are induced by the Bluetooth stack the board is running since they've shown up in multiple different enclosures and with multiple different drivers.

There's no nasty ringing, caused by either the drivers or the enclosure, so life is pretty good:

89

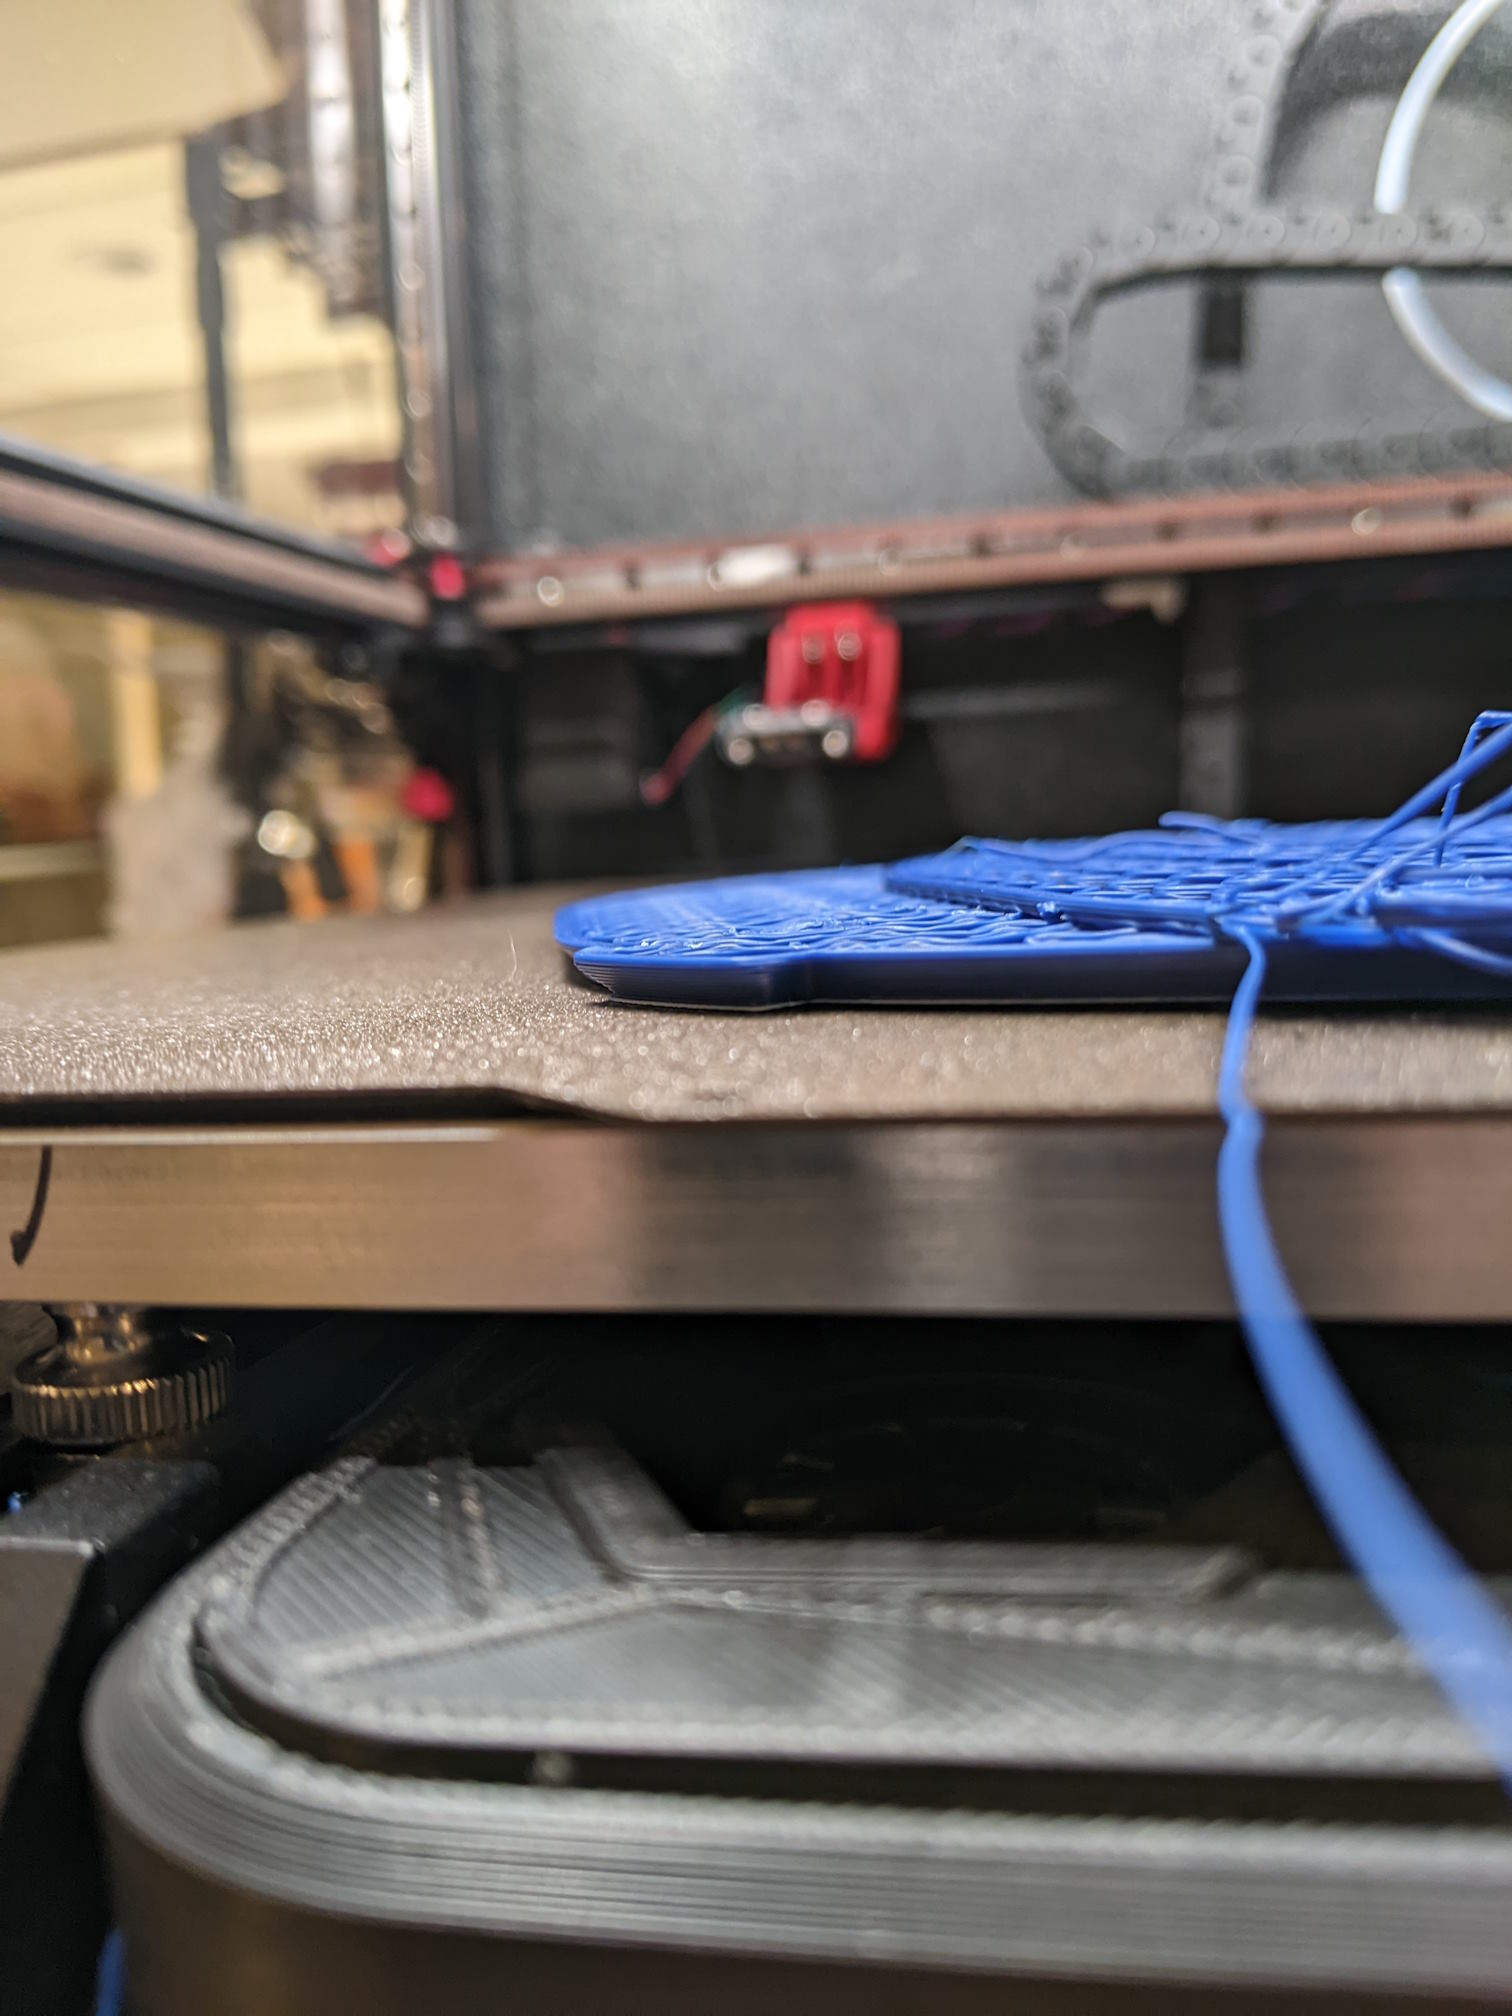
At least so far. The first go round had the nozzle crash into the tree support, resulting in a layer shift. The good news is that the print stayed very firmly stuck to the bed.

I've reset, lowered my extrusion multiplier a smidge, switched to a more traditional support pattern, and am going for it again. Wish me luck!

56

This is a follow up from my spaghetti post a few days ago.

Good news: I caught the nozzle catching on the infill during travels. The infill must have been curling up ever so slightly. Turning z-hop on solved this. I also bumped my nozzle to 255 based on a temp tower, but I don't think my original issue was flow related.

Bad news: this brought me to the failure above - evidently my chamber temps are too low for this size of ASA part and it warped. Maybe the higher nozzle temp contributed. Maybe this size of ASA part is unrealistic despite not having sharp corners. Maybe it's the fact that it's continuous from side to side. I am still going to attempt to print a hollow cylinder to go between this piece and another similar piece in ASA, so I guess we'll find out!

Good news: the part did not let go of the build plate. I'm pretty happy about this. My first layer is not overly squished, I've never used any adhesion aids (glue stick, hair spray, ASA slurry, etc), etc. Tuning my print_start sequence is resulting in a very consistent first layer.

Bad news: the build plate came up with the print. Holding the build plate down with binder clips or the like would probably just make something else fail.

Good news: I had enough PETG in stock to use that instead. Zero warpage, so great success. I had to go a bit slower because a flow test showed that I'm limited to around 25 mm^3 for PETG before the extrude motor started misstepping, despite bumping temp to 255 °C. I limited flow to 20 mm^3 to be safe. The print's a success so meh.

112

Any suggestions before trying again after a reset? This is my first go round changing nozzle diameter. I went from a 0.4 mm nozzle to a 0.6 mm nozzle.

After the swap I checked my extrusion multiplier (no change needed) and tuned pressure advance (I had to decrease the value a bit, but it looks spot on now).

As part of the nozzle swap, I also bumped line width from 125% to 150% in Orca Slicer (should be around 0.9mm extrusion width) and increased layer height to 0.3mm. This should put me around 22 mm^3/s of material, which shouldn't be an issue for a Rapido 2 but this is the most flow I've pushed through it so far. Maybe I should bump temp a touch? I'm still at my fairly-low-for-ASA 230 that I was using with my 0.4mm nozzle.

The print didn't move on the bed and shows no signs of warpage. There also aren't any signs of curling on the areas that the nozzle must have hit to cause the layer shift.

The only thing that seems like a miss was having z lift turned off while troubleshooting a print quality issue. I had it set to only lift above 0.25mm (not on the first layer) and only lift below z 0mm (this probably disabled z-hop). Z hop when retracting is set to 0.2mm, which is less than my 0.4mm retraction length so it seems like changing the "only lift below below z" value would re-enable z-hop.

86

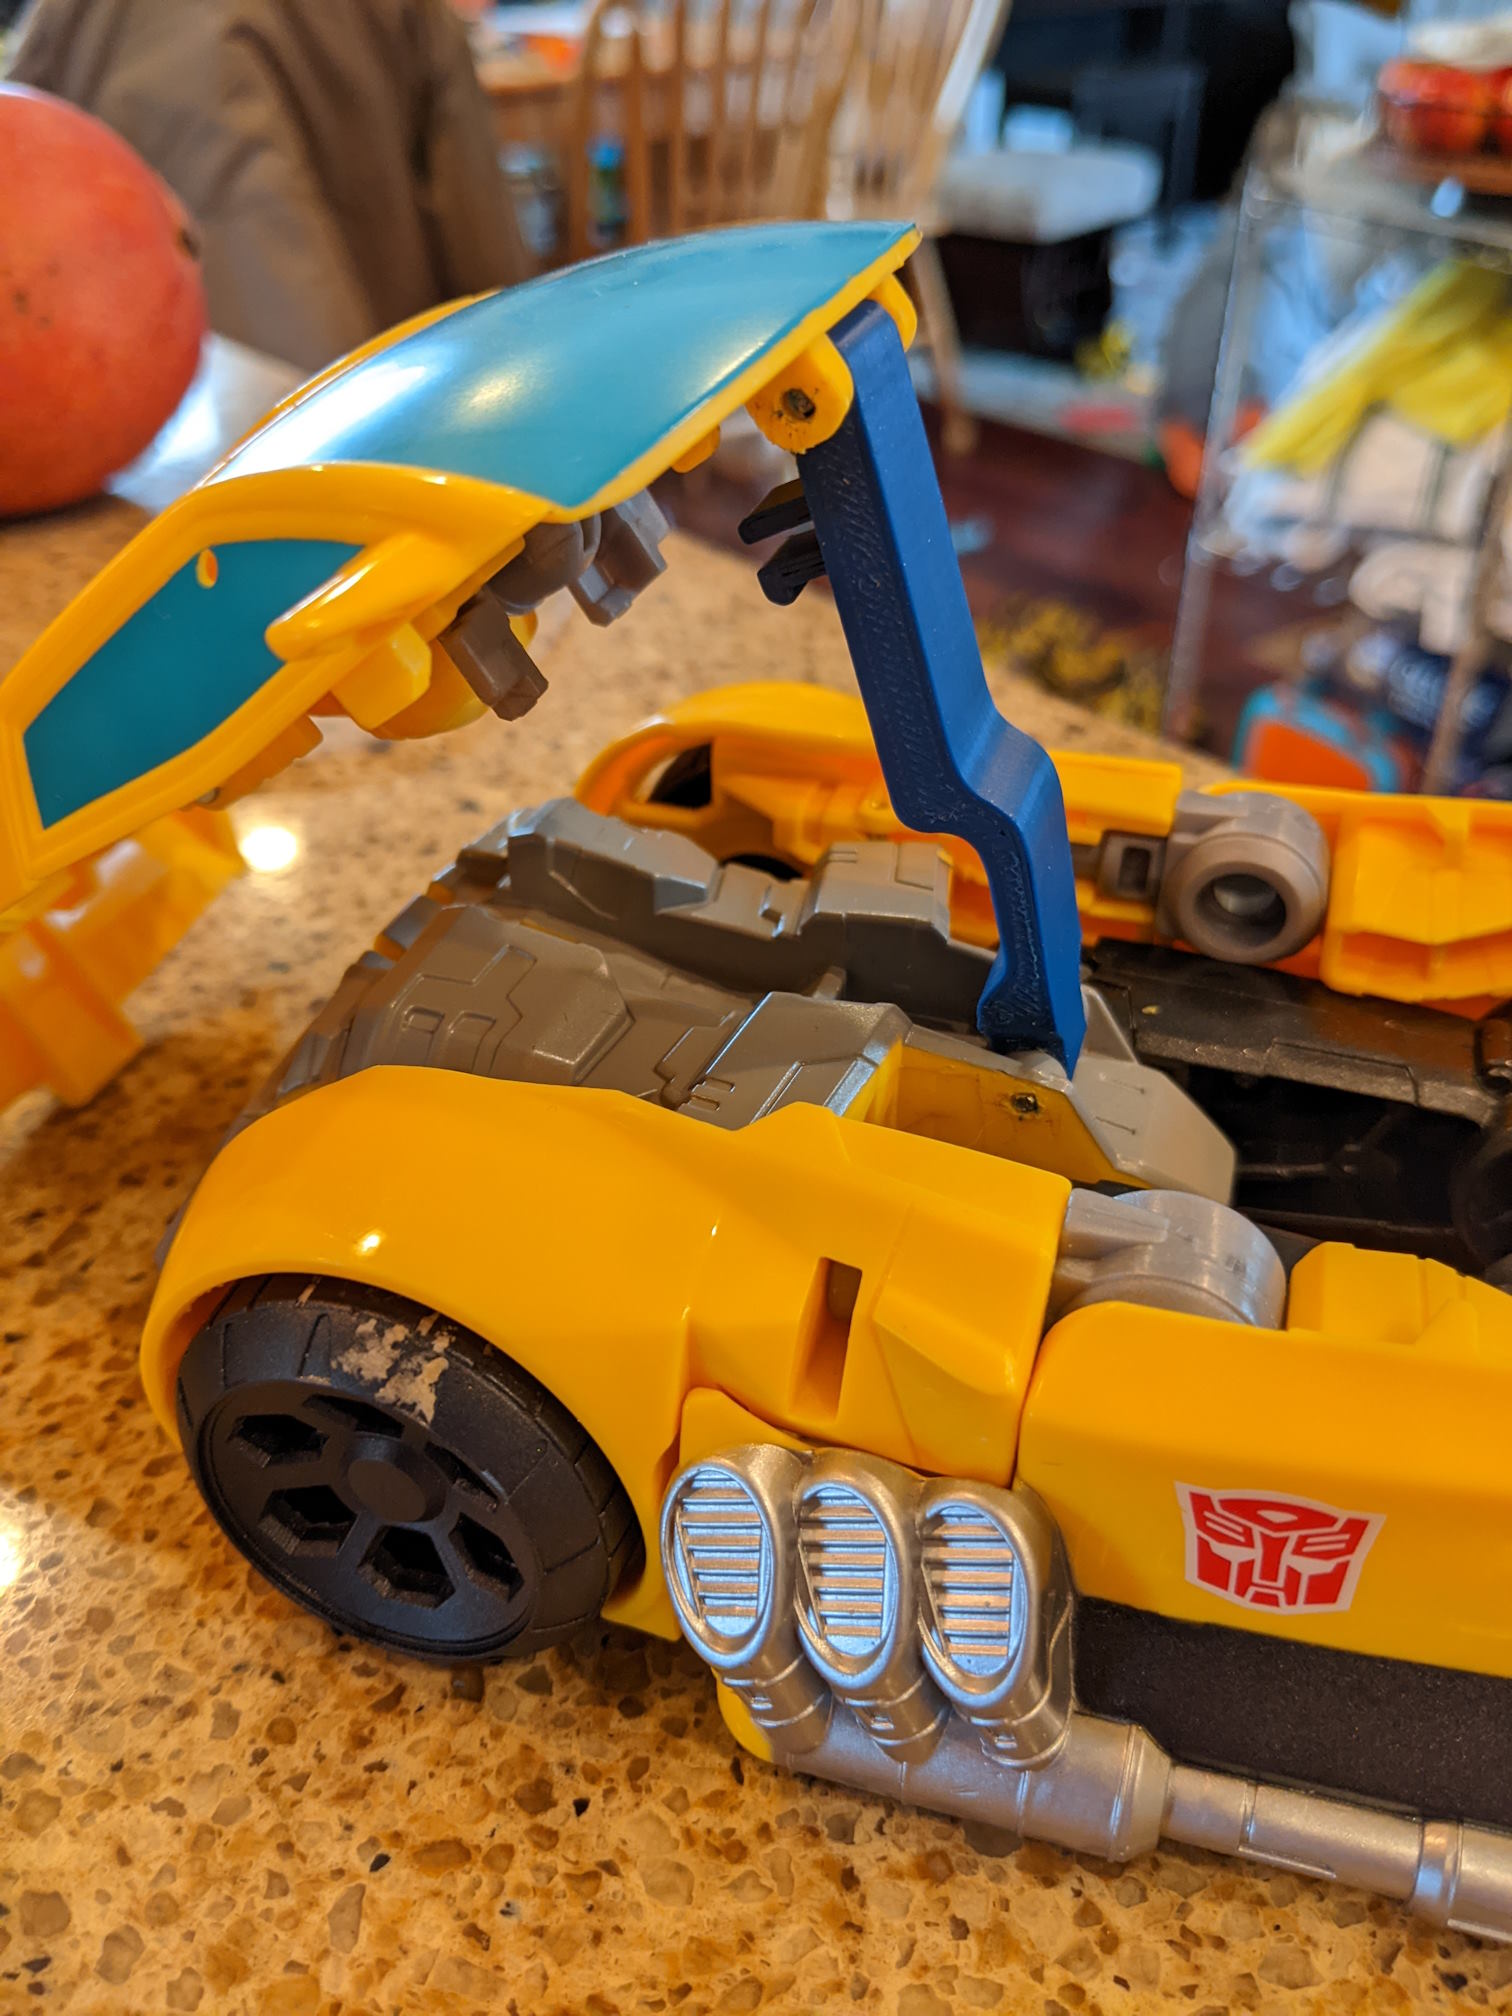
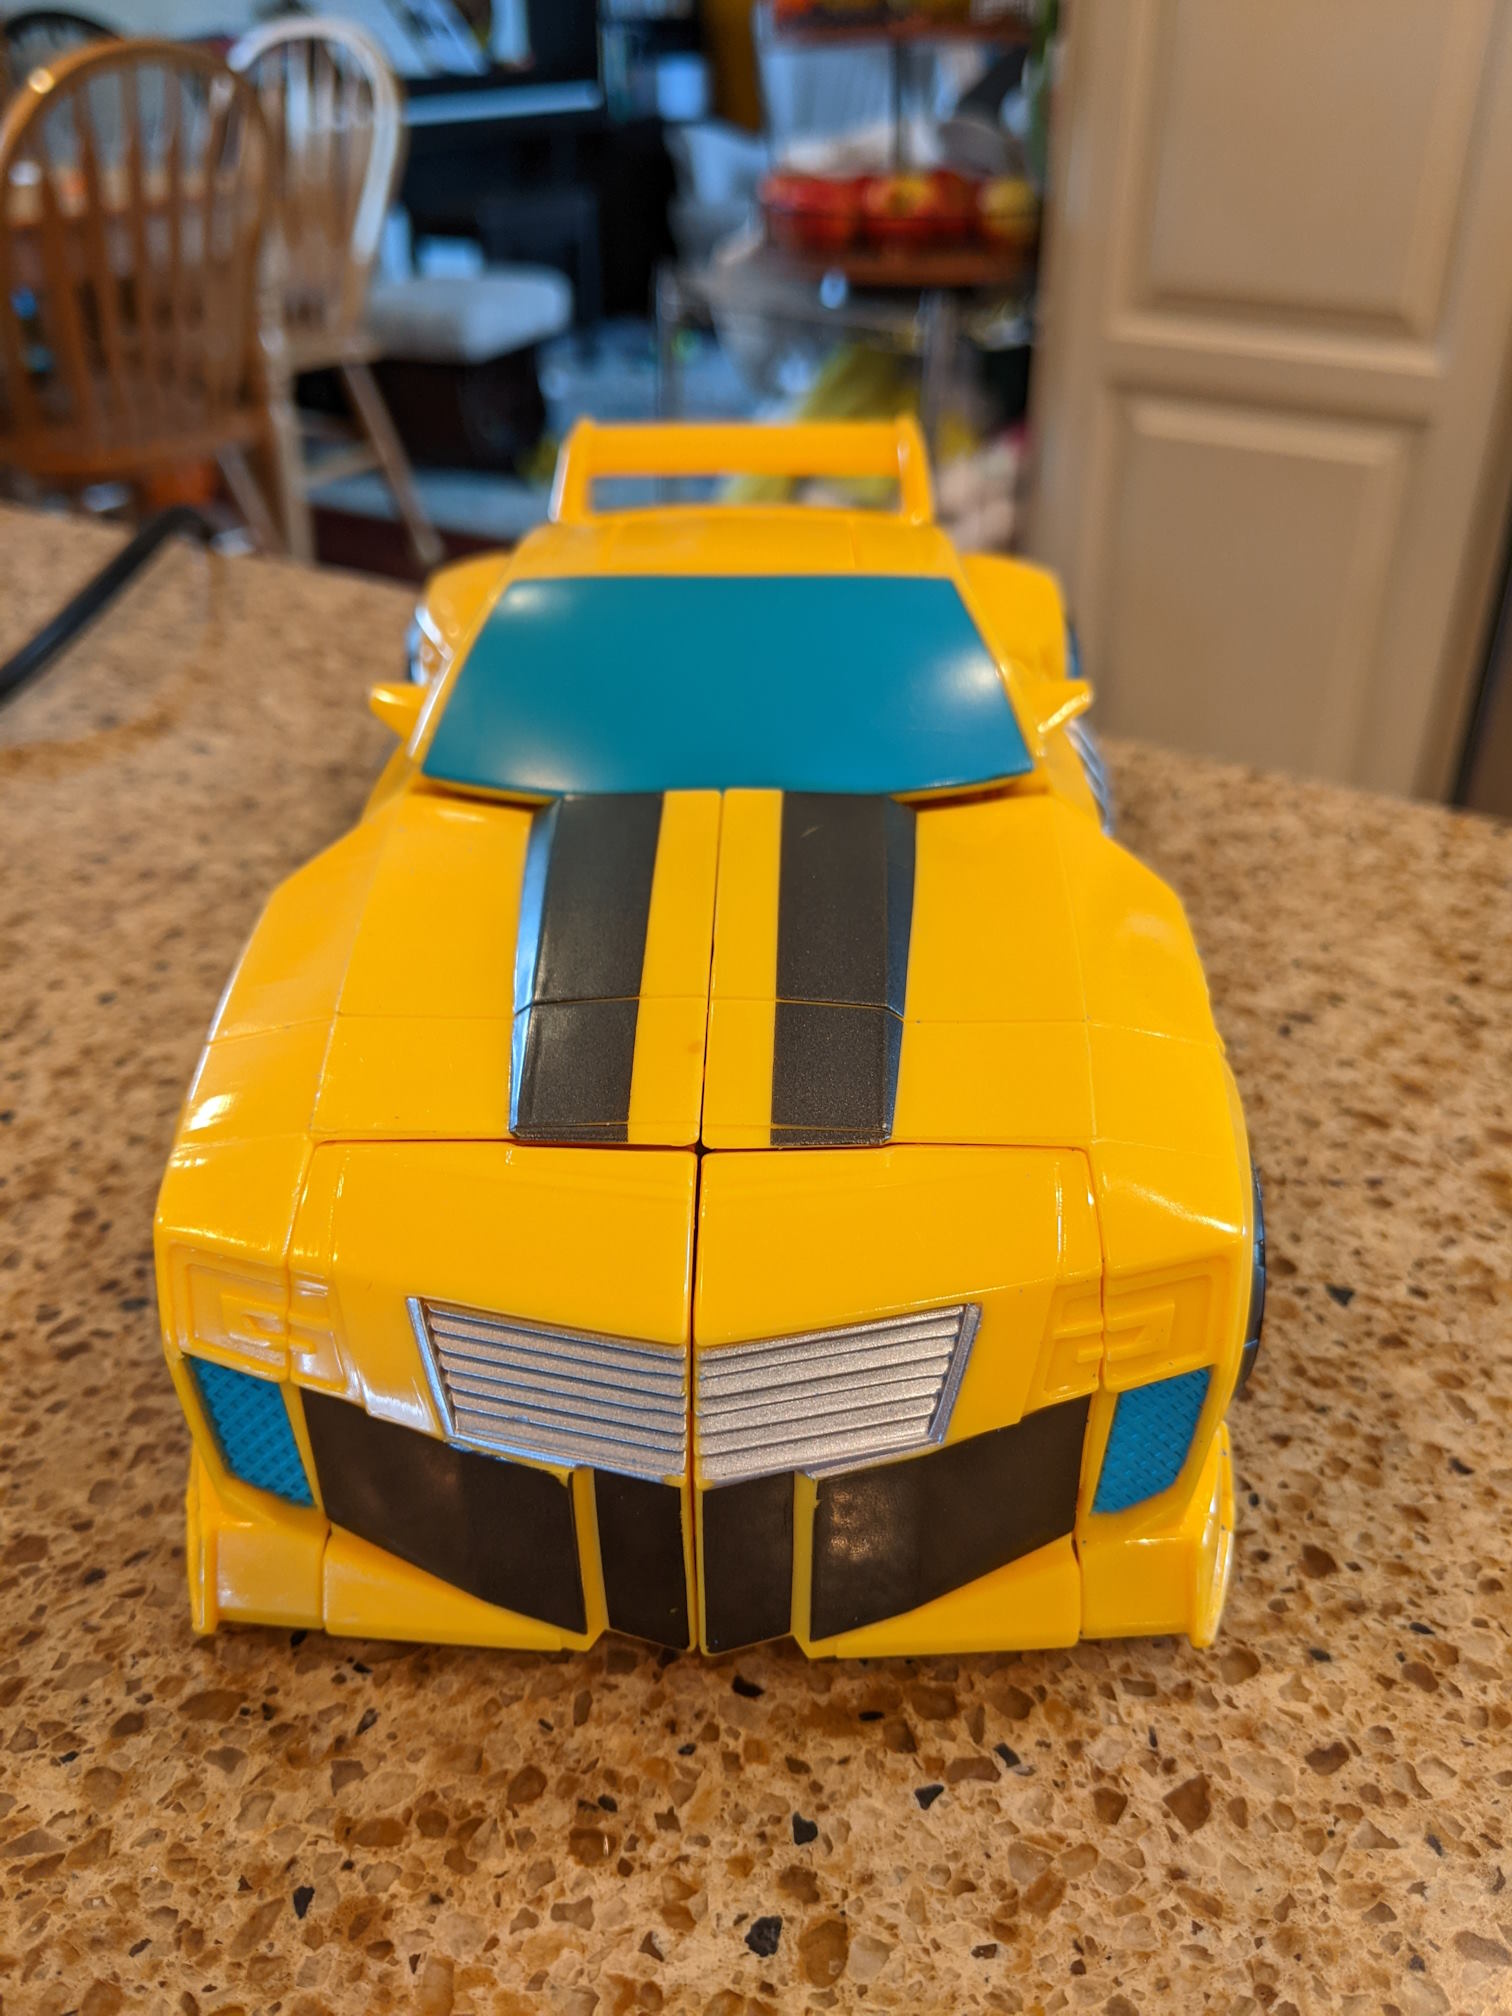
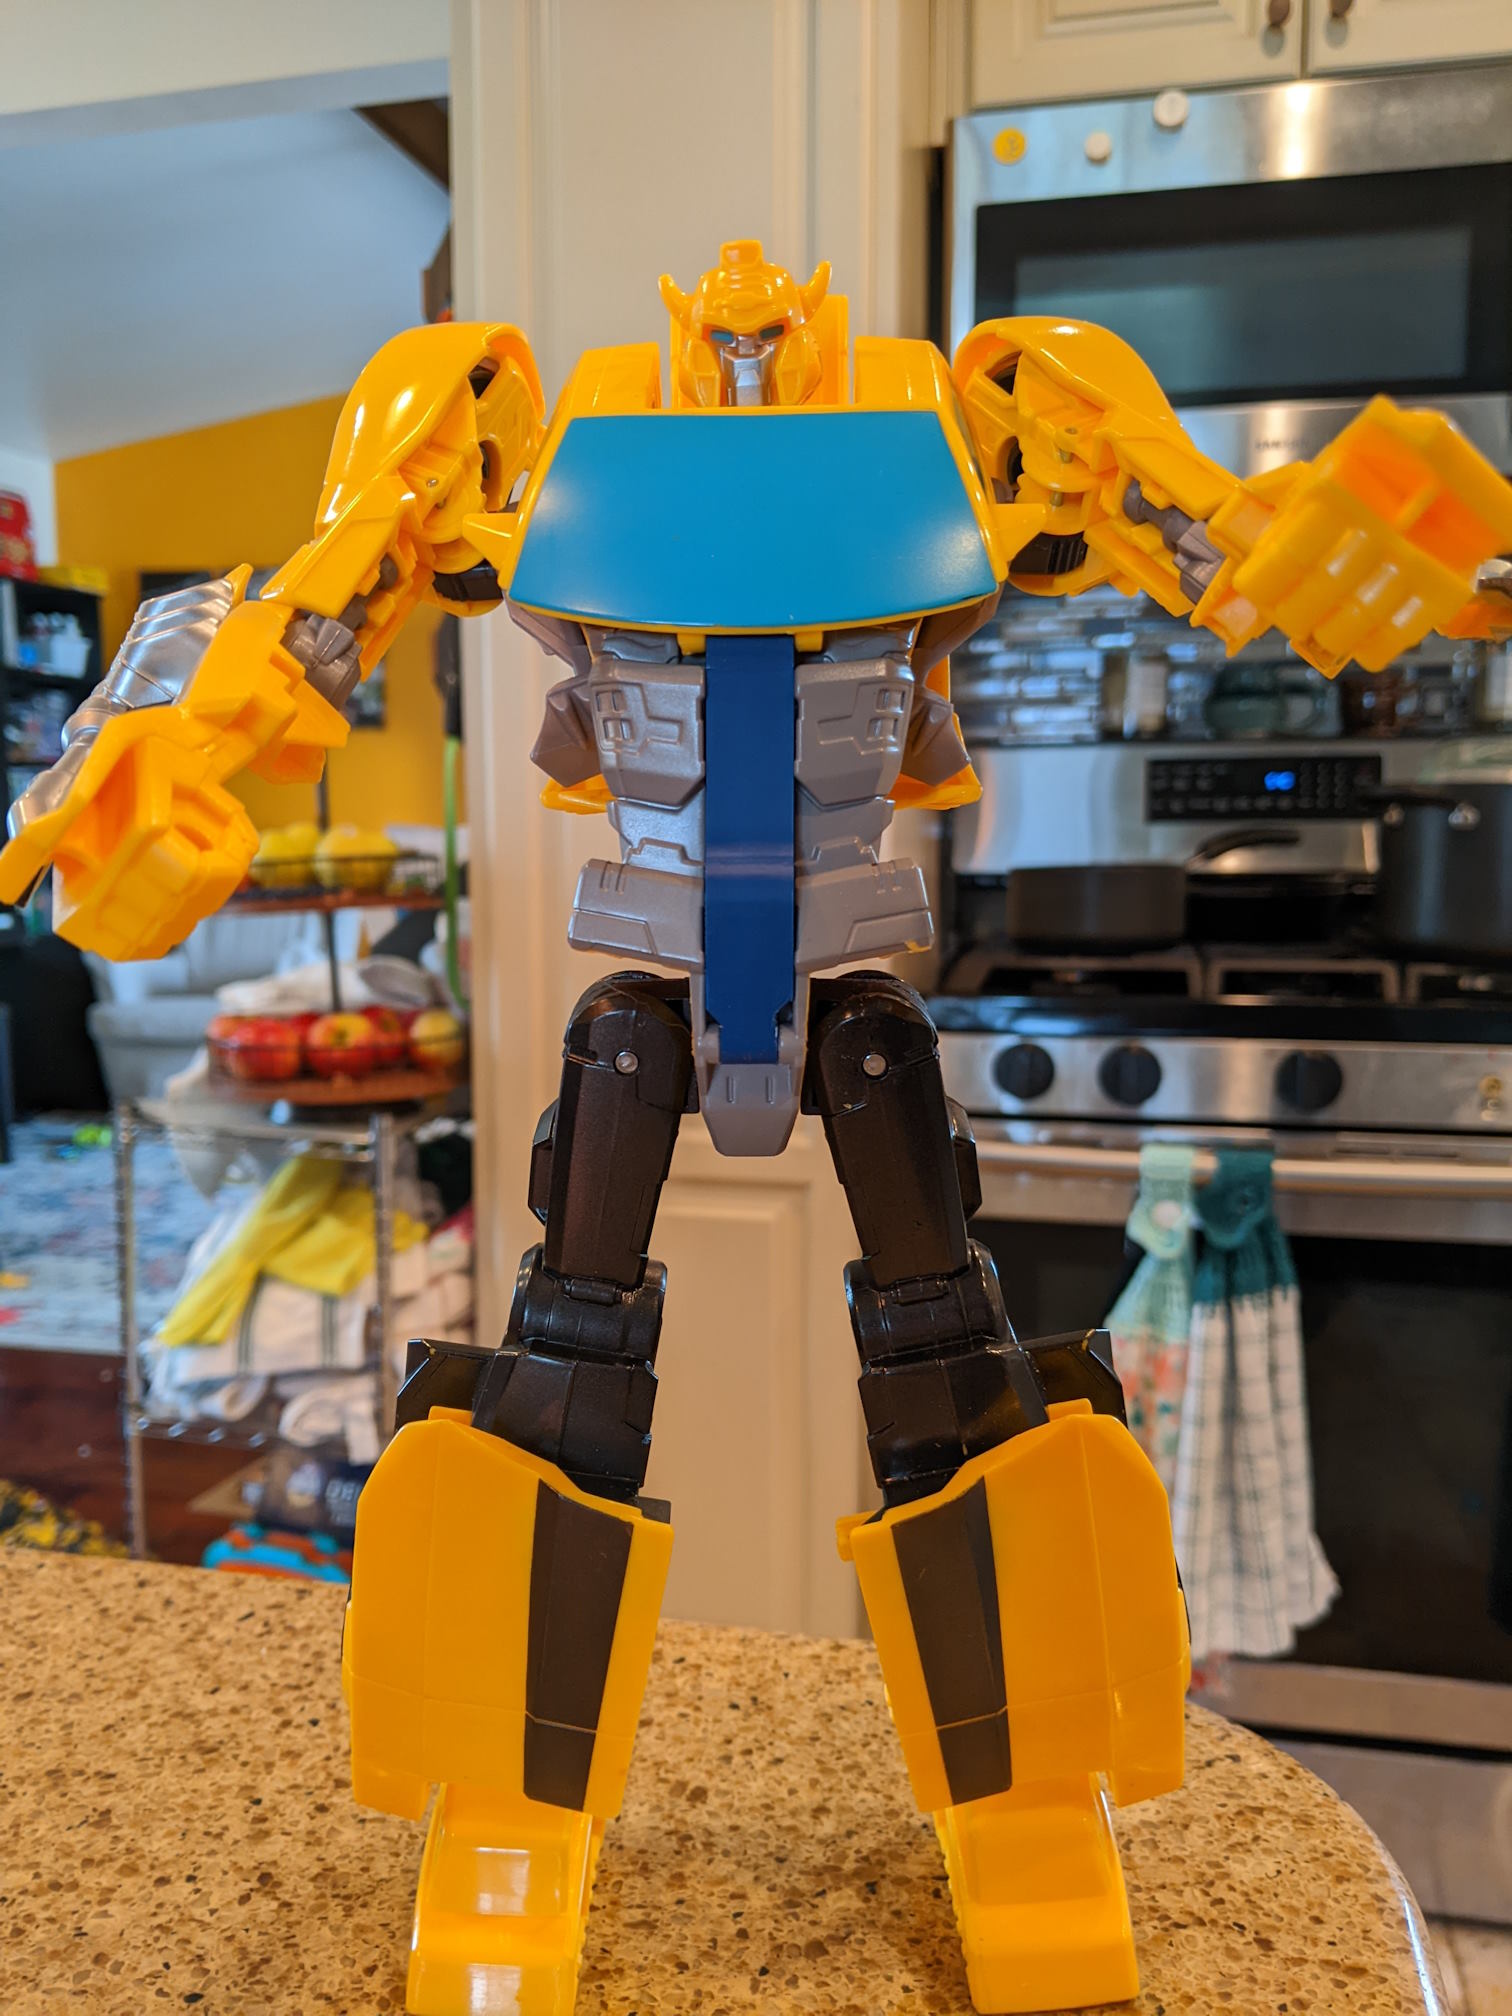
Our youngest broke his big brother's bumblebee. Three iterations later, everything fits pretty well and the older one is happy to have bumblebee back.

This part seems super niche, so no printables link. That said, if anyone needs a replacement for this VSO let me know and I'll upload it.

35

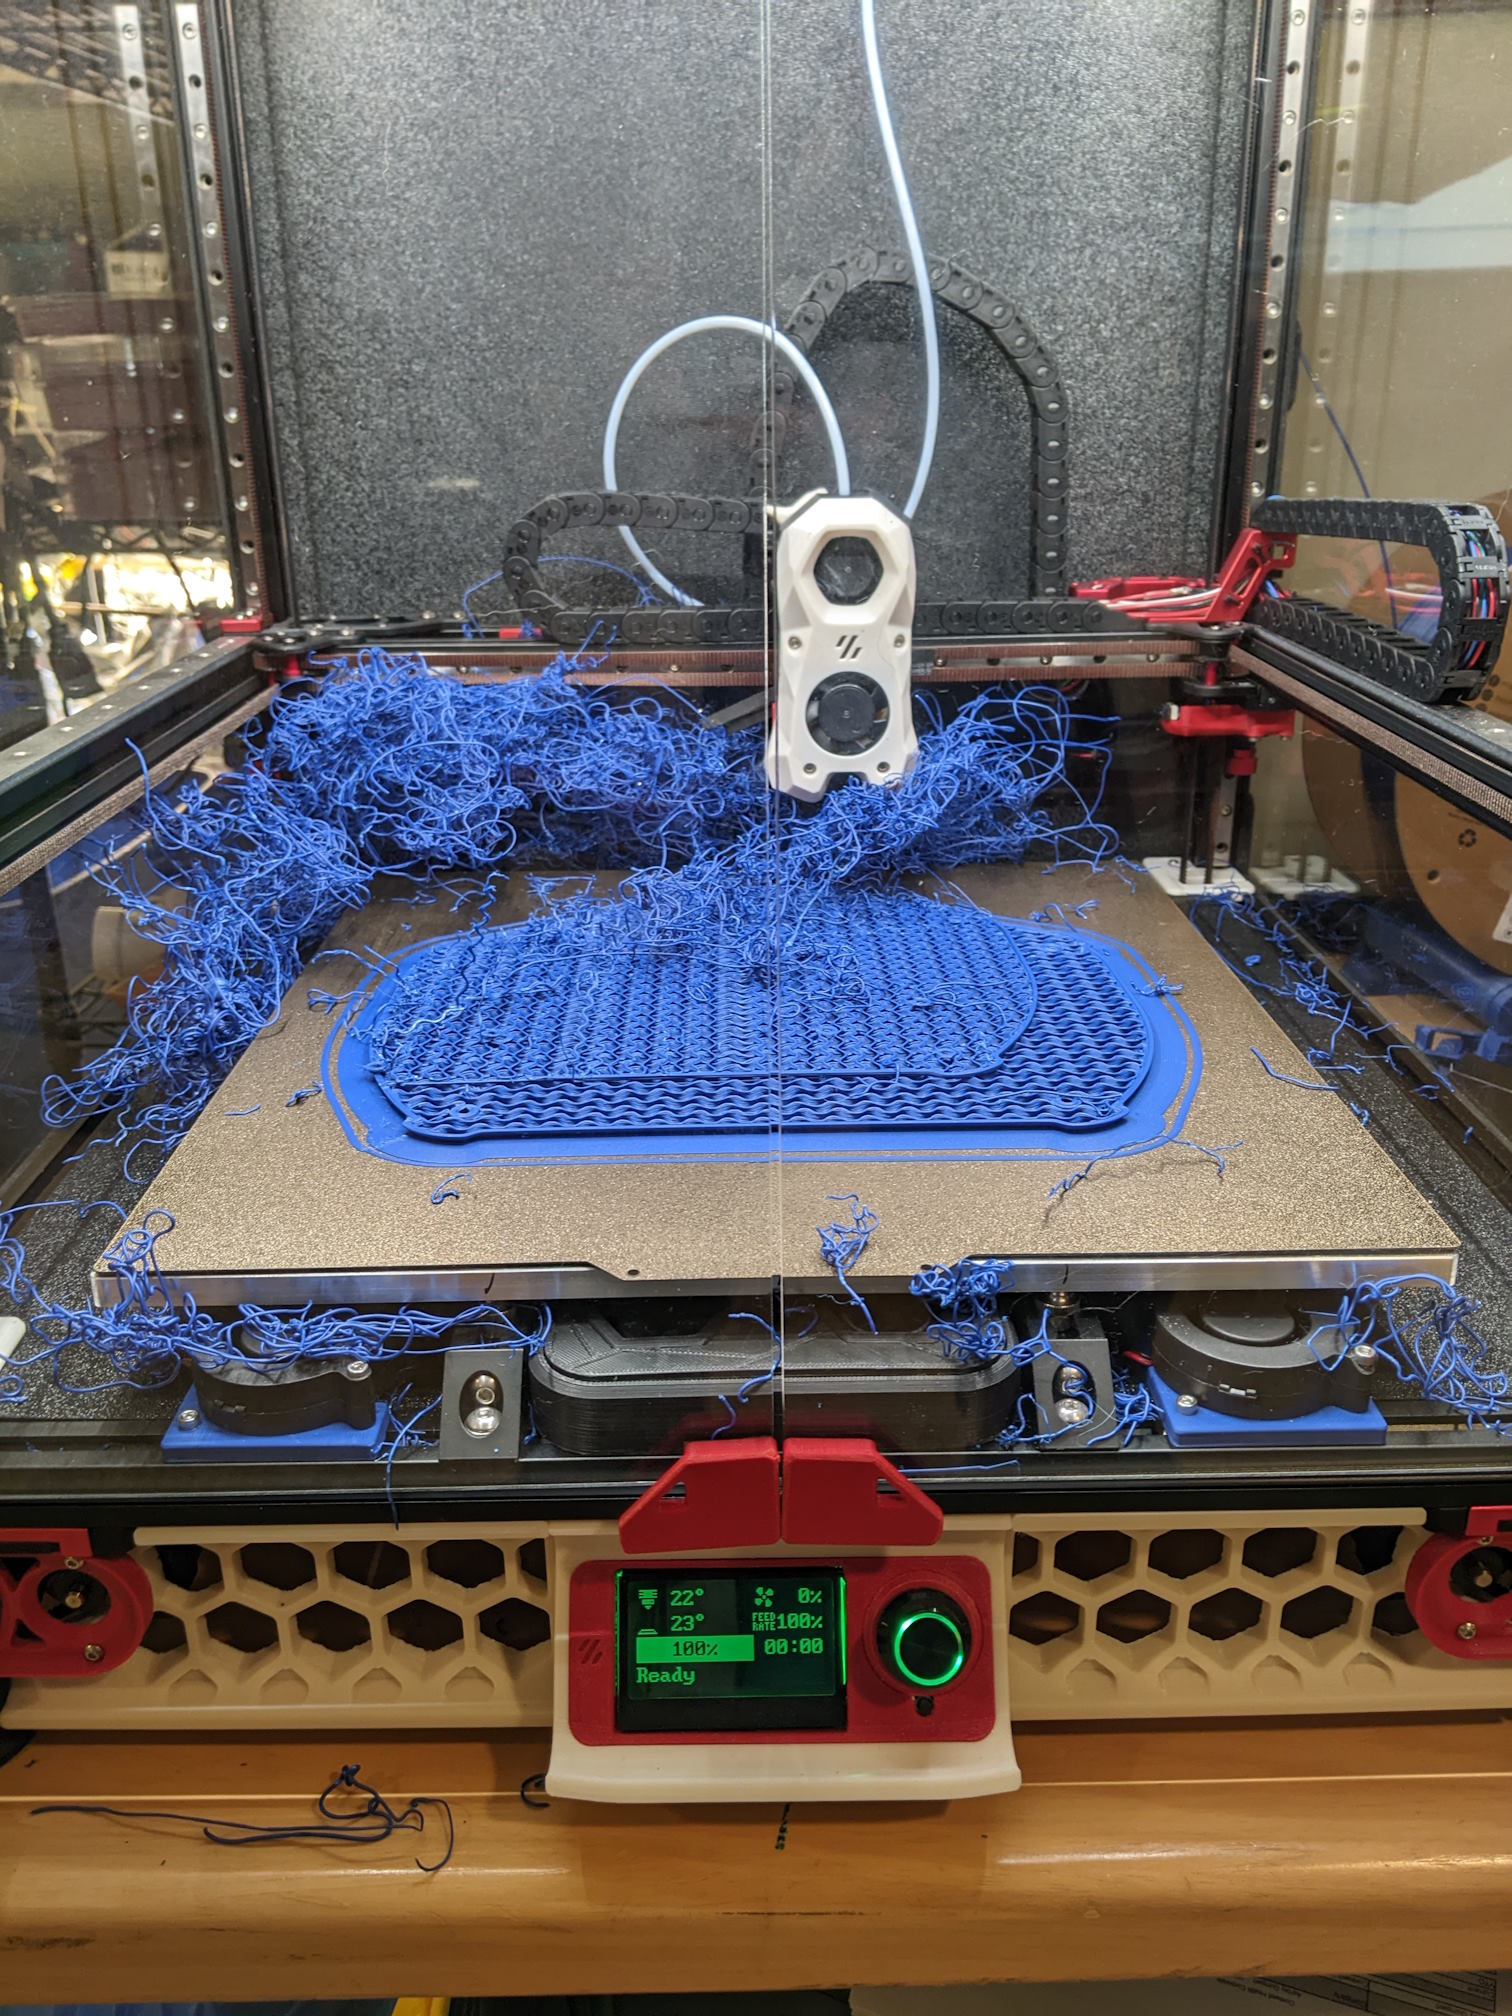
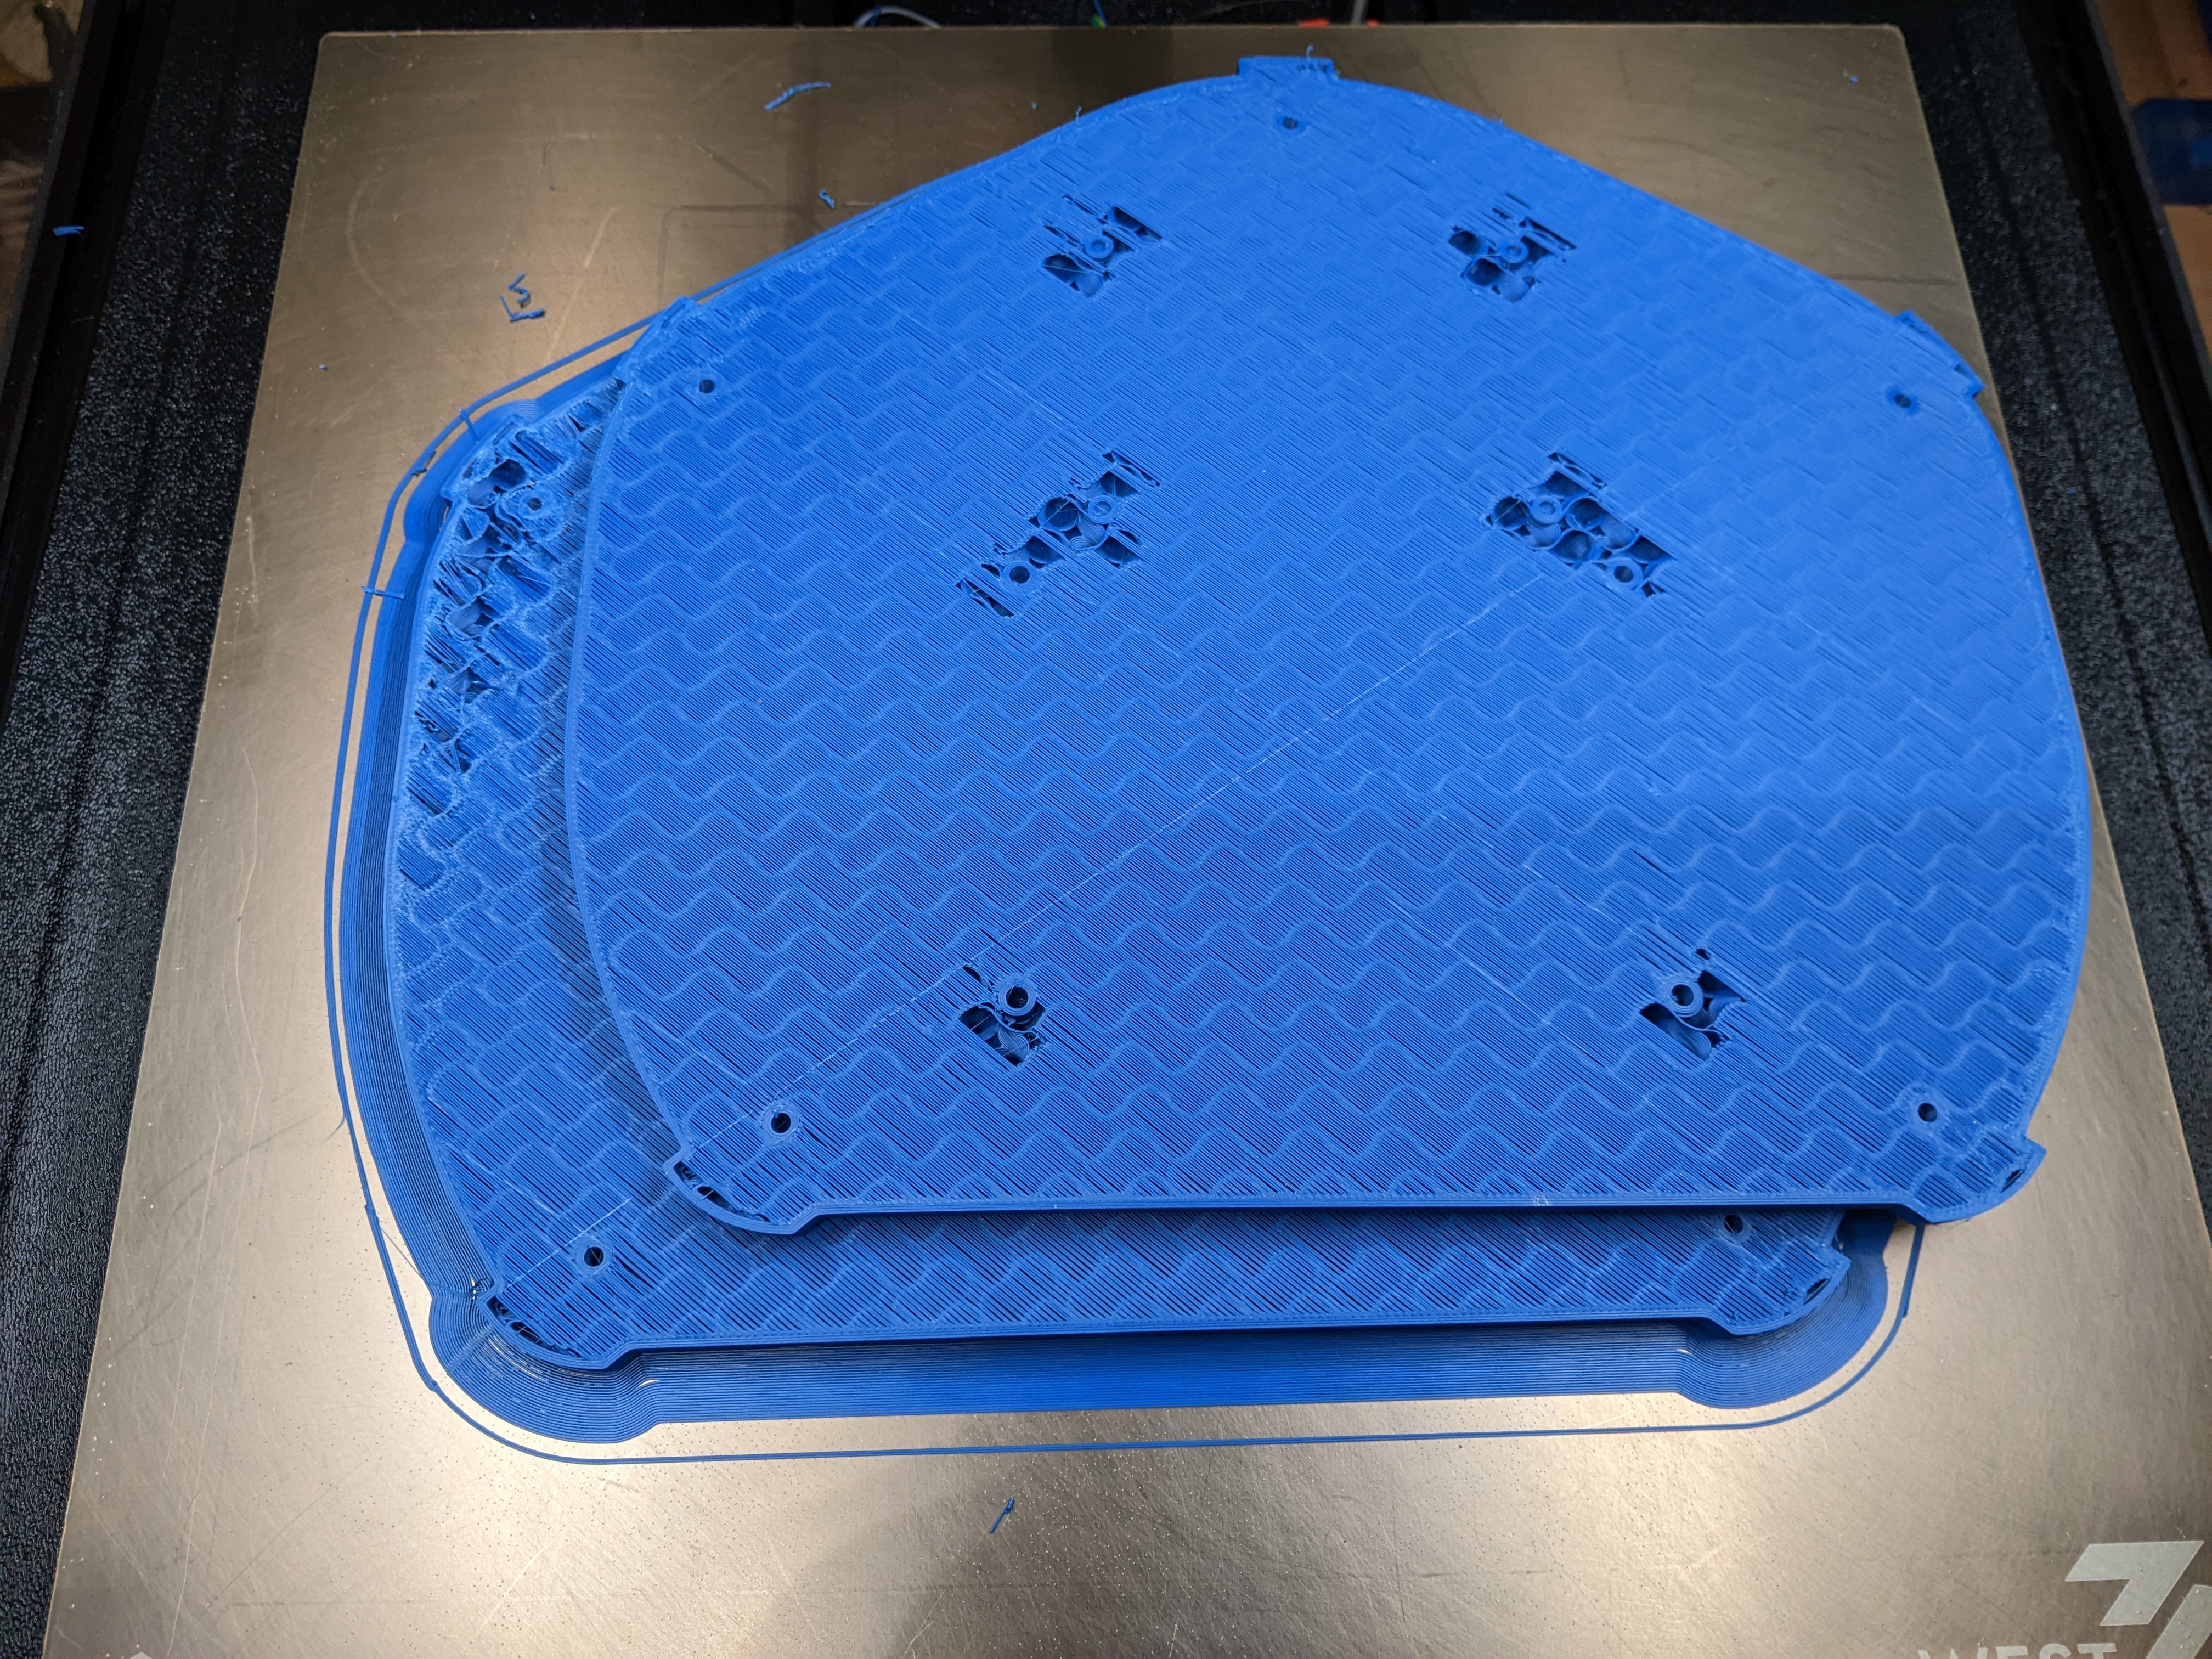
The printer is a Voron 2.4, the extruder is a StealthBurner, and the hot end itself is a Rapido MK1. I'm printing Polymaker ASA on a spool that hasn't given me any grief thus far (I last printed with it a few days ago) and am slicing with Orca Slicer.

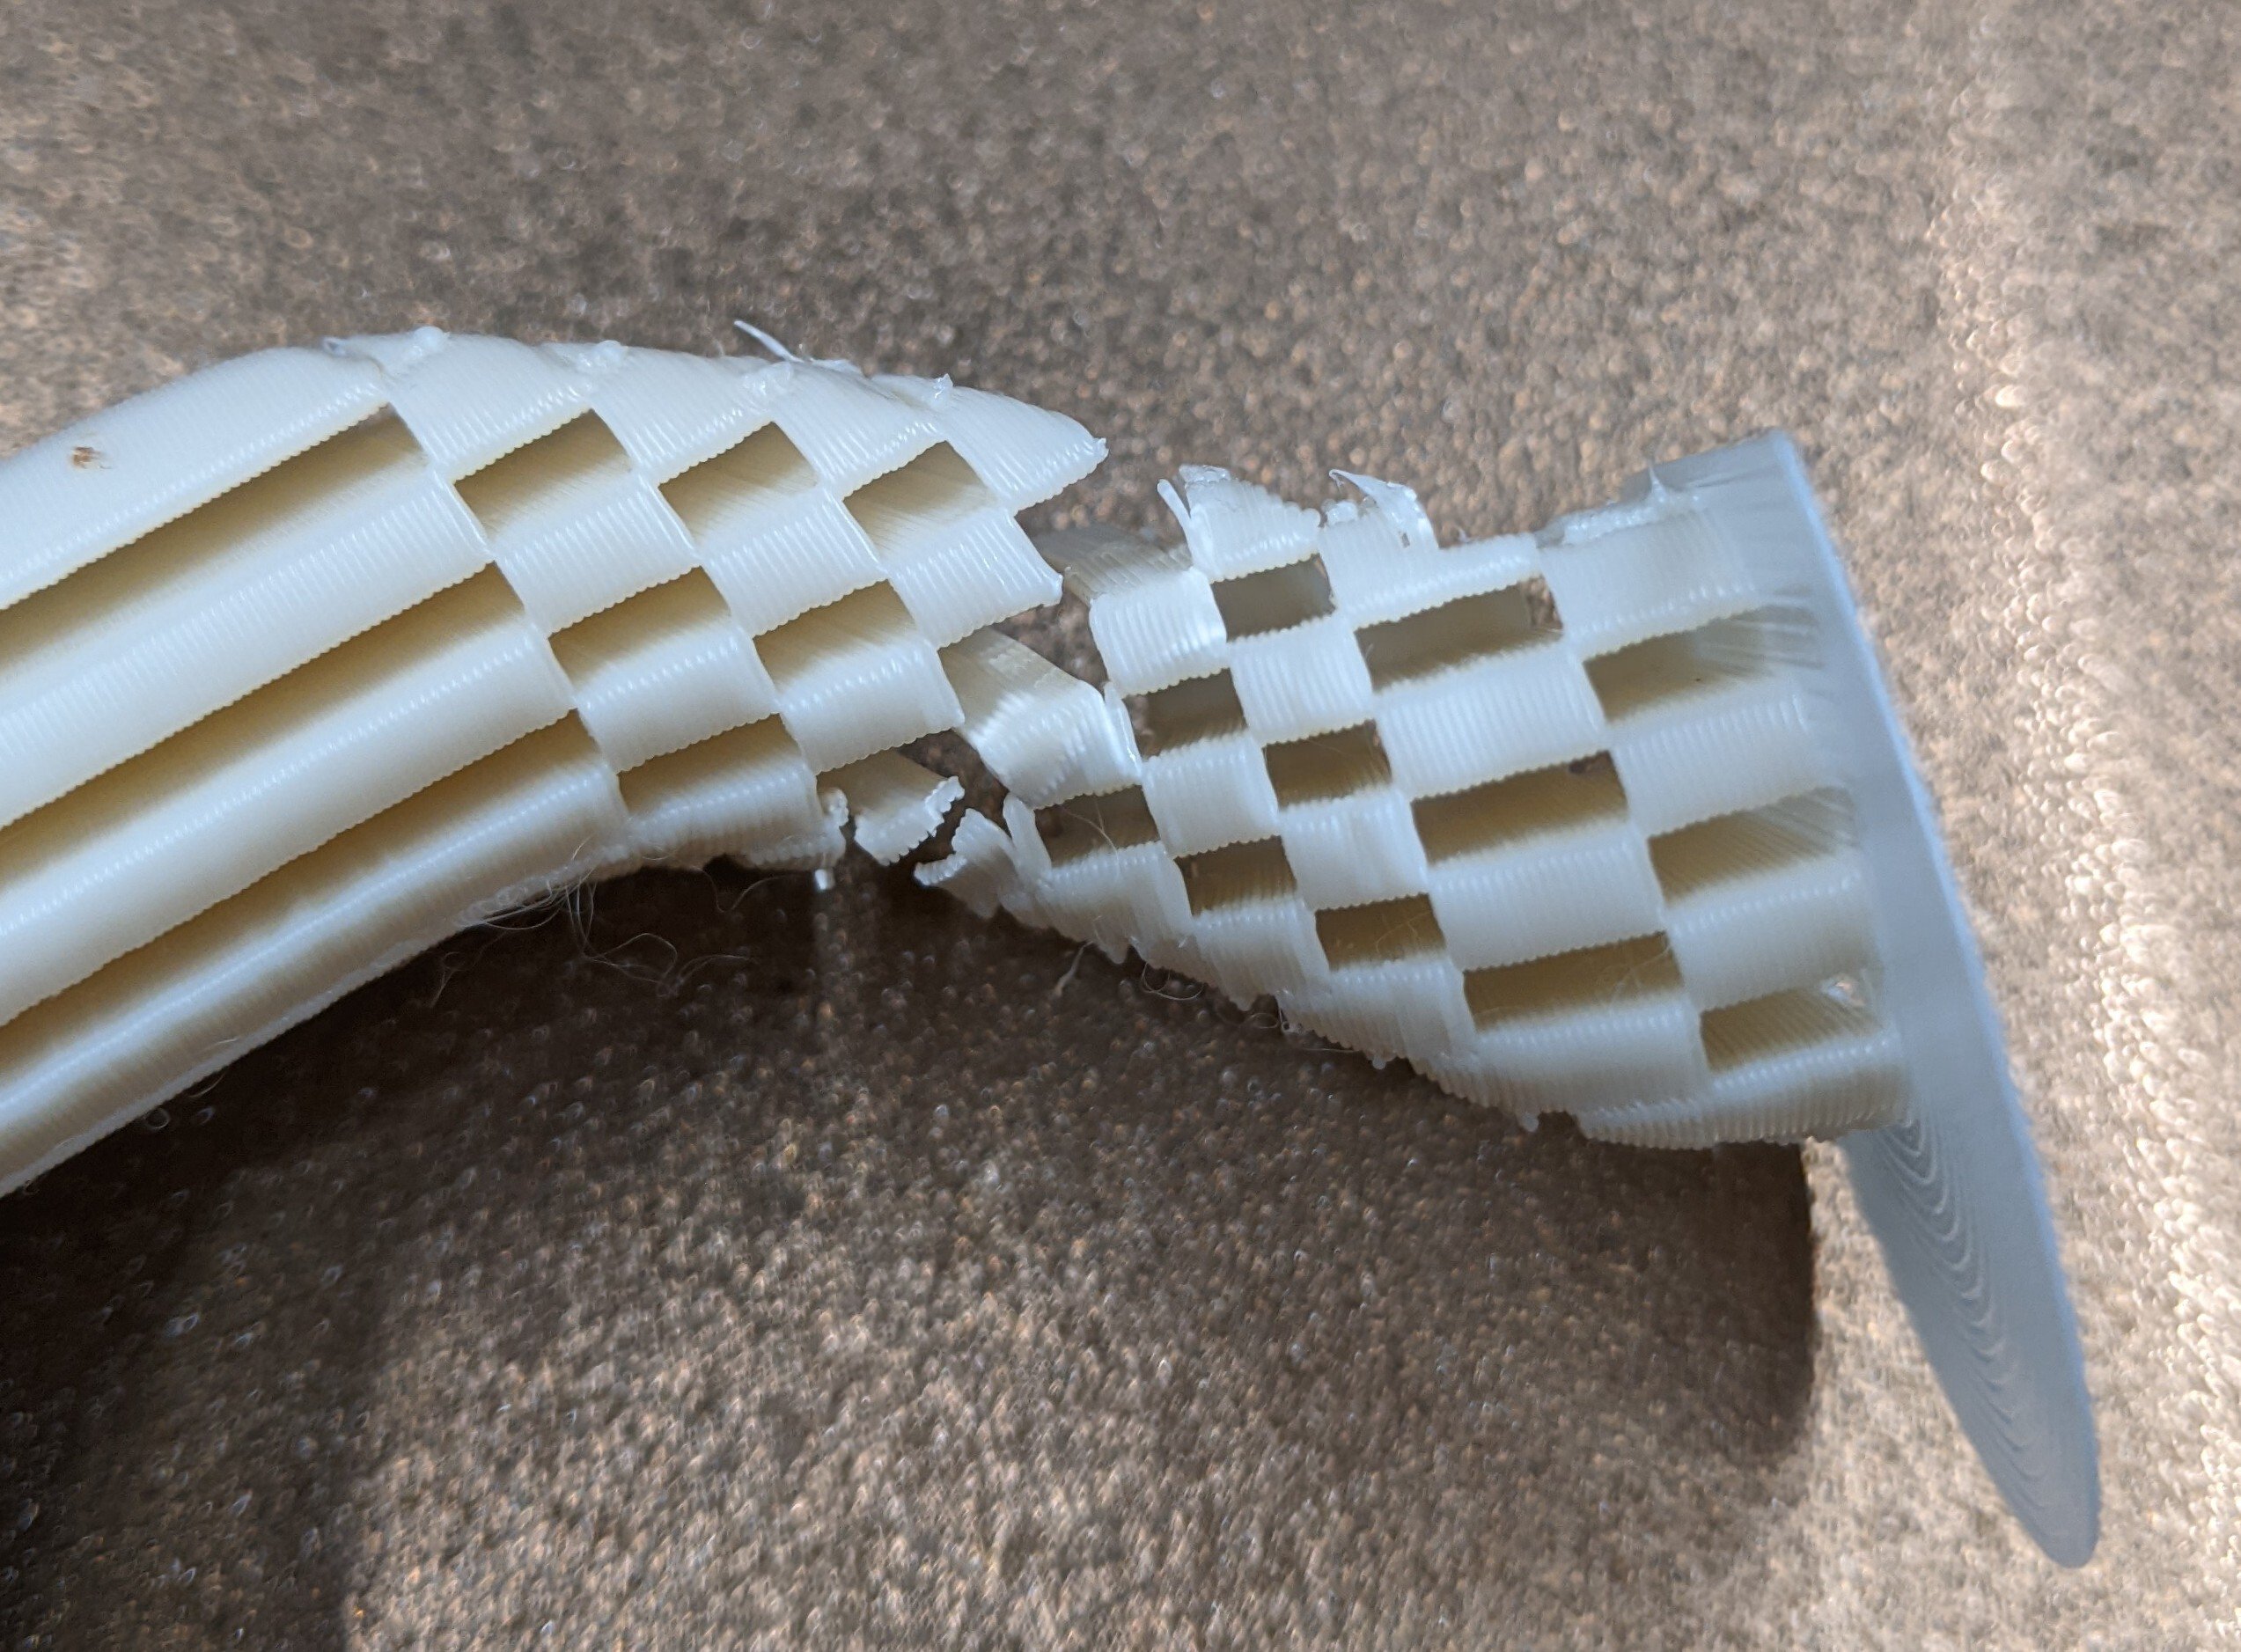
The printer has about 700 hours on it. In that time, I've run 4.1 km of filament through it. These two prints are two of the three jams I've experienced in that time span. The first print failed on a very similar feature (internal bridge), but on a much much much smaller print. I've printed some pretty long (> 12 hour) parts on this printer with the same brand of filament, and similar settings, without issues although this is the first large "fairly normal polygon with big parallel faces" that I've tried to print.

For all three jams, I was able to release the extruder latch and pull the filament out of the heat brake. There was a blob at the bottom of the filament, which would be too big to get through the orifice in the heat brake (it's a very snug fit on a Rapido). I suspect this is from sitting touching the heat brake for the remaining hour and 50 minutes in the print after the jam occurred. Note to self: install a filament run-out sensor....
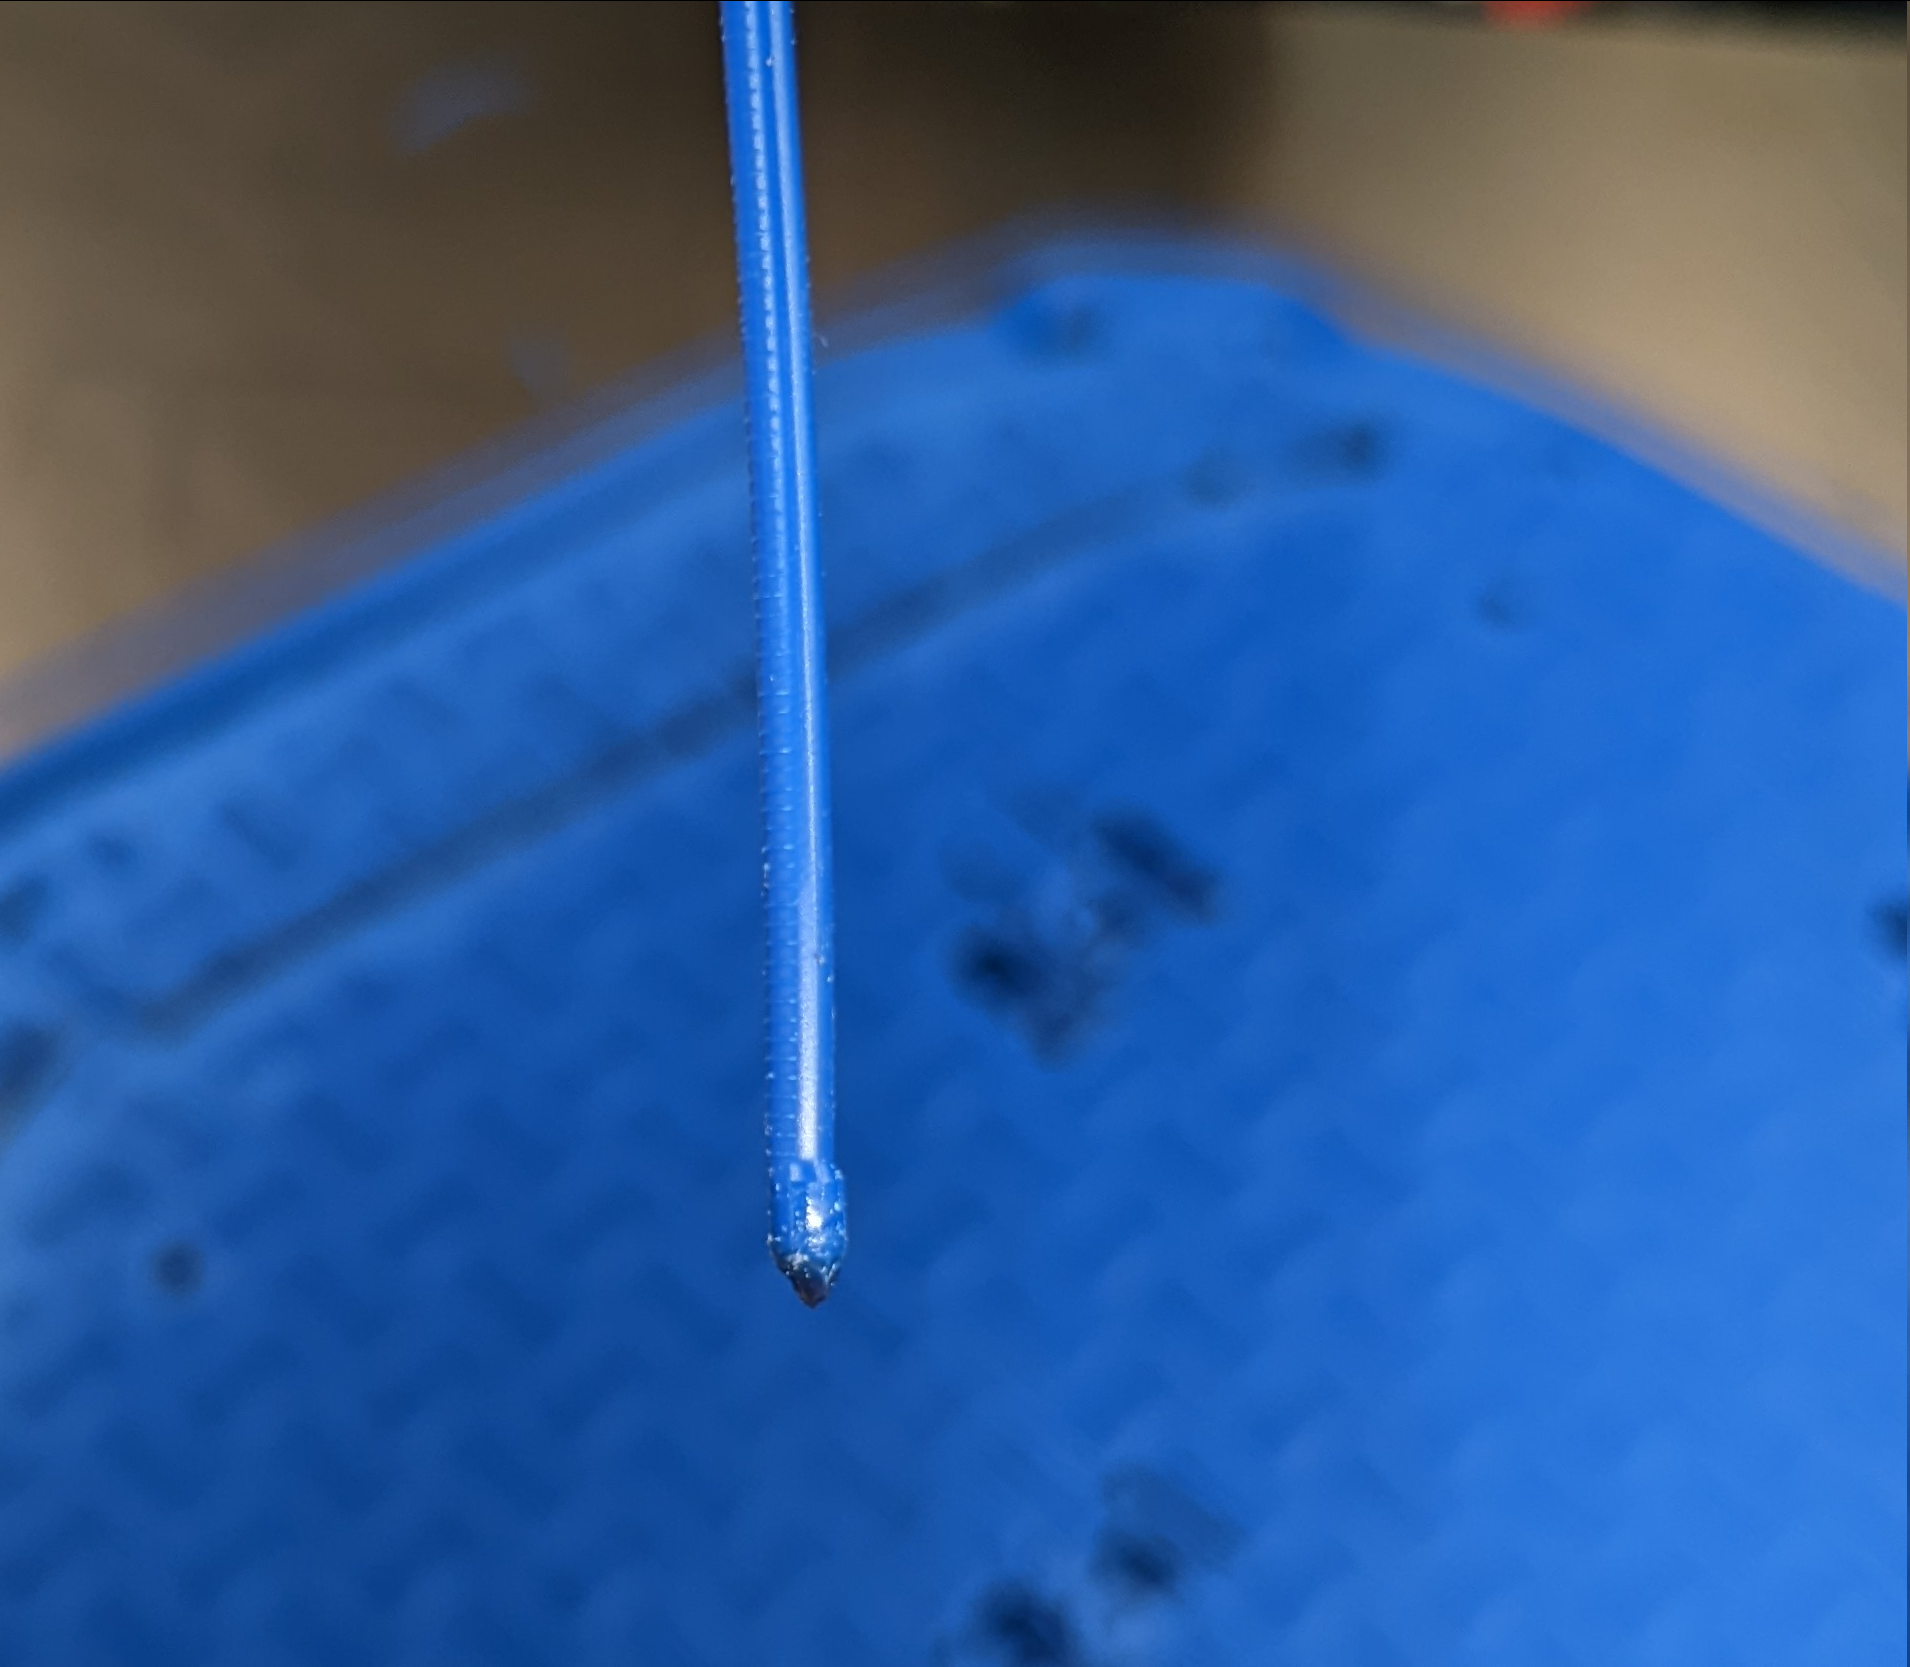
There's also always been a little bit of filament left in the hot end. The photo below is what came out after manually pushing it out with a metal rod I got with my i3 clone.
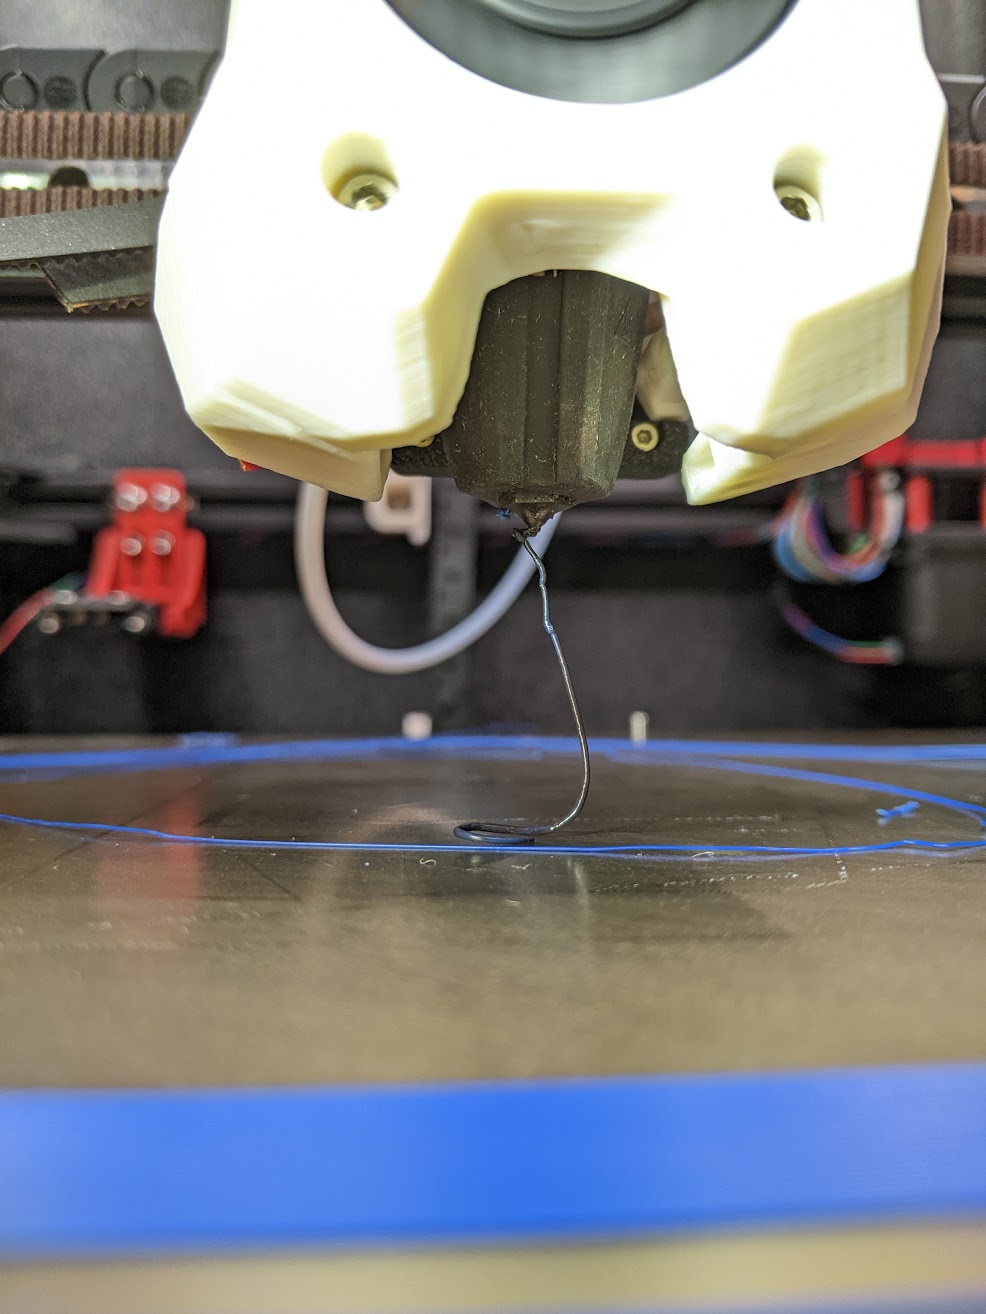
After the first clog on the small print, I reset and the print went off without a hitch. I didn't think about it again until the top print above failed. I decided to swap nozzles just to be safe and bumped my extruder temp up from 230 to 240.

It looks like I might have been under extruding a tad on the third print and/or I need to tune pressure advance. The OG nozzle was plated brass, and I had recently tuned, so if it was starting to wear out then some minor under extrusion with a new/fresh nozzle makes sense.

Here's what the slicer shows as happening on this layer. I am not showing the full layer so you can see it ends with the internal bridge on the lower left. There are a handful of retractions, but they're not very frequent. There is no retraction at the end of the internal bridge before the travel to the start of the next layer.
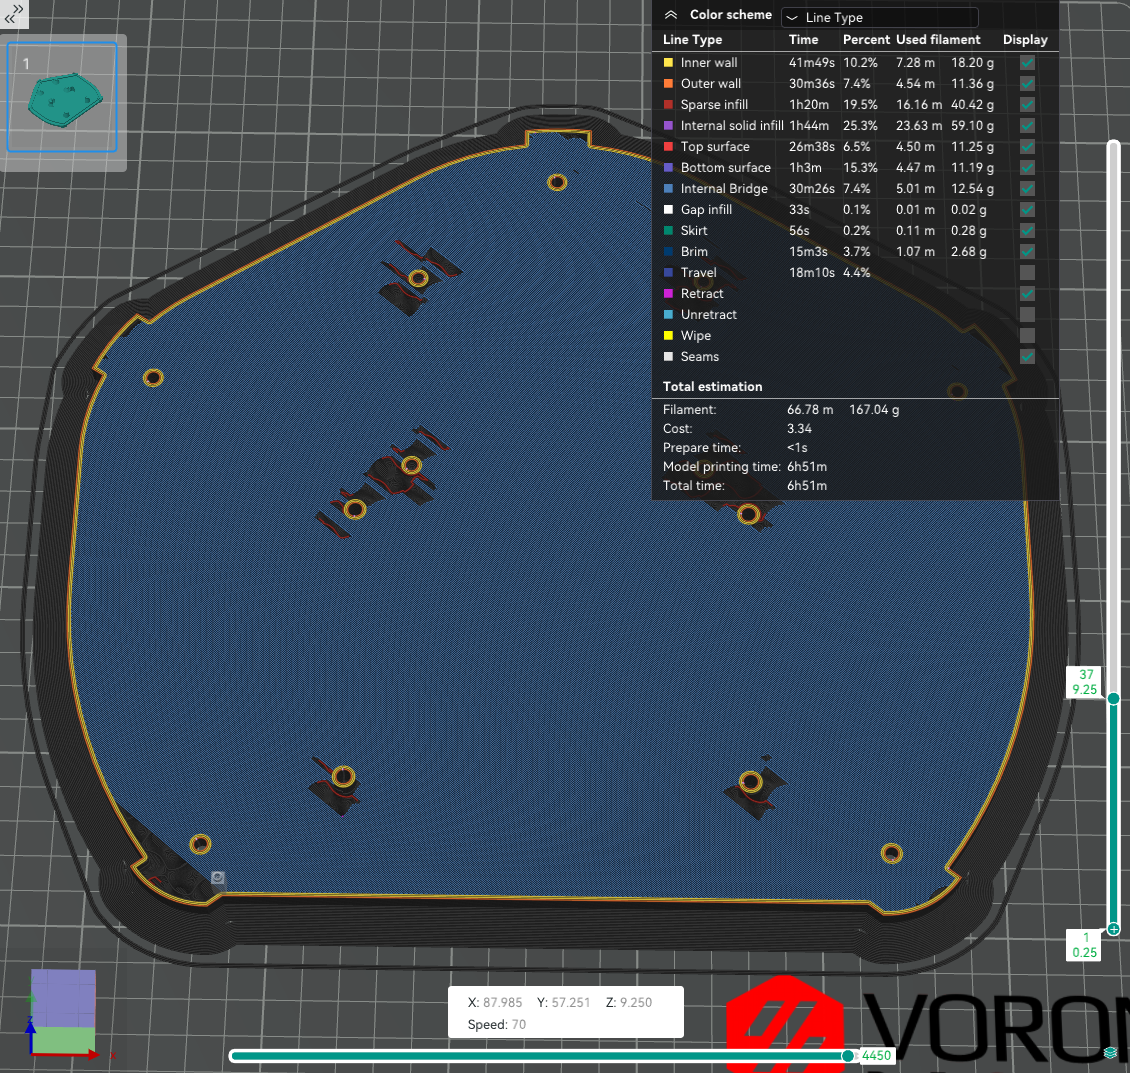
The next layer starts perimeters first in the lower right hand corner. I don't see evidence of the perimeters starting, so odds are the jam is happening between the two layers.

I have the slicer set to print nearly all features at the same speed, other than overhangs. This is potential correlation #1
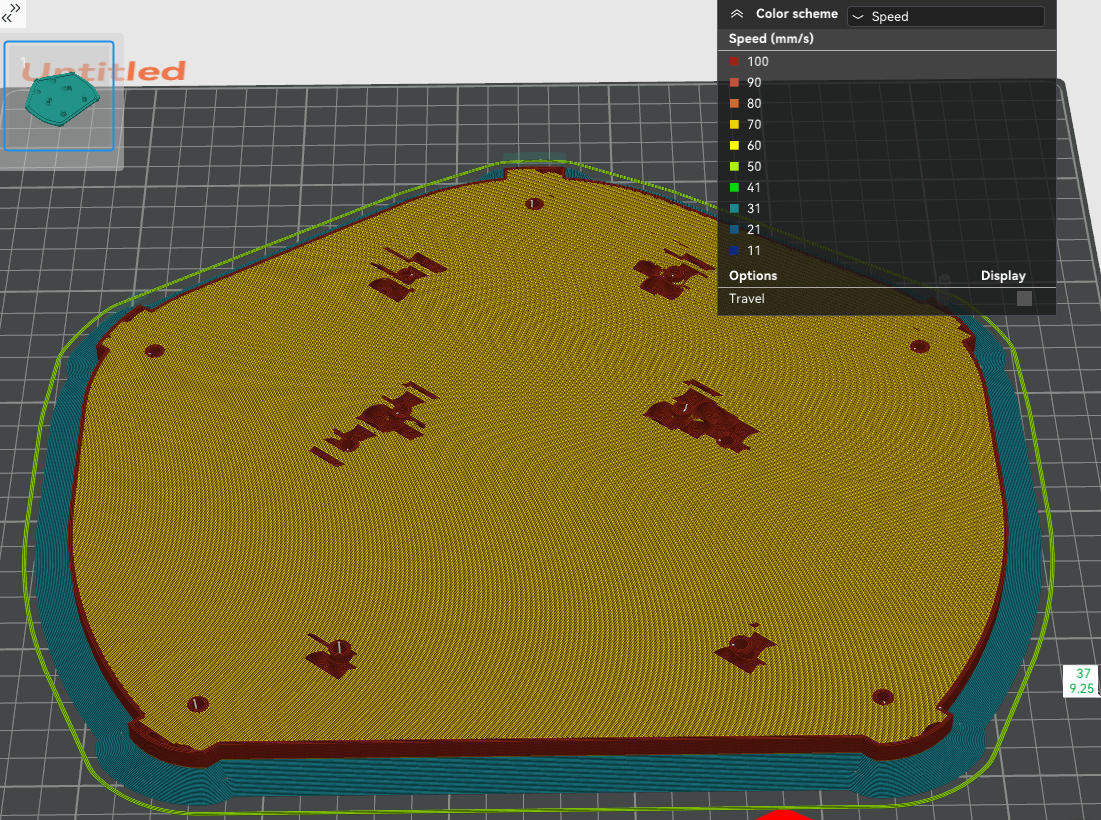
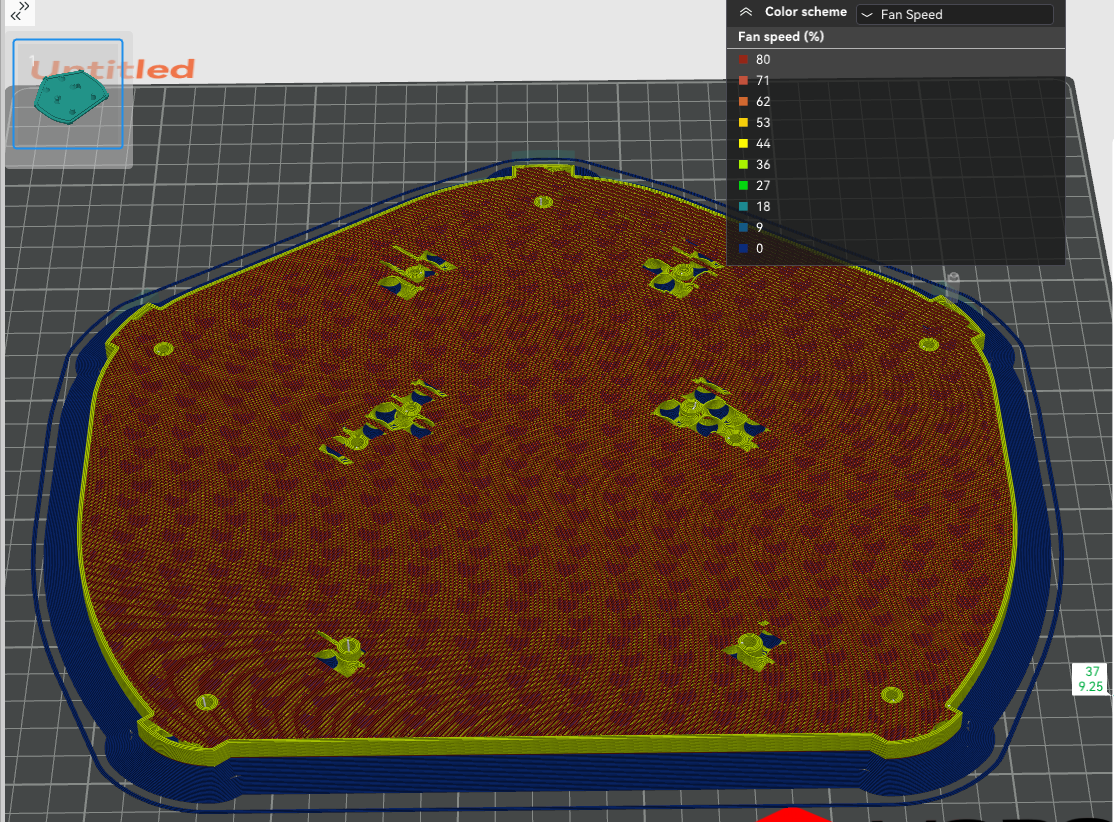
I have the fan set to 40% with no cooling for the first 10 layers. However, for overhangs it's going to 80%. This is potential correlation #2
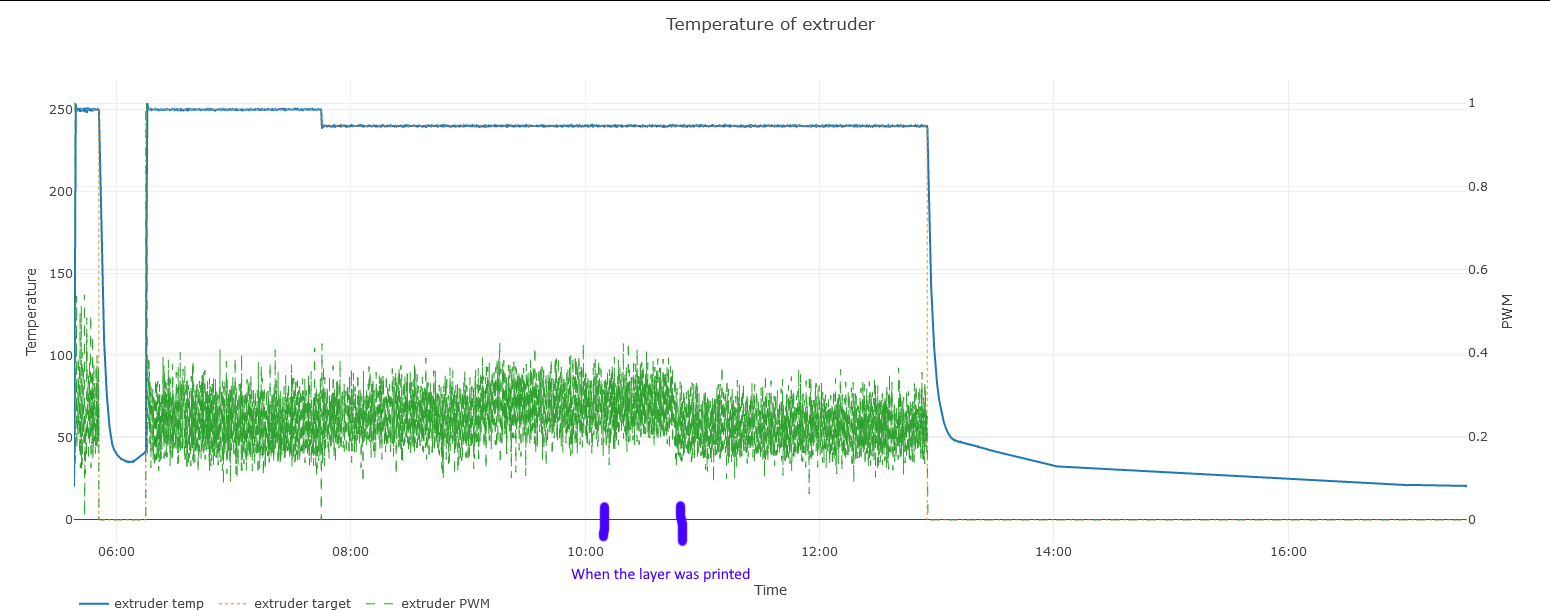
Looking at a graph of what was going on with the extruder, it looks like all is (fairly) well here, at least from a temp perspective. The min PWM value might increase a hair for this layer, but without calculating the average and/or smoothing the line it's hard to eyeball meaningfully. It does appear that the PWM falls off some once the jam occurs.
All ideas and tips welcome!
90
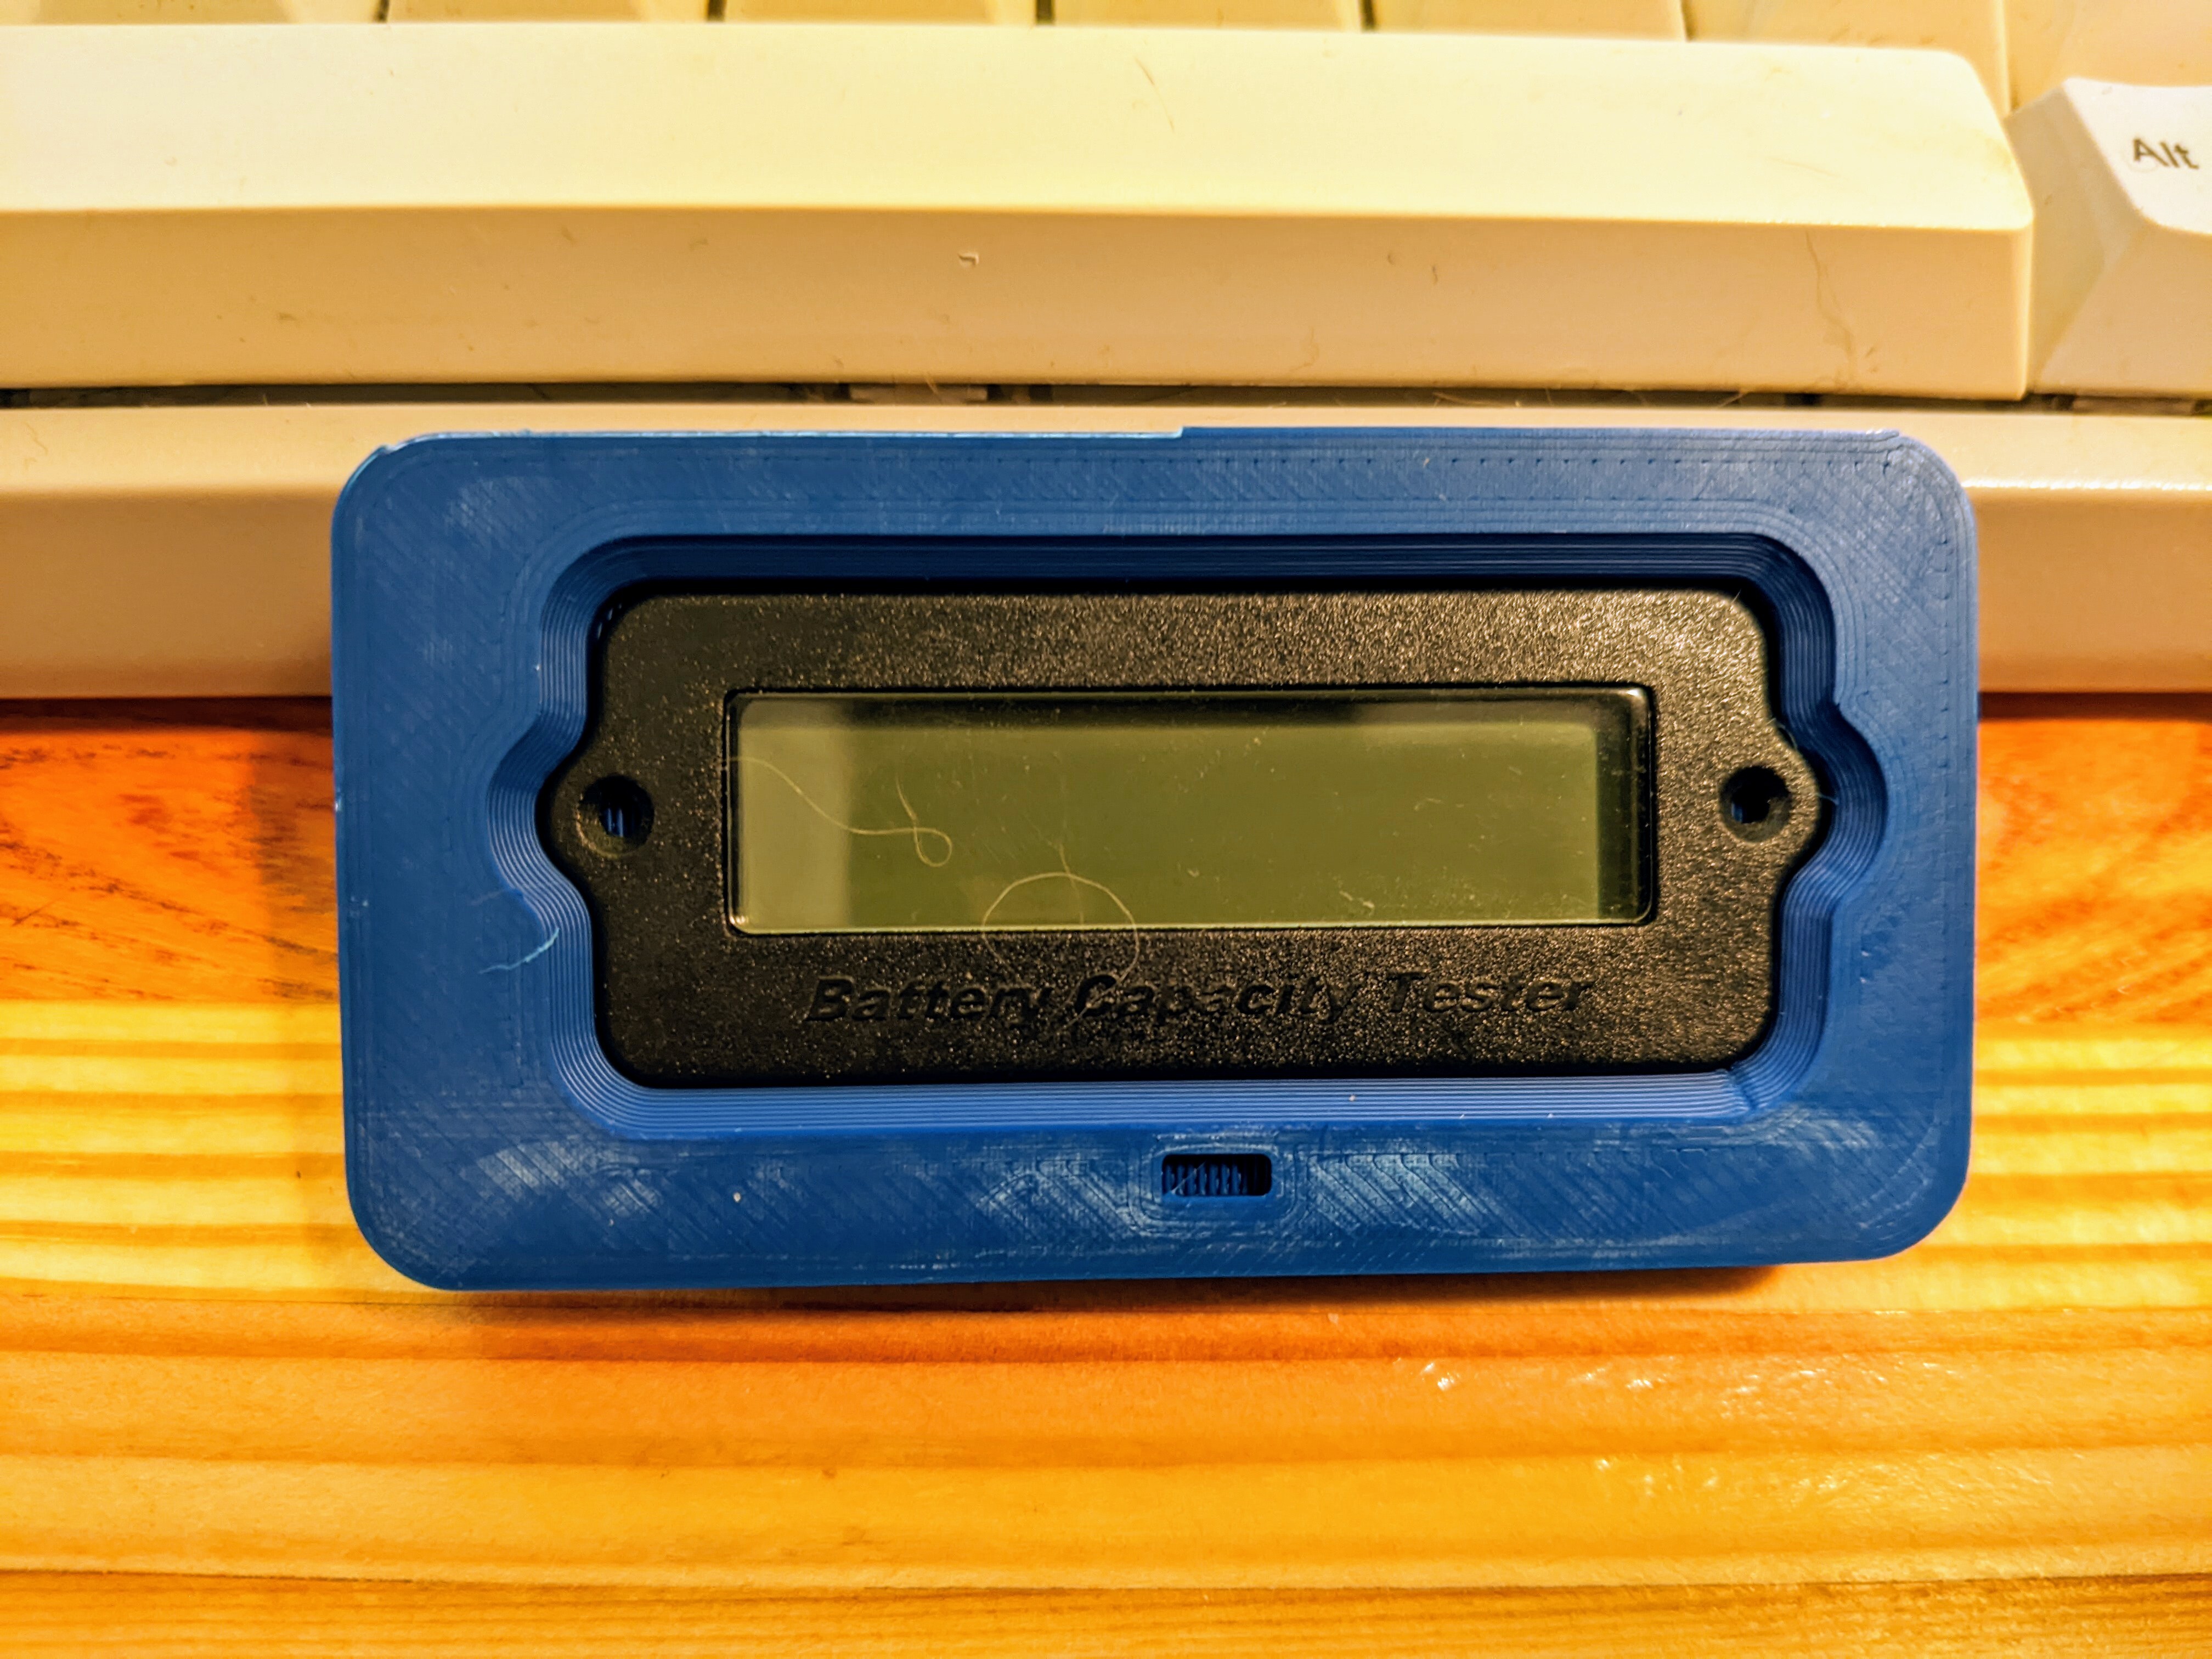
It fits! (lemmy.world)

Pardon the brim remnants. Not pictured: the many prior iterations. This started as a head on photo that I imported into fusion 360 and scaled after some measuring with calipers. It's not perfect, but it's rapidly approaching good enough. The square indent is to help with orientation - although the part obviously is not symmetrical, it's much harder to judge the home.

[-] IMALlama@lemmy.world 38 points 1 year ago

Until your home instance defederates from another instance. Sure, you can always make another account, but your average user wants a lower friction experience.

I'm reasonably active in the fediverse, but I recognize that the more explaining it takes to the average user the less likely they're going to want to join in.

The old old top gear cool wall tried to hit on this concept. You could have a very technically excellent car classified as uncool because if you had to explain why it was cool to a normie you had already lost them.

It will be hard for the fediverse to get over this hump, which is probably why you see so many Linux users here and so few say woodworkers or other (somewhat) more niche communities.

view more: next ›

IMALlama

joined 1 year ago